Maintenance5562−1/A2
Winterthur Gas & Diesel Ltd.
2/ 3
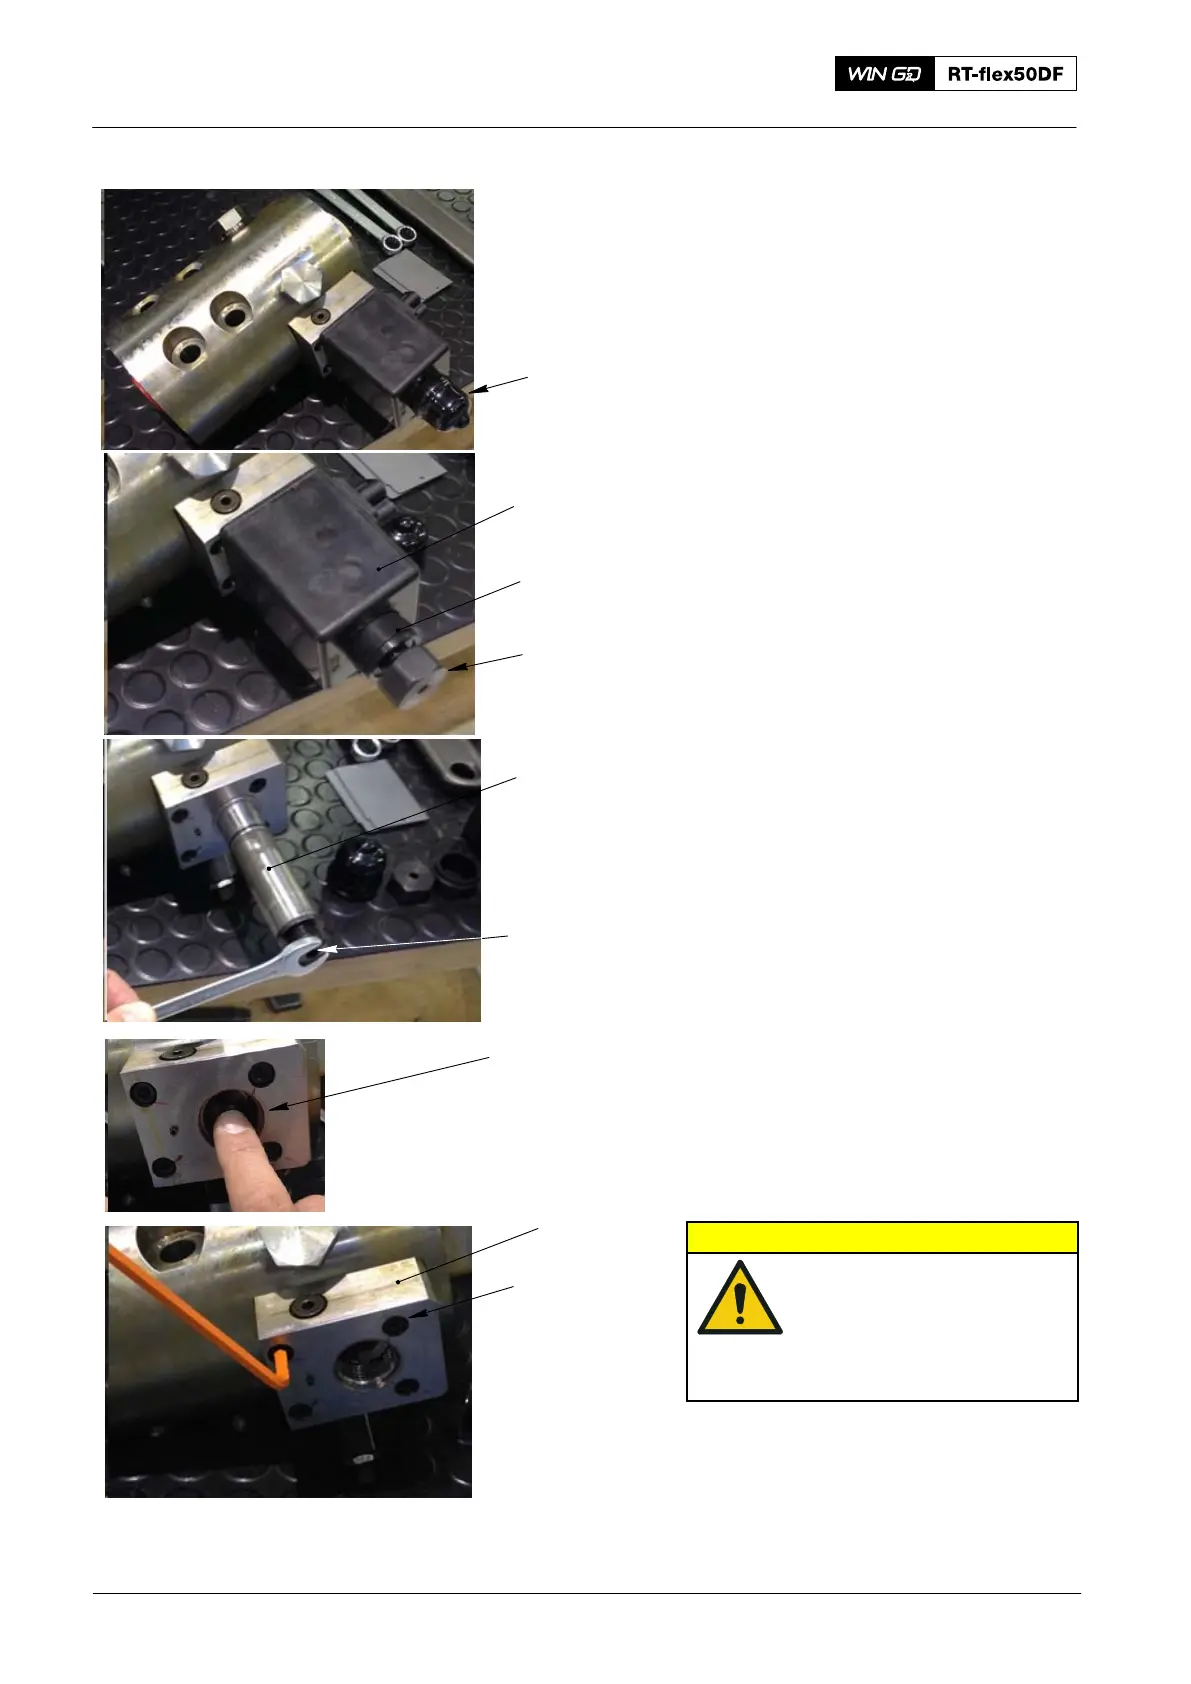
4) Carefully remove the rubber cap
(Fig. 2).
5) Record the installed position of the
plastic collar.
6) Remove the nut, plastic collar and
solenoid.
7) Remove the solenoid tube.
8) Use your finger to push the lever. Make
sure that you can feel two different
spring tensions.
Note: If the valve closes and you can get
rail pressure, it is not necessary to
continue the procedure. Refer to
paragraph 2.3, step 5) to step 9) to
assemble the PCV.
CAUTION
Injury Hazard: Make sure
that there is no pressure in
the fuel rail or the drain
side of the system. High
pressure fuel can cause
injury to personnel.
9) Remove the four Allen screws from the
block.
10) Remove the block.
Fuel Pressure Control Valve: Manual Release Valve − Clean
2018
Nut
Fig. 2
Lever
Block
Rubber
Cap
Solenoid
Plastic
Collar
Solenoid
Tube
M6 Allen
Screws
Hole