5562−1/A2
Winterthur Gas & Diesel Ltd.
3/ 3
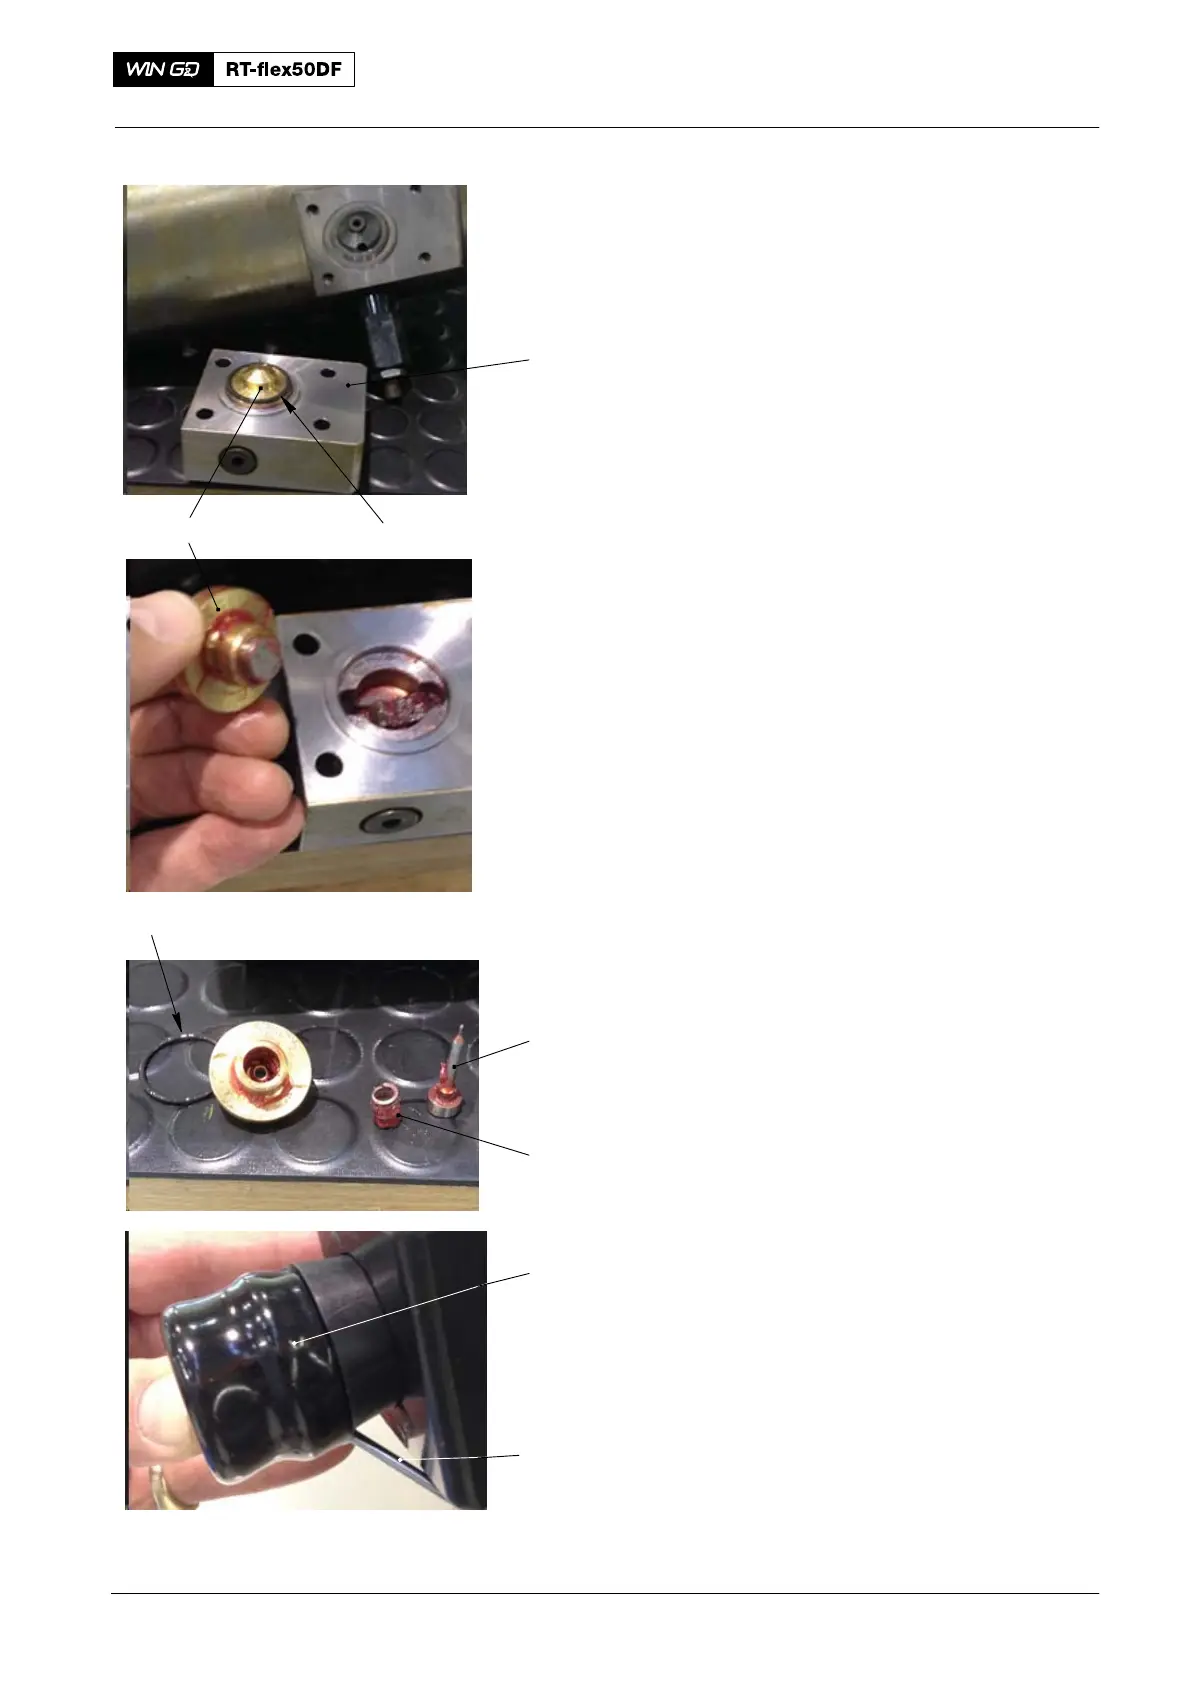
11) Carefully remove the pusher (Fig. 3).
Note: It is possible that the pusher will
stay on the PCV body.
12) Remove the plunger and spring from
the PCV.
2.2 Clean and Apply NeverSeez
1) Remove the grease from all
components (pusher, plunger, spring
and O−ring).
2) Apply a thin layer of NeverSeez to all
components (plunger, spring and
pusher.
3) Put NeverSeez into the hole in the
solenoid tube (see Fig. 1 and Fig. 2).
4) Push the internal pin in and out with
your hand to apply the NeverSeez.
2.3 Assemble
1) Put the plunger and spring into the
pusher assembly.
2) Put the O−ring and pusher in position in
the block.
3) Attach the valve block to the PCV with
the four M6 Allen screws.
4) Torque the for M6 Allen screws to
15 Nm.
5) Attach the solenoid tube to the valve
block.
6) Put the solenoid in position on the
valve block.
7) Put the thick part of the collar against
the solenoid.
8) Attach the nut to the solenoid. Tighten
the nut.
Note: During step 9), hold in the pusher
with your hand to help you attach
the rubber cap (Fig. 3).
9) Use a small flat−blade screwdriver to
attach the rubber cap over the plastic
collar.
Fuel Pressure Control Valve: Manual Release Valve − Clean
2018
Fig. 3
Block
O−ring
Pusher
Plunger
Spring
O−ring
Rubber
Cap
Flat−blade
Screwdriver
Maintenance