Maintenance6606−1/A1
Winterthur Gas & Diesel Ltd.
6/ 7
.
17) Continue to operate the engine room
crane and the manual ratchet (H3).
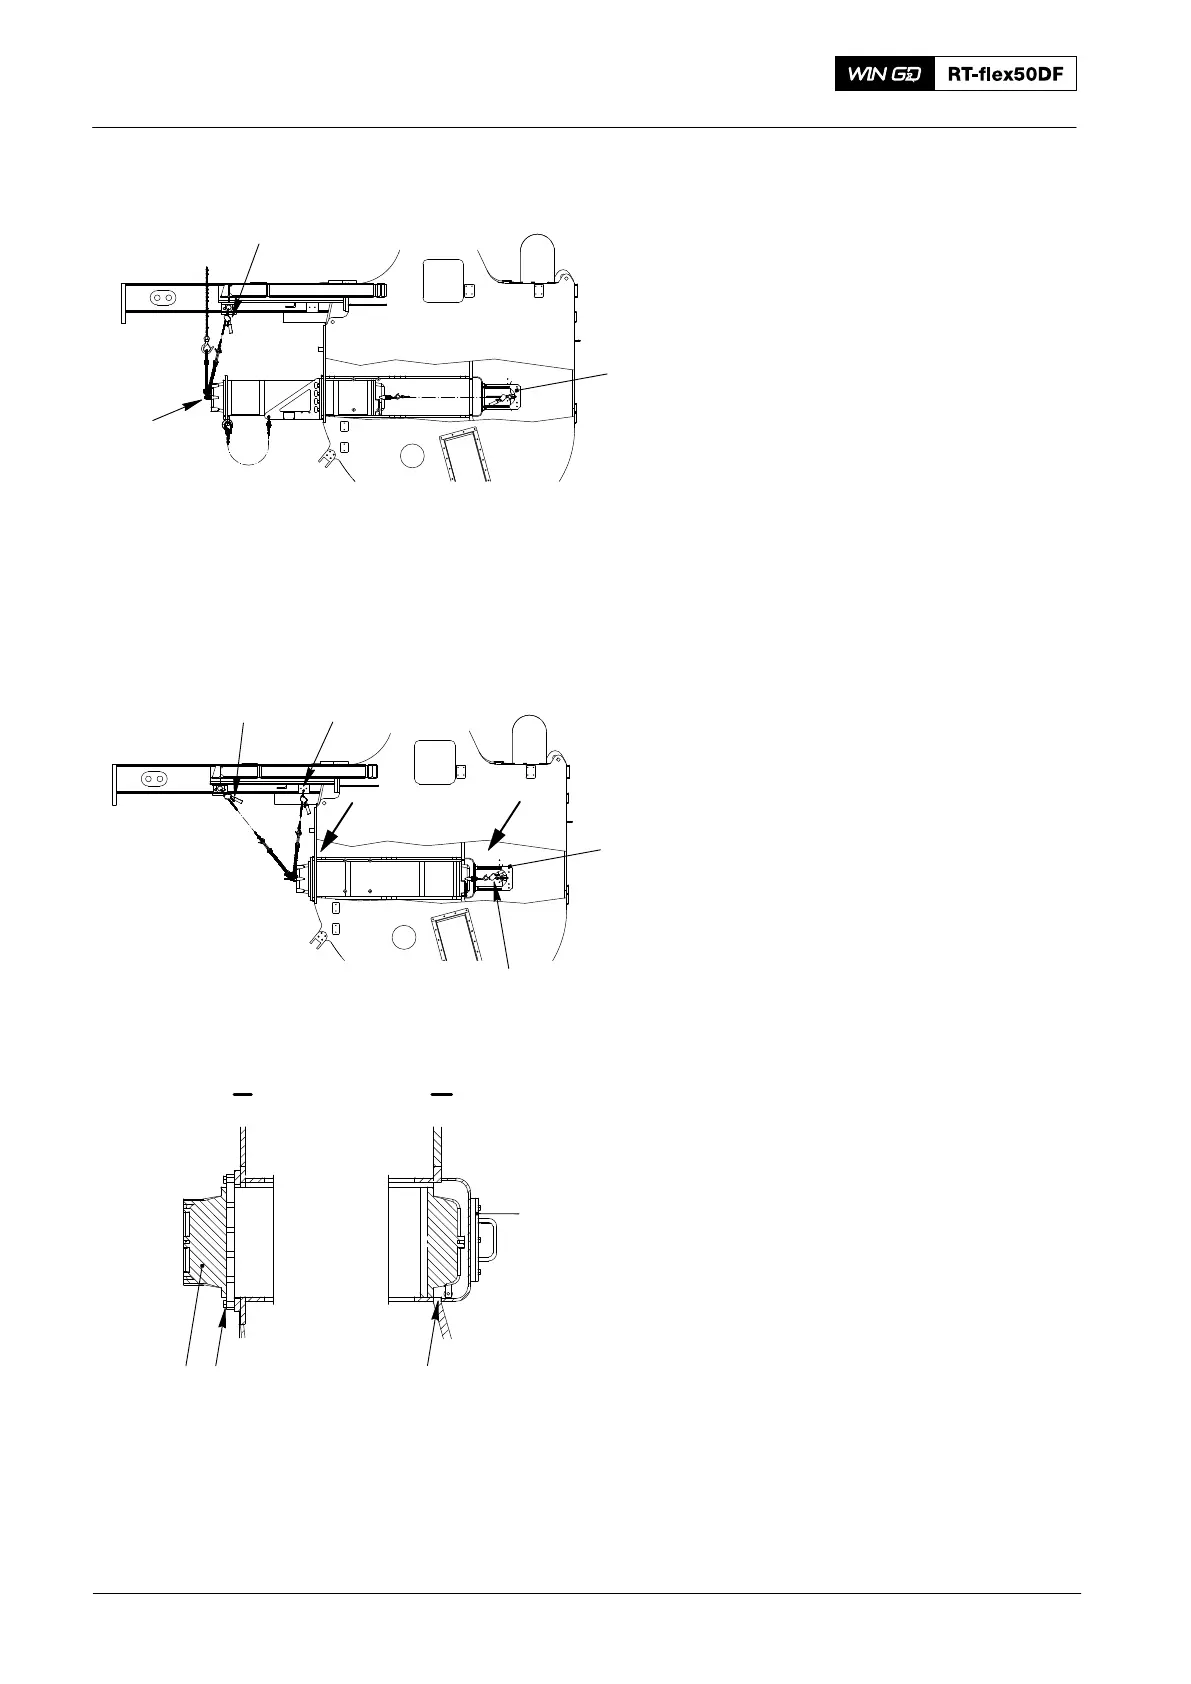
18) Attach the manual ratchet (H1, Fig. 8)
to the front chain (94666I).
19) Operate the manual ratchet (H1) to
hold the weight of the SAC.
20) Remove the engine room crane from
the front chain (94666I).
21) Continue to operate the manual ratchet
(H3) to pull the SAC into the scavenge
air receiver as shown.
22) Attach the manual ratchet (H2, Fig. 9)
to the front chain (94666I).
23) Apply a high-temperature and
non-hardening jointing compound to
the sealing surfaces.
Note: During step 23) operate the manual
ratchet (H2) to control the height
of the SAC.
24) Operate the manual ratchet (H3) to pull
the SAC fully into the scavenge air
receiver. At the same time, operate the
manual ratchet (H1) to keep a light
tension on the chain.
25) Install the bottom plates and rails that
you removed before.
26) Remove the manual ratchets (H1, H2,
H3).
27) Remove the left and right supports
(94663A/B) and the safety chains
(94663D).
28) Remove the lugs (94663C).
29) Remove the chains (94666I) and the
swivel lugs (94048−M16) from the
SAC.
30) Attach the SAC (4) to the scavenge air
receiver with the screws (2).
31) Attach the cover (1) to the rear of the
SAC (4).
Scavenge Air Cooler: Removal and Installation
2016
Fig. 8
Fig. 9
I II
STEP24
1
H1
9
WCH03084
94666I
H3
94
II
I
H1 H2
WCH00708