Maintenance
6606−2/A1
Winterthur Gas & Diesel Ltd.
9/ 9
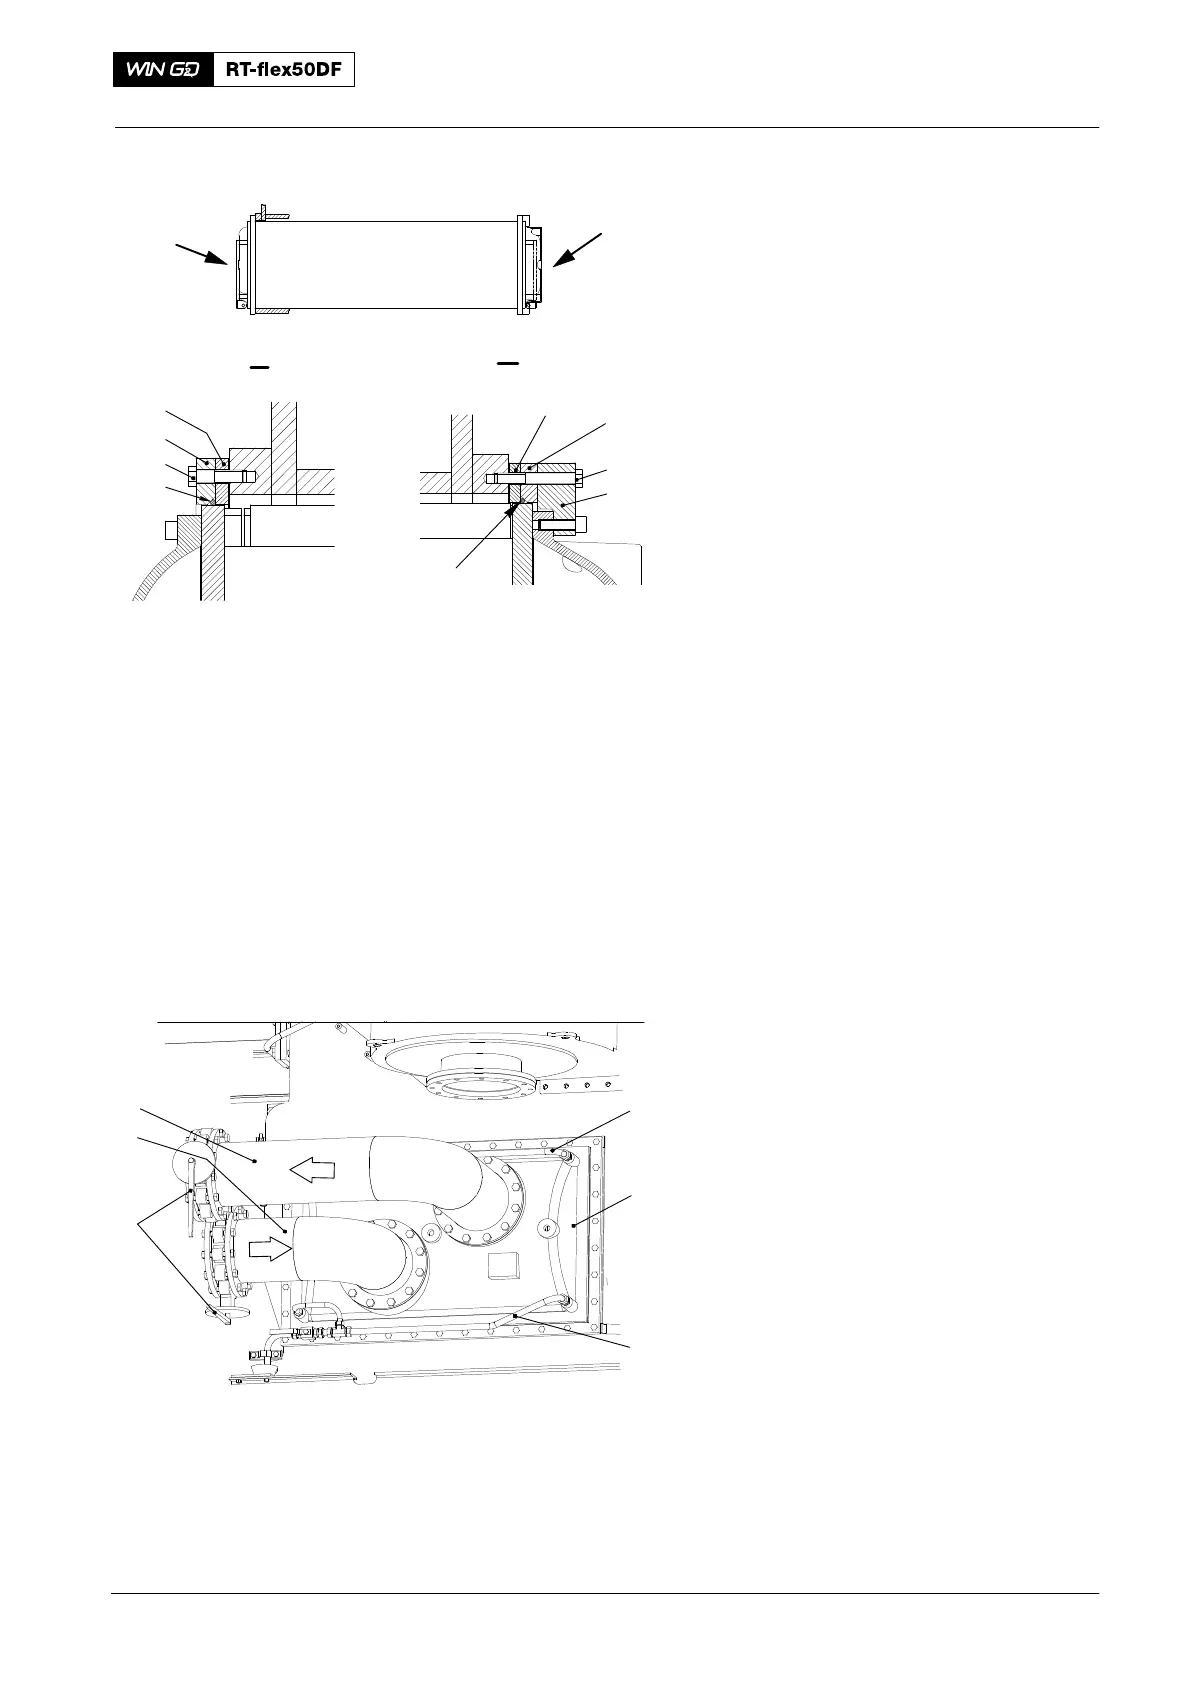
1) Put a new O-ring (6, Fig. 16) in
position.
2) Put the collar (9) in position.
3) Put the flange (8) in position.
4) Attach the flange (8) to the SAC with
the M16x60 screws (7).
5) Torque the M16x60 screws (7) to the
value given in 0352−2.
6) Put a new O-ring (5) in position.
7) Put the collar (2) in position.
8) Put the flange (1) in position.
9) Attach the flange (1) to the SAC with
the M16x60 screws (3).
10) Torque the M16x60 screws (3) to the
value given in 0352−2.
4. Completion
1) If necessary, install the bottom plates,
rails and platform elements.
2) Install the drain pipe (3, Fig. 17).
3) Install the vent pipe (1).
4) Install the inlet pipe (5).
5) Install the outlet pipe (6).
6) Install the auxiliary blower.
7) Open the butterfly valves (4).
8) Release the air in the SAC.
9) Start the cooling water pump.
10) Make sure that there are no leaks.
11) Make sure that no scavenge air flows
between the SAC and its housing.
12) Stop the cooling water pump.
Scavenge Air Cooler: Removal and Installation 7 Cyl.
2016
I
DRIVING END
II
FREE END
I
WCH03311
8
7
9
6
II
1
4
2
3
5
Fig. 16
Data for SAC A46-SF
FREE END
2
1
3
5
6
4
Fig. 17