Maintenance6606−2/A1
Winterthur Gas & Diesel Ltd.
8/ 9
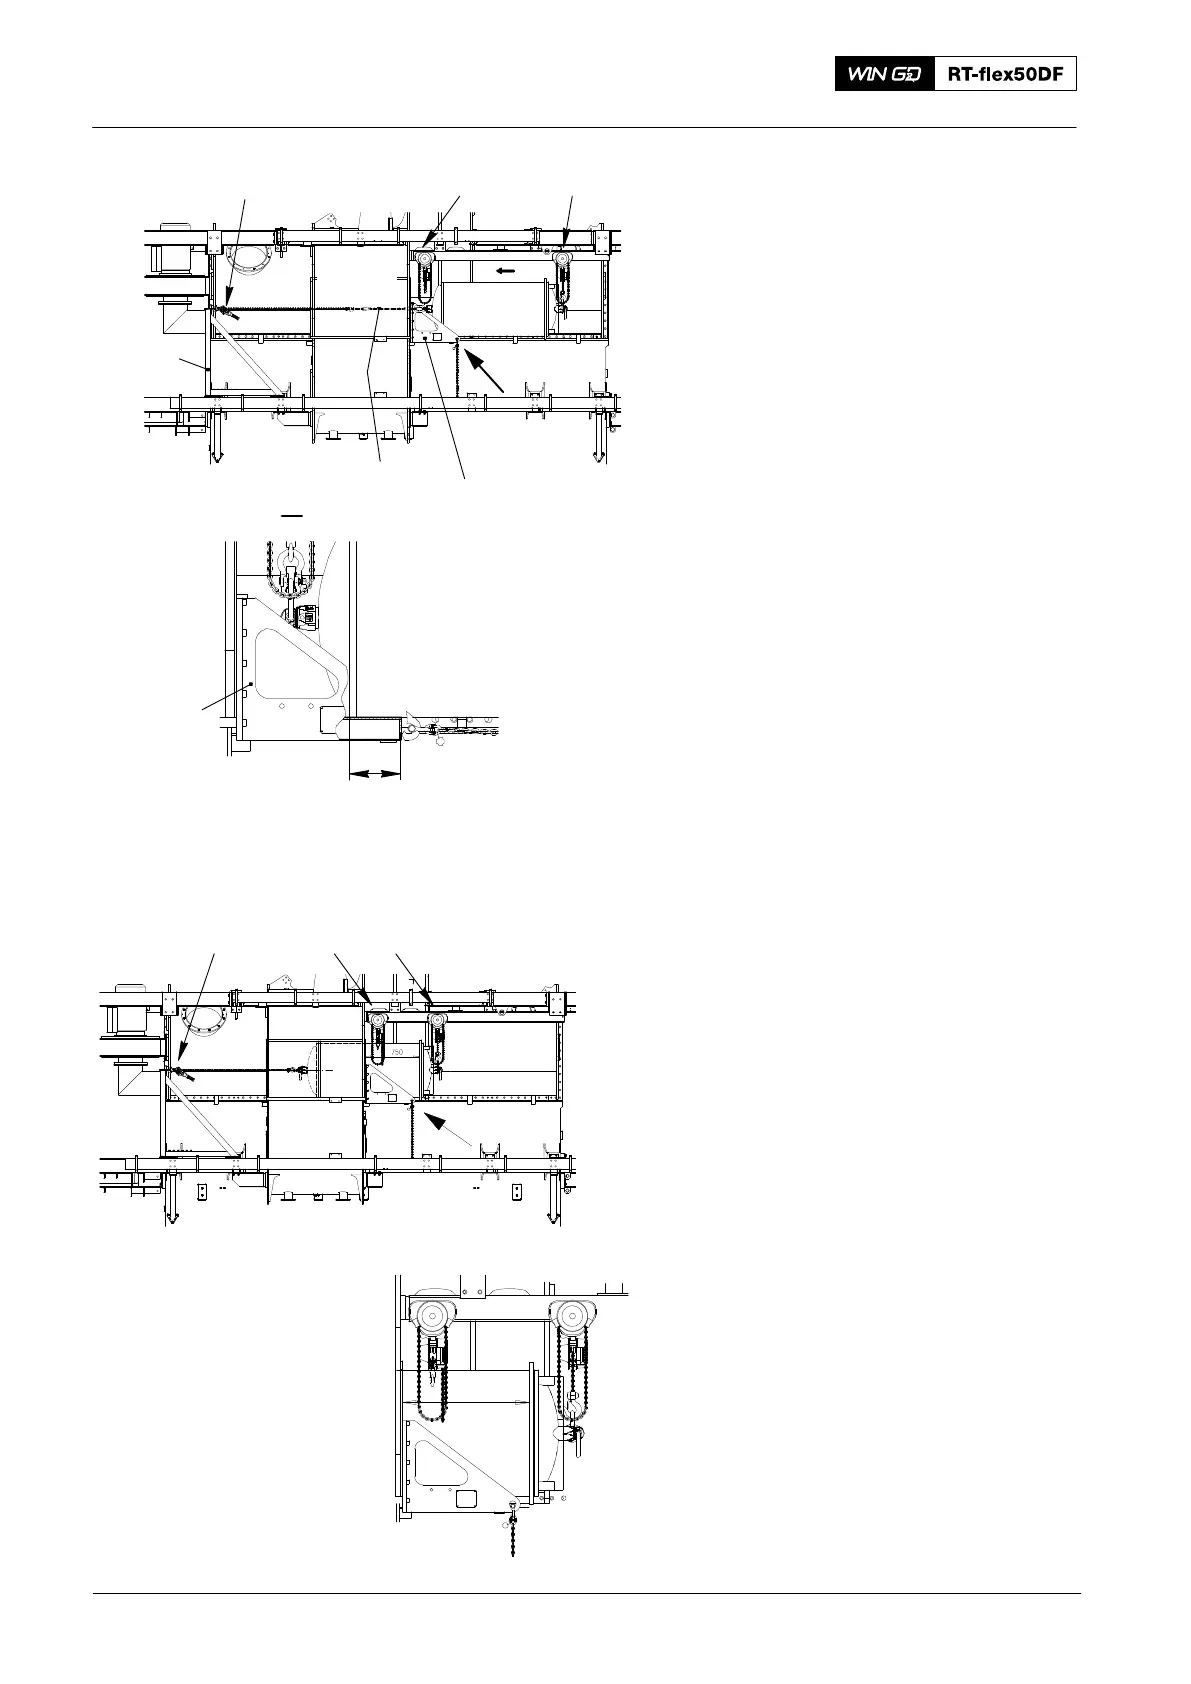
19) Attach the support (94661-IL, Fig. 14)
to the applicable platform support at the
driving end.
20) Attach the manual ratchet (H1) to the
support (94661-IL).
21) Move the SAC on to the supports
(94663A, 94663B). Make sure that the
distance between the front of the SAC
and the end on the support is a
minimum of 195 mm.
22) Remove the lifting plate (94663−IL).
23) Attach the wire rope sling (94666) to
the swivel lugs (94048−M30) on the
SAC.
24) Attach the manual ratchet (H1) to the
wire rope sling (94666).
Note: During step 25), operate the chain
block (H3) to lift the end of the
SAC a small distance. This keeps
most of the SAC weight off the
supports (94663A/B).
25) Operate the manual ratchet (H1,
Fig. 15) to move the SAC into the
receiver until the rear of the SAC is 750
mm from the opening.
26) Remove the chain blocks (H2, H3) from
the platform rail.
27) Operate the manual ratchet (H1) to pull
the SAC fully in.
28) Remove the left and right supports
(94663A/B).
29) Remove the support (94661−IL).
30) Remove the manual ratchet (H1).
31) Remove the swivel lugs (94048−M30)
and the eye bolts (94040−M30).
Scavenge Air Cooler: Removal and Installation 7 Cyl.
2016
WCH00115
94661−IL
I
94666
H2H1 H3
94663A
94663B
I
195 mm
94663A−IL
94663B−IL
Fig. 14
I
750 mm
H2 H3
Fig. 15
H1