Maintenance
6708−2/A1
Winterthur Gas & Diesel Ltd.
7/ 8
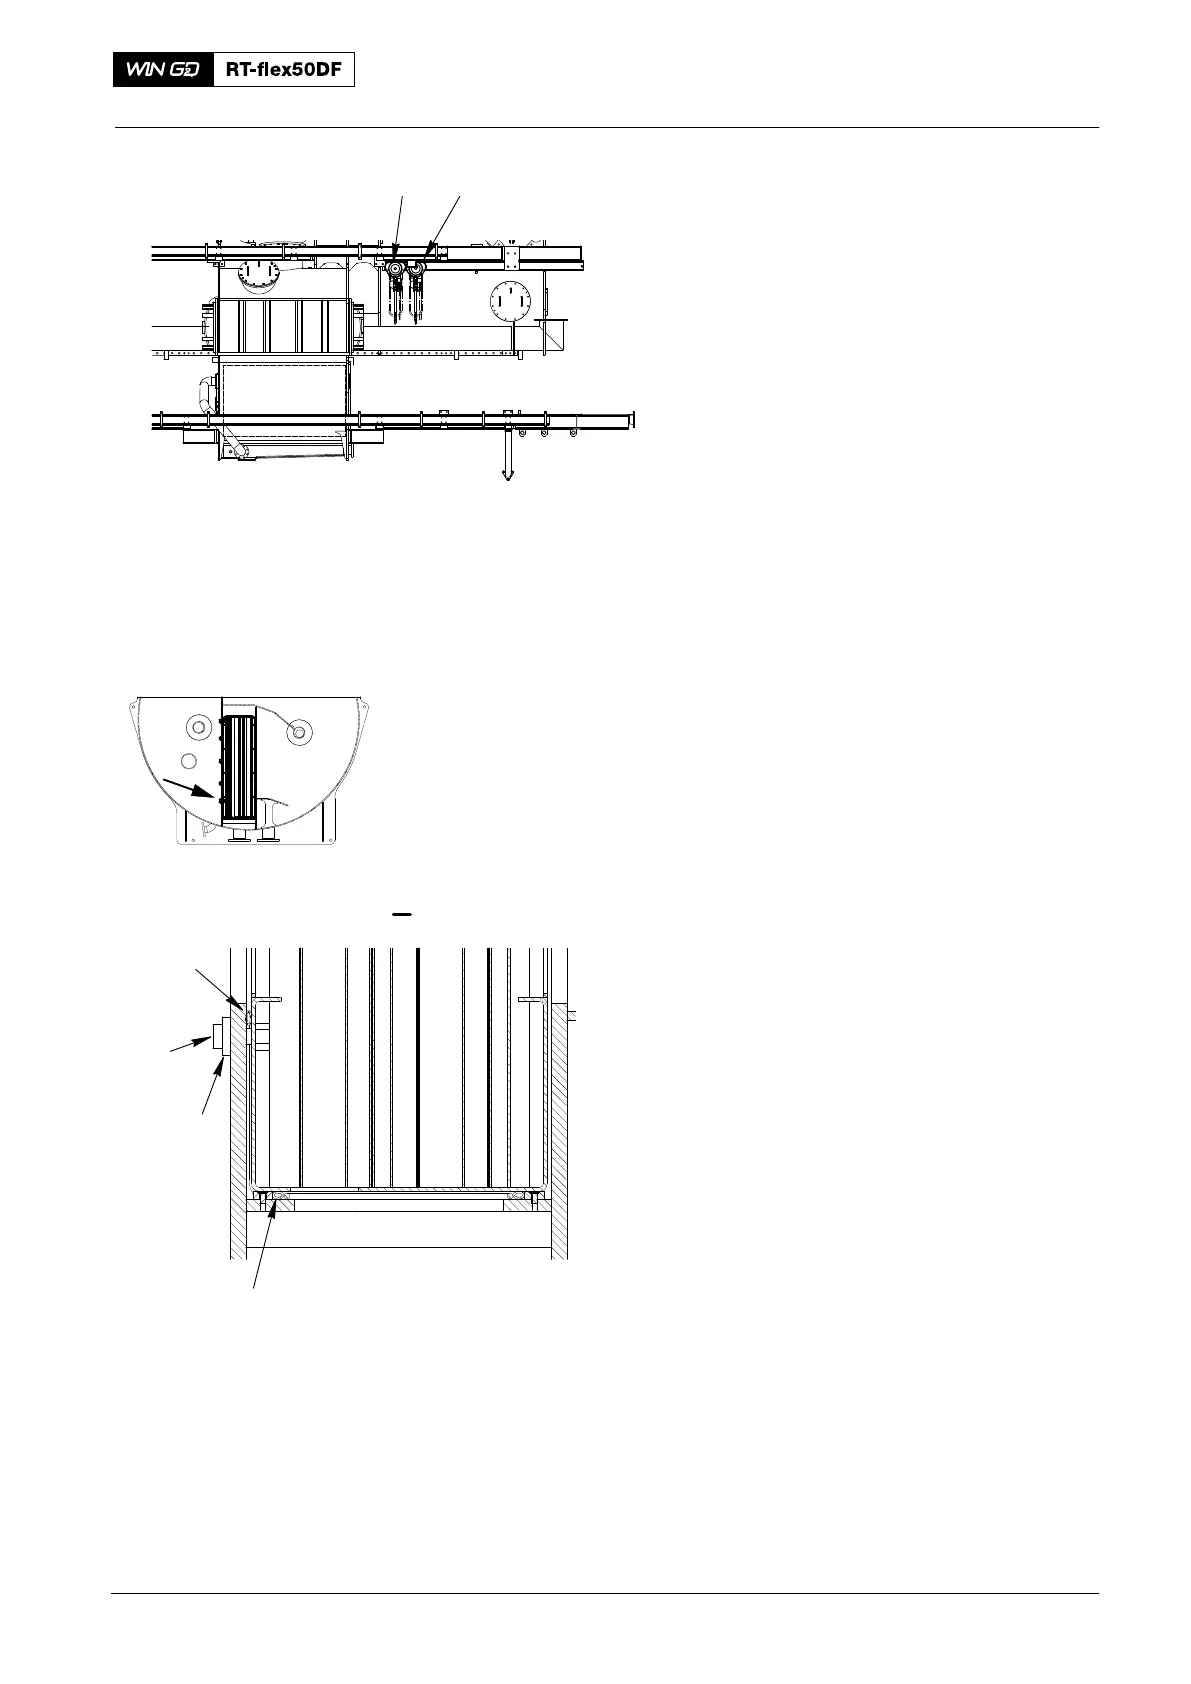
20) Remove the manual ratchet (H1, H2
and H3, Fig. 12)
21) Put a new rubber cord (4, Fig. 13) in
the position shown. Bond together the
ends of the rubber cord,
22) Make sure that the rubber cords (1, 4)
are seated correctly.
23) Put oil on the threads of the 18 M16x55
screws (3).
24) Put the 32 intermediate rings (2) and
the 32 M16x55 (3) screws in position.
25) Torque the 18 M16x55 screws (3) to
the value given in 0352−2.
2016
Water Separator: Removal and Installation 7 Cyl.
H1 H2
Fig. 12
I
WCH03360
I
WCH03360
2
3
4
Fig. 13
1