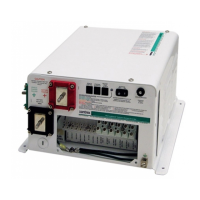
PROSINE 2.0 INVERTER•CHARGER USER’S MANUAL
18
445-0089-01-01
Installation Tools and Materials
You will need the following to install the inverter•charger, display panel, and
battery temperature sensor:
❐
Wire stripper
❐
Mounting screws or bolts
❐
#2 Phillips screwdriver
❐
Wrench for DC terminals (1/2 inch or 13mm or adjustable)
❐
AC cable (i.e. 2-conductor-plus-ground cable), sized appropriately for
load and application
❐
Wire nuts or crimp connectors for AC wire and appropriate tools
❐
Two 1/2 inch strain-relief clamps for AC cables
❐
DC cable, sized appropriately for load and application
❐
Lugs and terminals for the DC cables as well as appropriate tools (e.g.
crimping tool)
❐
AC and DC disconnects and over-current protective devices
Installation Procedures
This section provides detailed installation information. For your convenience,
the overall procedure is divided into ten main steps:
❐
Step 1:
Designing an installation. (Start on page 19.)
❐
Step 2:
Choosing a location for the inverter•charger. (Start on page 23.)
❐
Step 3:
Mounting the inverter•charger. (Start on page 24.)
❐
Step 4:
Connecting the AC input wiring. (Start on page 25.)
❐
Step 5:
Configuring the output neutral bonding system. (Start on
page 27.)
❐
Step 6:
Connecting the AC output wires. (Start on page 29.)
❐
Step 7:
Connecting the DC cables. (Start on page 31.)
❐
Step 8:
Mounting the display panel. (Start on page 34.)
❐
Step 9:
Connecting the battery temperature sensor. (Start on page 35.)
❐
Step 10:
Connecting the remote shutdown feature. (Start on page 38.)
NOTE
For residential installations, installation codes may require a wiring enclosure for
DC connections and cables. Contact Xantrex or your distributor for this part.
 Loading...