PROSINE 2.0 INVERTER•CHARGER USER’S MANUAL
26
445-0089-01-01
AC Input Connections
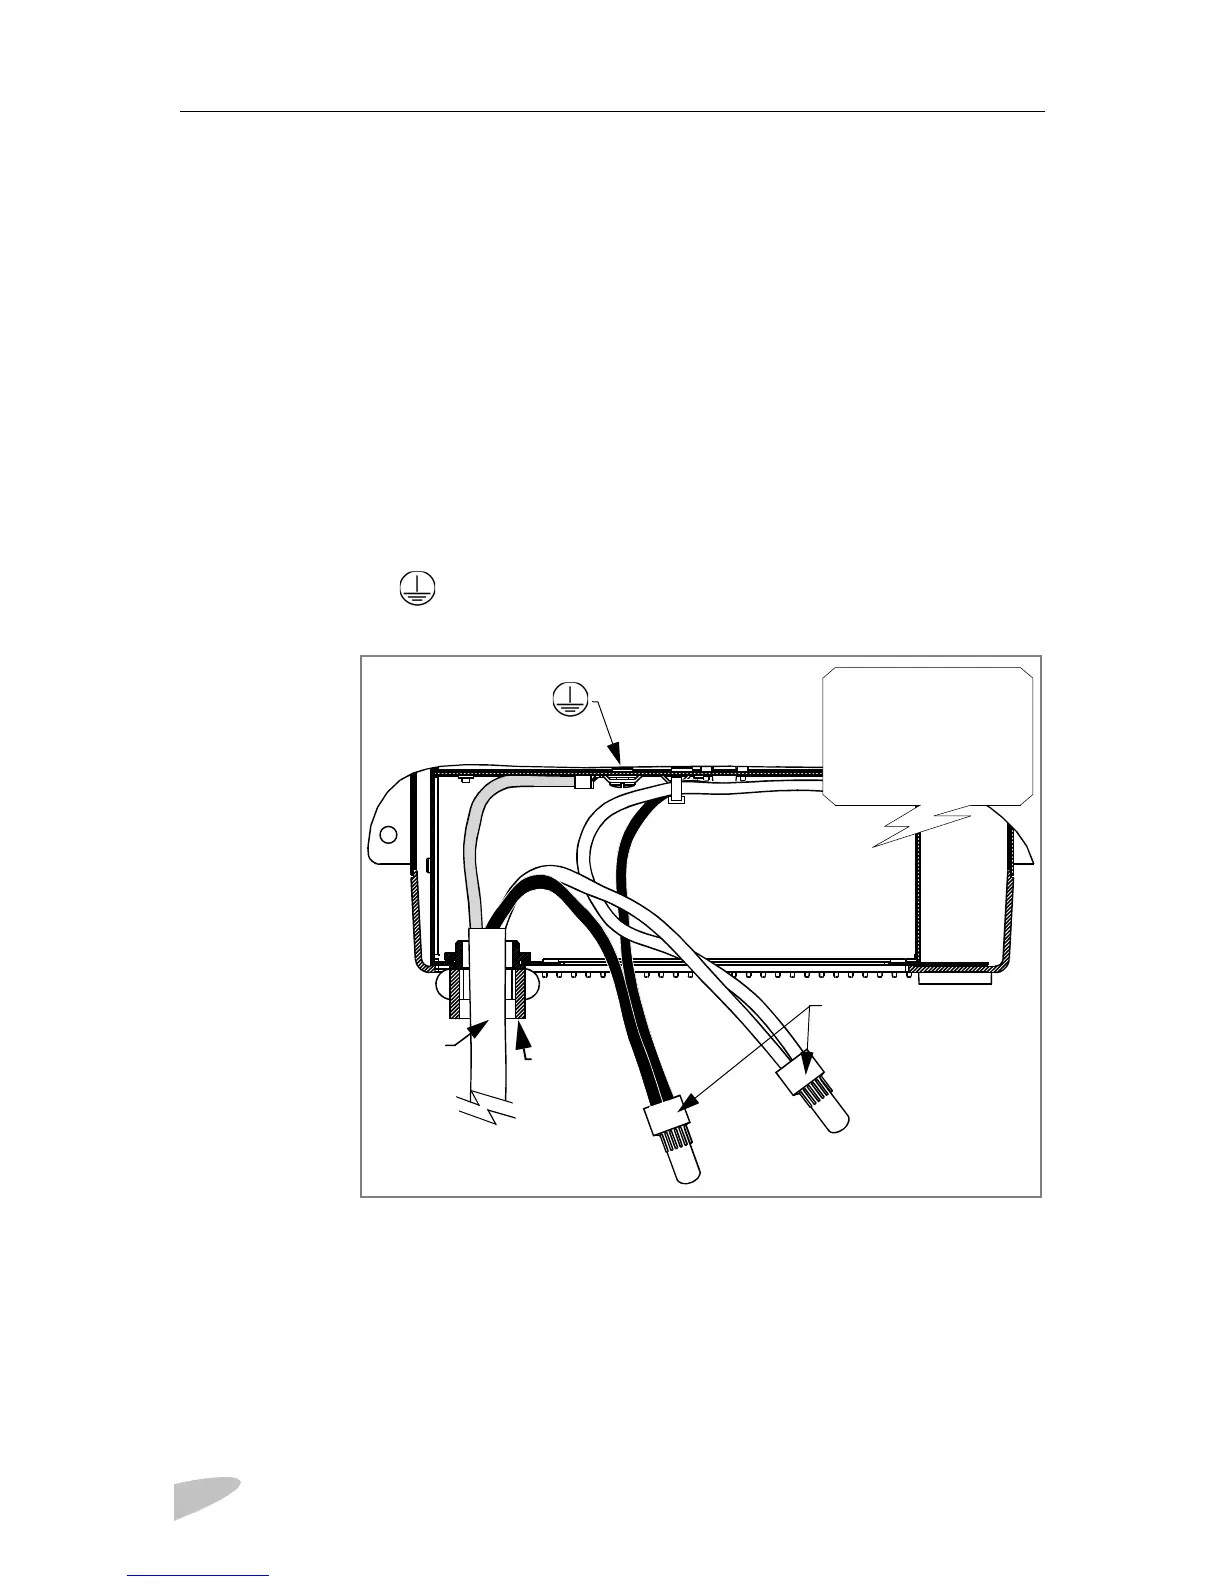
Figure 11 is a cutaway top view of the PROsine 2.0 wiring compartment. It
shows one incoming AC cable and its connections to the PROsine 2.0 wires.
➢
➢➢
➢
To make the AC input connections
1. Run 10AWG 2-conductor-plus-ground cable through one of the cable
clamps on the AC end.
2. Strip about two inches of the jacket from the AC cable and separate the
three wires.
3. Connect the incoming black and white (line and neutral) wires to the
PROsine AC input black and white wires.
4. Connect the incoming ground wire to the screw on the chassis marked
. Use a crimp-on ring terminal if the AC input ground wire is
stranded. Solid wire can be screwed directly under the head of the screw.
Figure 11 Incoming AC Cable (Top, cutaway view of wiring compartment)
Cutaway view of
PROsine 2.0 wiring
compartment as
seen from the top.
wire nuts or crimp
connections (depending
on type of installation)
grounding screw
clamp
for AC cable
AC cable
 Loading...