03/2003
4-68
8850/ 510DP
REP 9.5
Repairs and Adjustments
Replacement
CAUTION
Ensure that the Developer Module is fully reinstalled in the brackets. Push the Module fully to
the left (drive side). A slight drop may be felt as the Module goes into position.
CAUTION
Ensure that the gear is free to engage the Developer Module drive gears.
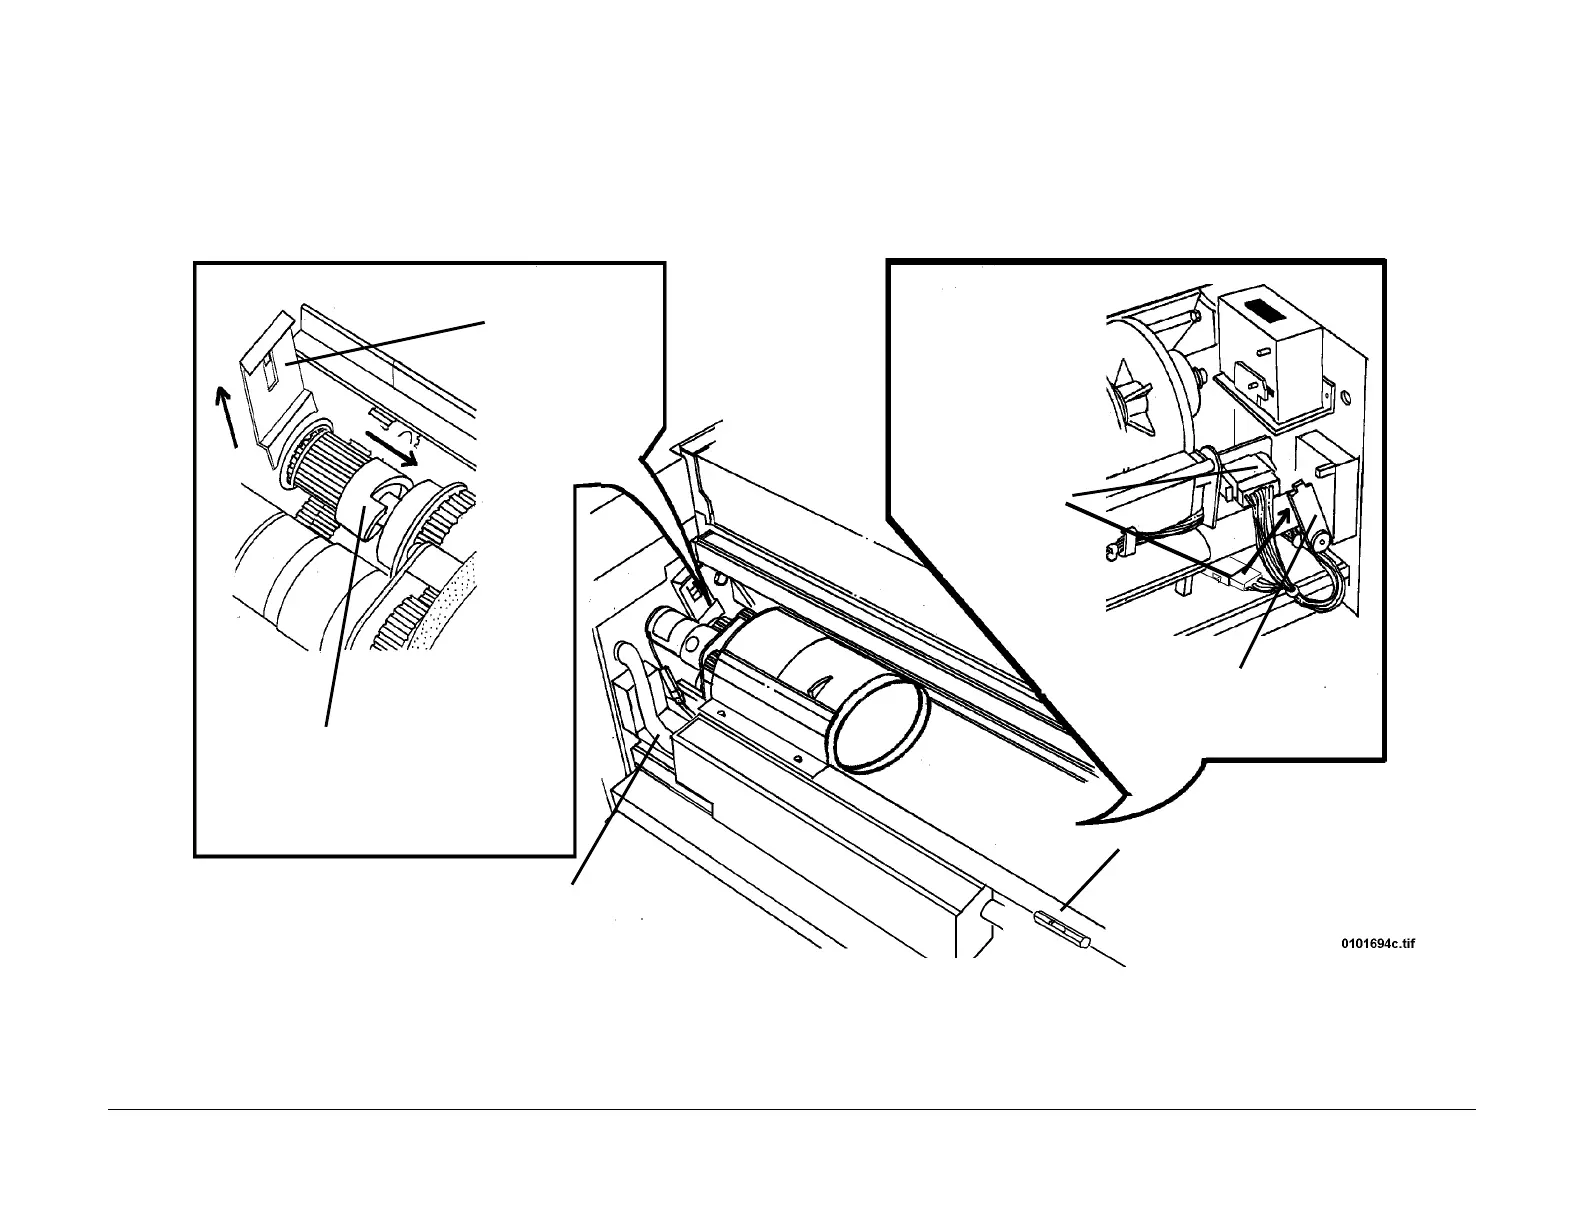
1. (Figure 3): Reinstall the Developer Module.
NOTE: If a new Developer Module is being installed, a new charge of Developer Material
must be installed. Refer to (REP 9.7) Developer material.
Figure 3 Reinstalling the Developer Module
6
Rotate the gear to
engage the drive
5
Lift the Gear
Retainer
2
Reconnect A22P1and
8850 W/TAG 2/SPS
510dp connect the
developer heater
1
Place the Developer
Module back in the
Printer and push it to the
left (drive side)
3
Press tab and swing up
Clamp Bar until it locks (one
each end)
7
Position a level on the rear edge of the Devel-
oper Housing extrusion. Using the Printer
Leveling Pads, level the Printer Developer
Module.
4
Reconnect the hose
to the Air Filter
 Loading...


