03/2003
4-114
8850/ 510DP
REP 10.1
Repairs and Adjustments
CAUTION
When installing the Heat Rods be sure to insert the red connectors into the Heat Roll. The
red connectors should be on the drive side of the Fuser Drawer. Installing them incorrectly
will cause a Printer fault code and possibly damage a fuser component.
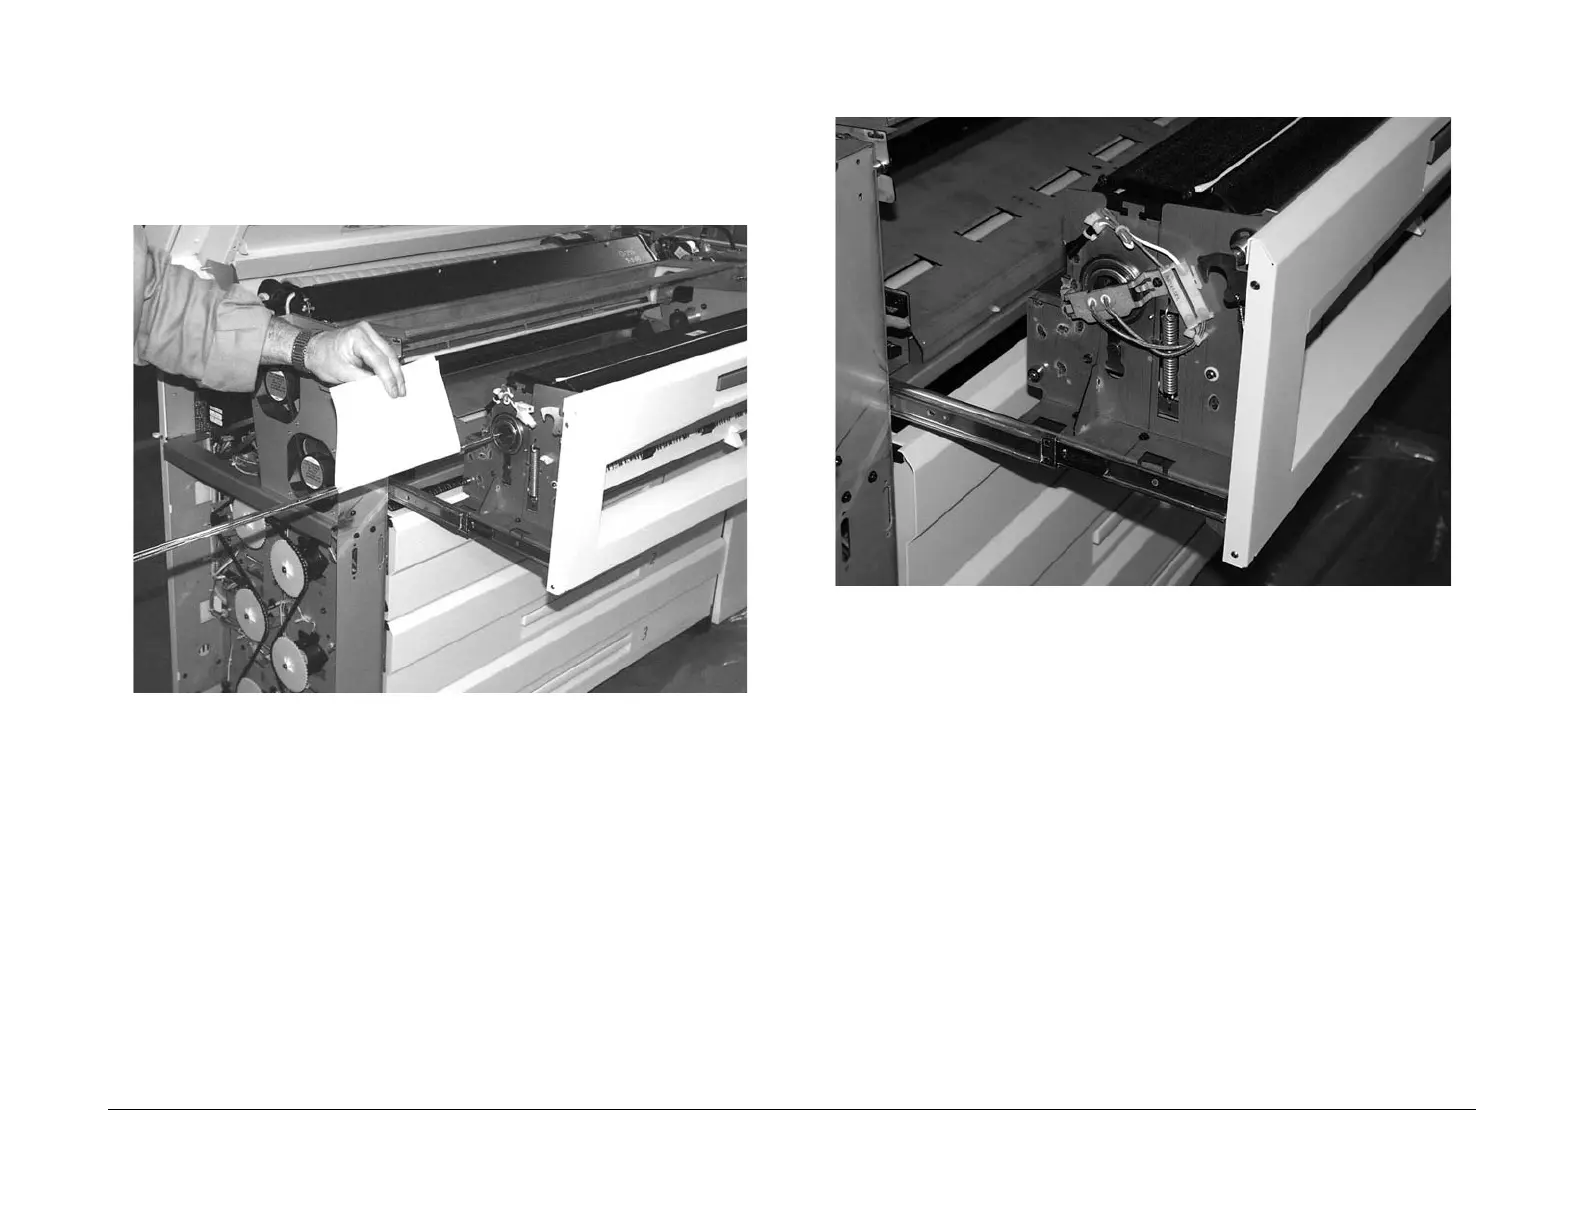
4. (Figure 7): Pick up one end of one Heat Rod by the wire. Wrap a sheet of paper around
the glass and hold both ends of the paper with one hand. Use one hand on the rear, white
wire and the other holding the paper to guide each Heat Rod into the fuser from the rear.
Figure 7 Inserting a Heat Rod into the rear of the fuser
5. As the Heat Rod wire exits the front of the fuser, place the front fuser grommet on the
front wire of the rod.
6. Repeat (Step 5 and Step 5.) for the remaining Heat Rod.
7. With the Heat Rods wires inserted, press the fuser grommet into the front fuser bracket.
8. Place the rear fuser grommet on the wires on the rod ends protruding from the rear of the
fuser.
9. With the Heat Rod wires inserted, press the fuser grommet into the rear fuser bracket.
10. Holding the rear fuser bracket, push the rods towards the front of the Printer until the
ceramic necks of the rods are positioned in the front fuser grommet.
11. Holding the rear fuser wires, push the rear fuser bracket to position the ceramic necks of
the rods in the rear fuser grommet.
12. Fasten the rear fuser bracket to the Fuser Assembly.
13. (Figure 8): Attach the Heat Rod wire connectors to the front (red to red) and rear (white to
white) wire connectors on the Fuser Assembly.
Figure 8 Attaching and dressing the fuser wires and connectors.
14. Dress the wires and connectors, as shown in Figure 12, to avoid contact with the Printer
when the Fuser Assembly is closed.
15. The remainder of the replacement is the reverse of the removal.
16. Perform (ADJ 10.1) Fuser Temperature.
 Loading...


