03/2003
4-113
8850/ 510DP
REP 10.1
Repairs and Adjustments
Replacement
CAUTION
Wear gloves or wrap a sheet of paper around the Heat Rod when handling the Heat Rod. Do
not touch the glass section of the Heat Rod. Oil from fingers can cause damage to the Heat
Rod.
CAUTION
The connectors on the Fuser Heat Rods are color- coded. Ensure that the red connectors on
the Fuser Heat Rods are connected to the red connectors on the Fuser Harness (located on
the drive side of the Fuser Assembly).
NOTE: Do not remove the connectors from the wires on the ends of the Heat Rod.
NOTE: Step 1: If this procedure is being done as a result of replacing the Heat Rods, the Sup-
port Bracket will have been removed. If it is a result of doing an install, the bracket will need to
be removed.
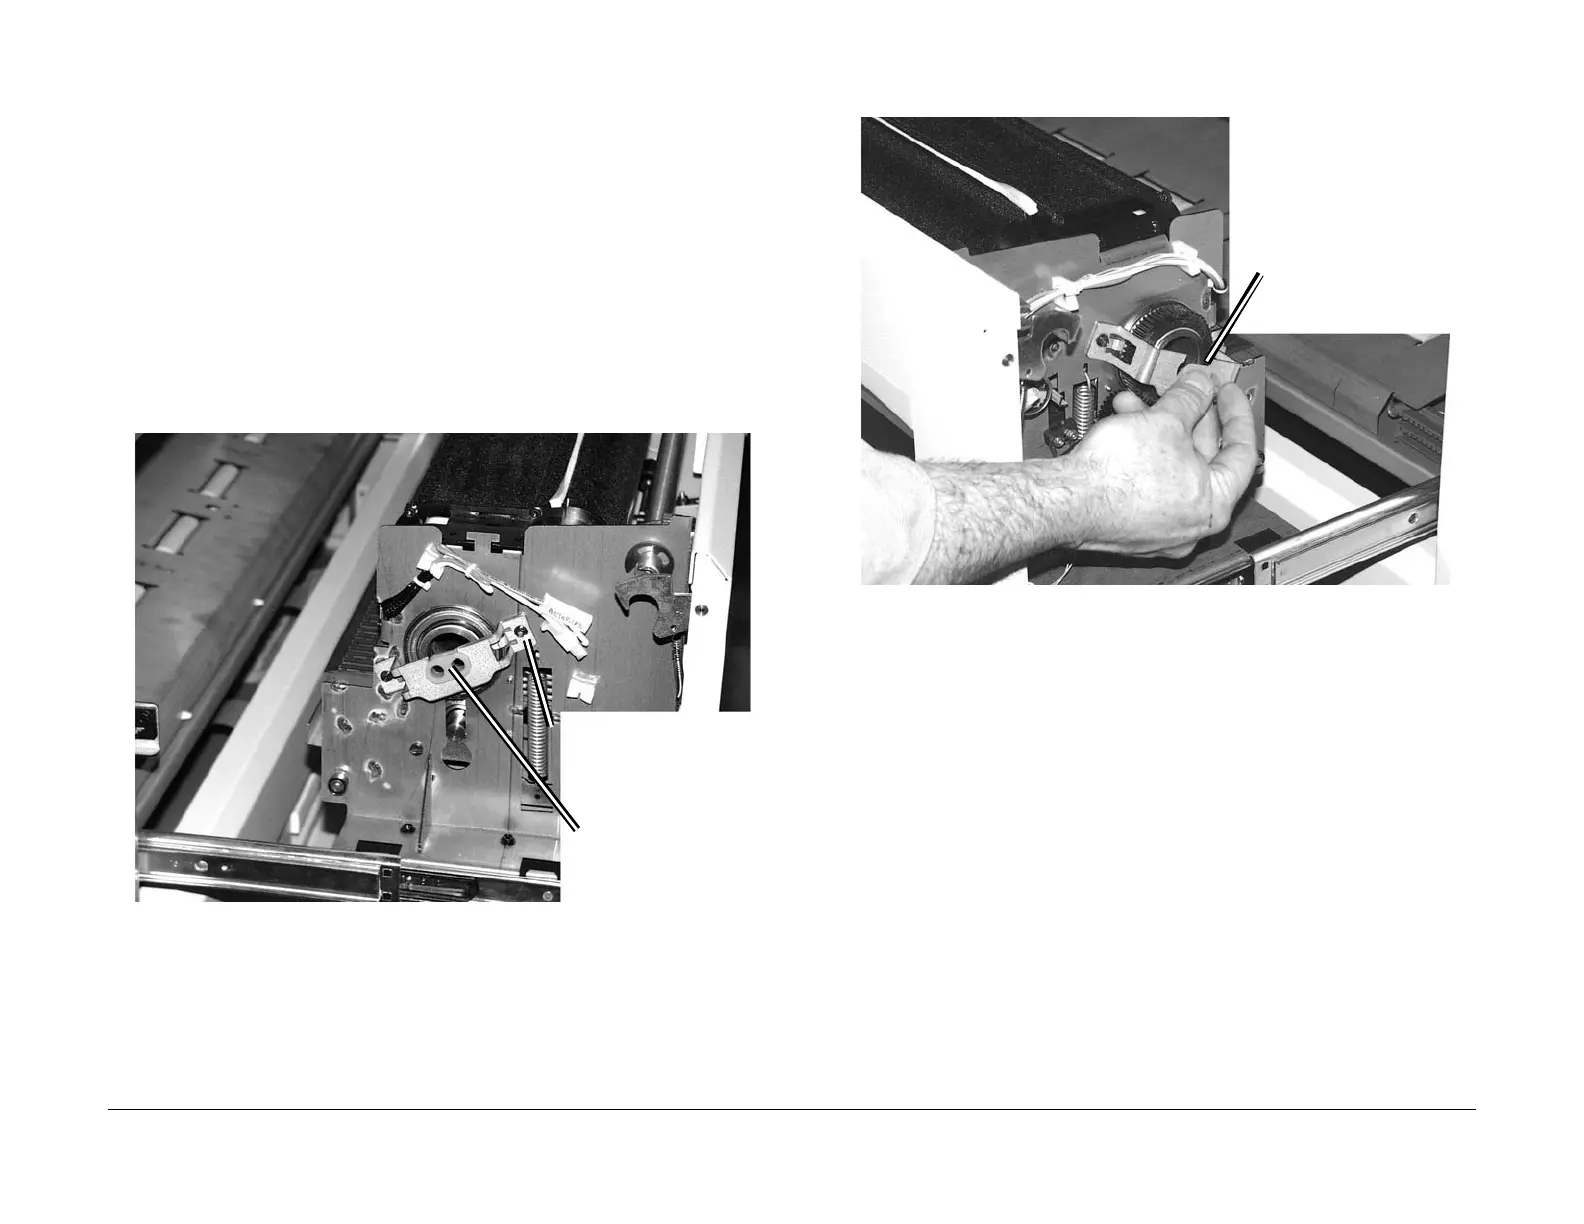
1. (Figure 5): Unfasten the rear Fuser Heat Rod Bracket from the Fuser Assembly and sep-
arate the grommet from the bracket.
Figure 5 Removing the Grommet from the Bracket
2. (Figure 6):Remove the Heat Rod Grommet located on the front of the Fuser Assembly
(drive side).
Figure 6 Removing the front Fuser Heat Rod Grommet
3. Straighten any bends in the wires on both Fuser Heat Rods.
NOTE: Examine the color and shape of the connectors on both the Fuser Heat Rods and
their corresponding connectors on the Printer. Note the following:
• The connectors are color-coded. Red connectors go on the drive side of the
Fuser Assembly. White connectors go on the non-drive side.
• The shapes of the connectors are molded to eliminate the possibility of crossing
wires on one side of the Fuser Assembly or the other.
• Lateral orientation of either of the Fuser Heat Rods within the Fuser Heat Roll (edge
or center) does not matter, so long as the red connectors are placed on the drive
side of the Fuser Assembly.
1
If required, remove the (2)
screws on the rear Heat
Rod Bracket and remove
the Bracket
2
Remove the Heat Rod
Grommet from the
Bracket
1
Remove the front Heat
Rod Grommet.
 Loading...


