03/2003
4-131
8850/ 510DP
REP 10.8
Repairs and Adjustments
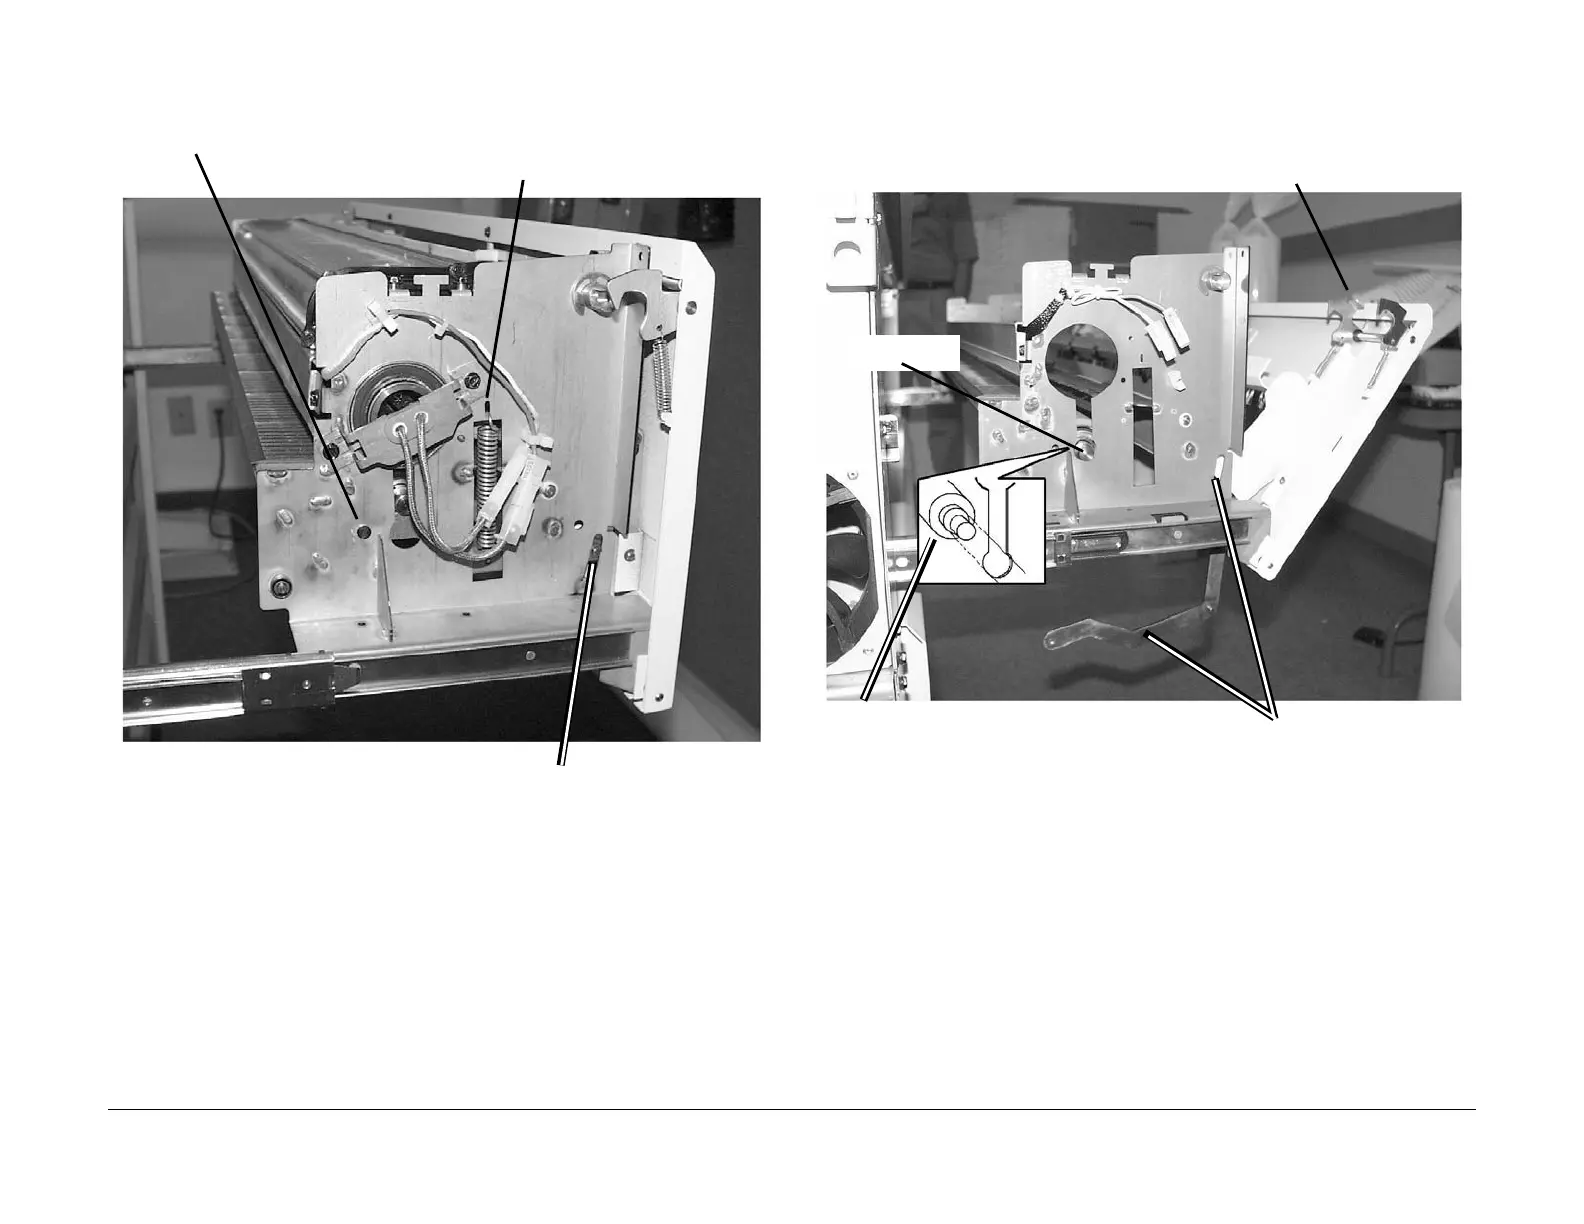
4. (Figure 4): Prepare to remove the Pressure Roll left side.
Figure 4 Preparing to Remove the Pressure Roll
5. (Figure 5): Remove the Pressure Roll from the Printer.
Figure 5 Removing the Pressure Roll from the Printer
6. (Figure 6): Remove the Pressure Roll from the Shaft.
1
Use the Spring Removal tool to remove
the Spring from the frame
3
Remove the E-ring from
the guide pin
2
Remove the screw
4
Remove the Pressure Roll from the underside
of the Fuser Assembly, right side first
3
Lift the Pressure Roll slightly and guide
the inner shoulder of the shaft out the
circular cutout at the base of the slot
2
Remove the Guide Pin from the slot
and drop the Pressure Roll Support
Arm downward
1
Lower the Latching Cover by releas-
ing the two latches located at either
side of the top of the cover
Pressure Roll
Shaft
 Loading...


