EasyManuals Logo

Xerox WorkCentre C2424DX User Manual

Xerox WorkCentre C2424DX
432 pages
To Next Page IconTo Next Page
To Previous Page IconTo Previous Page
Page #341 background imageLoading...
Page #341 background image
Service Parts Disassembly 8-31
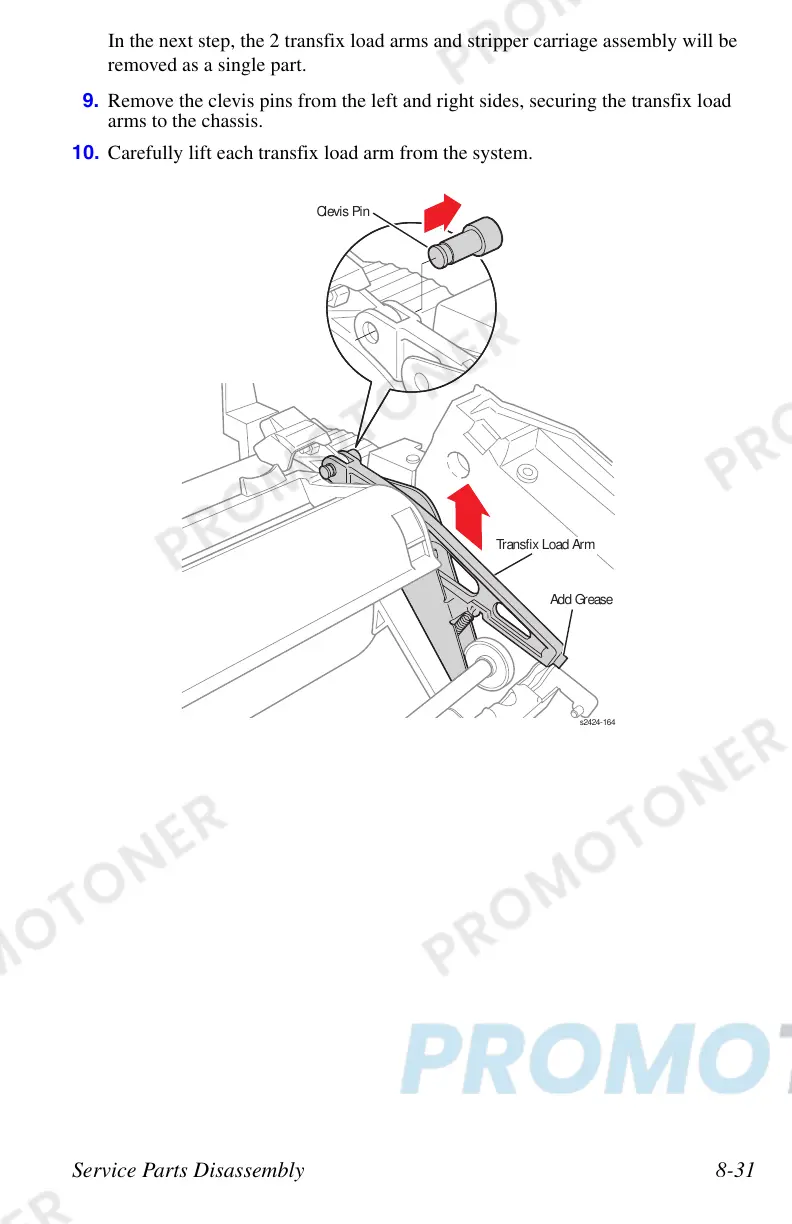
In the next step, the 2 transfix load arms and stripper carriage assembly will be
removed as a single part.
9. Remove the clevis pins from the left and right sides, securing the transfix load
arms to the chassis.
10. Carefully lift each transfix load arm from the system.
s2424-1
64
Add Greas
e
Clevis Pin
Transfix Load Arm

Table of Contents

Questions and Answers:

Question and Answer IconNeed help?

Do you have a question about the Xerox WorkCentre C2424DX and is the answer not in the manual?

Xerox WorkCentre C2424DX Specifications

General IconGeneral
BrandXerox
ModelWorkCentre C2424DX
CategoryPrinter
LanguageEnglish

Related product manuals