13185L-002 Rev. A 1/24/06 110XiIIIPlus Maintenance Manual Page 4-59
Maintenance Section 4
Align the Lower Drive Arm
The alignment of the lower drive arm must be checked any time the cutter PCB is
replaced.
1. Refer to RRP No. 1 on page 4-14. Turn the printer Off (O), remove the AC power
cord and data cables.
2. Refer to RRP No. 2 on page 4-16 and remove the electronics cover.
3. Refer to RRP No. 3 on page 4-17 and remove the power supply.
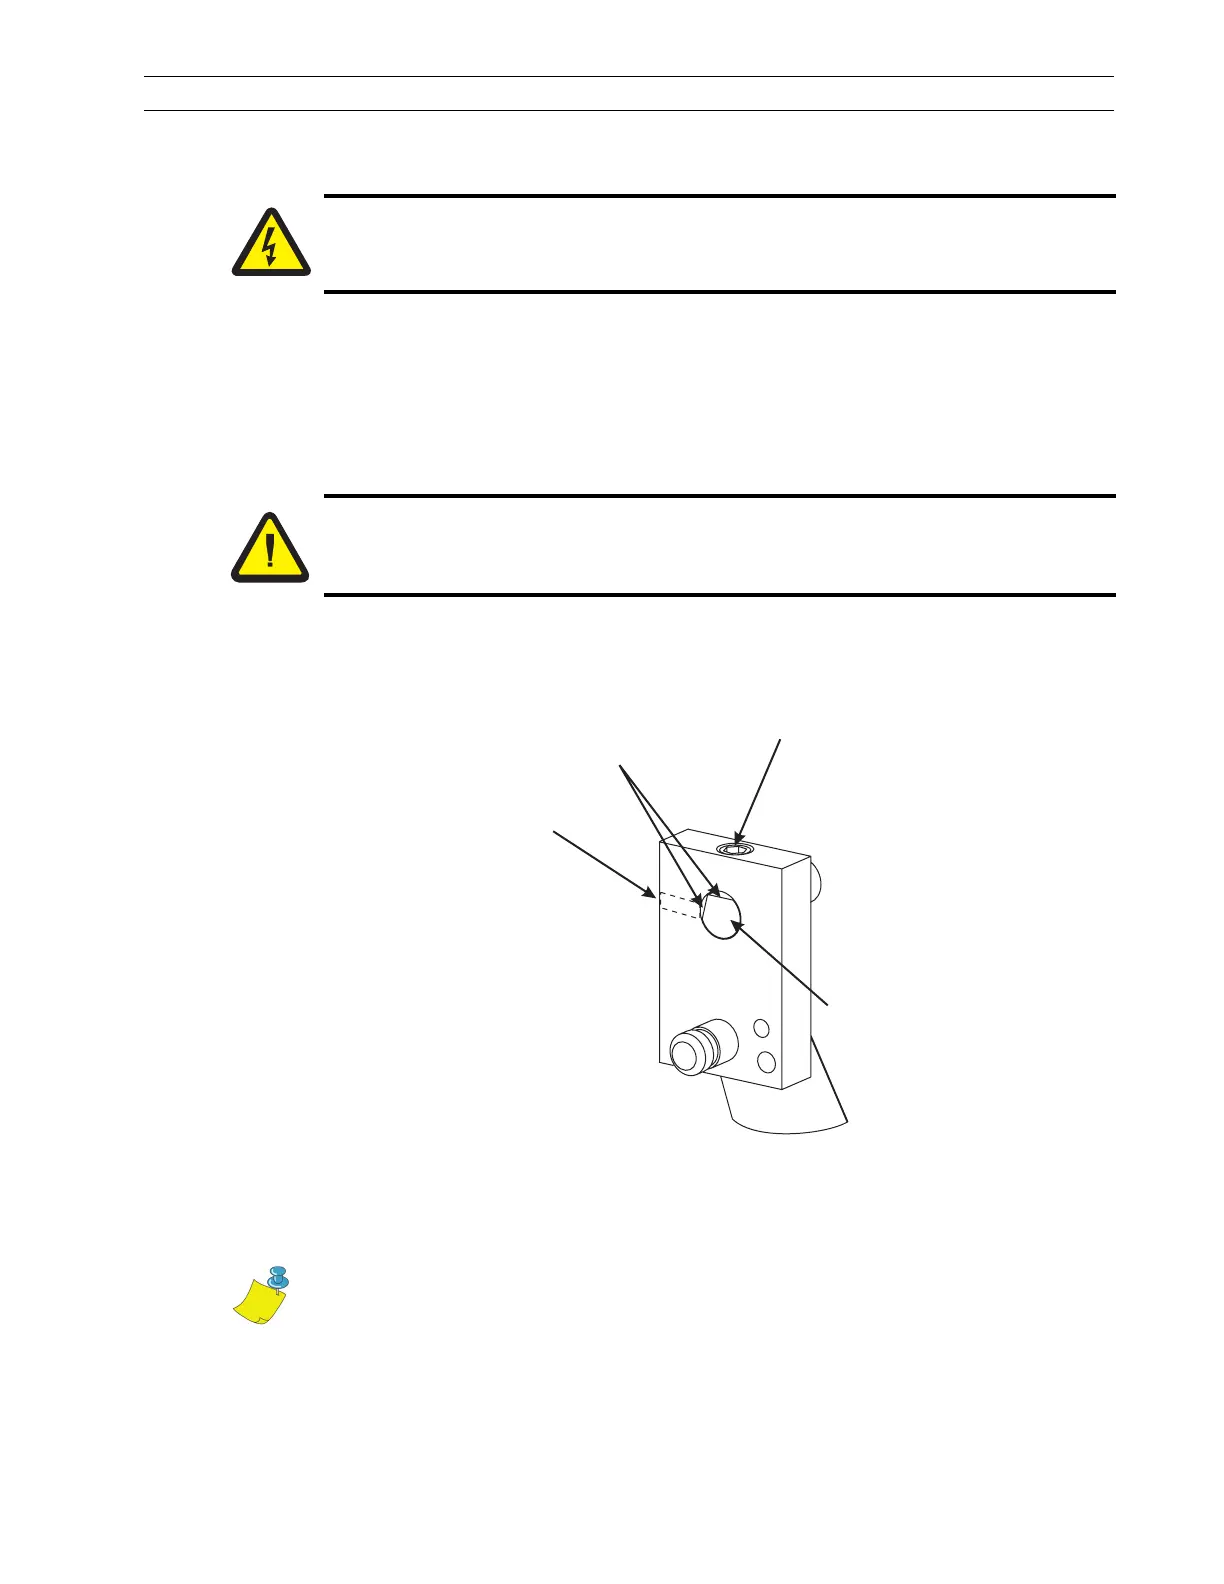
4. Refer to Figure 4-32. Loosen the screws securing the lower drive arm to the motor
shaft.
Figure 4-35. Lower Drive Arm
5. Rotate the cutter motor shaft until the two flats on the shaft align with the two set
screws, then tighten the set screws to 20 inch-pounds (2.3 N•m).
6. Rotate the lower drive arm until the sensor flag is approximately centered between
the front and back portions of the optical sensor. Ensure the sensor flag does not
touch the sensor at any time by rotating the lower drive arm a few degrees in both
directions.
Caution:
Unless indicated otherwise, turn the printer Off (O) and disconnect the printer
from the power source before performing the following maintenance.
Caution:
This installation must be performed by a qualified service technician.
Flats
Cutter Motor Shaft
Set Screw
Set Screw
Note • Do Not touch the flag with your fingers.
 Loading...