Page 4-76 110XiIIIPlus Maintenance Manual 13185L-002 Rev. A 1/24/06
Section 4 Maintenance
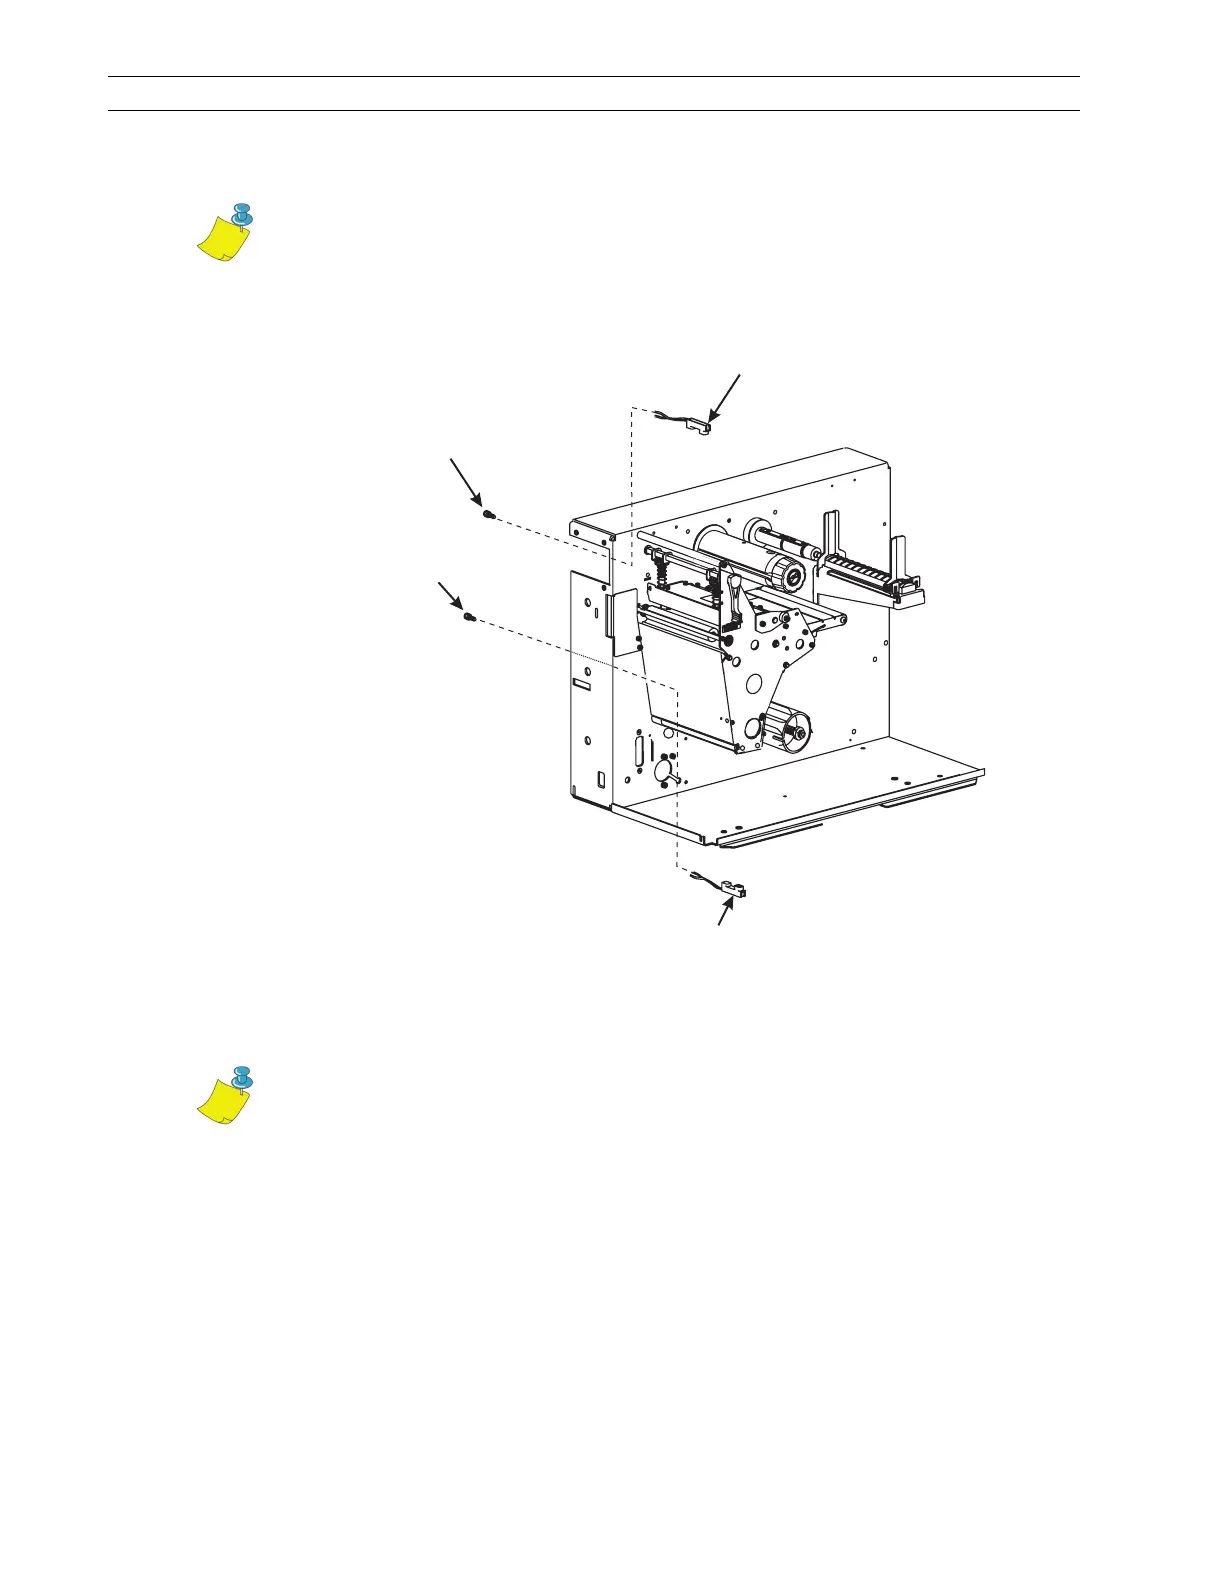
Install the Sensor
1. Insert the upper take-label sensor connector and cable through the upper hole in the
main frame.
Figure 4-49. Take-Label Sensors
2. Install the sensor with the window facing down. Secure the sensor to the main frame
with screw.
3. Insert the lower take-label sensor connector and cable through the lower hole in the
main frame.
4. Install the sensor with the window facing up. Secure the sensor to the main frame
with screw.
5. Refer to Figure 4-50. Route the wires through the cable clamps to the main logic
board. Ensure that the wires do not come in contact with any moving parts.
6. Connect the upper take-label sensor connector to P2 on the main logic board and the
lower label available sensor connector to P1.
Note • The upper take-label sensor has green/yellow wires.
Screw
Lower Sensor
Screw
Upper Sensor
Note • The lower take-label sensor has black/red wires.
 Loading...