A Accessories and platepads
Installing and setting up an Orbital Shaking Station
110
Bravo Platform User Guide
Uninstalling the Orbital Shaking Station
To uninstall the station:
1 Disconnect the Orbital Shaking Station power cord from the AC outlet.
2 Disconnect the control module serial cable from the Bravo computer.
3 Using the M2 hex wrench, remove the two socket-head screws in the Orbital
Shaking Station.
4 Remove the Orbital Shaking Station from the adapter pad.
5 Using the M5 hex wrench, remove the screw in the center of the adapter pad, and
then remove the adapter pad.
Next steps:
1 Install a platepad or accessory at this deck location.
2 In Diagnostics, select the appropriate profile, and then click the Configuration tab
and reconfigure this location.
3 Adjust the teachpoint of the location.
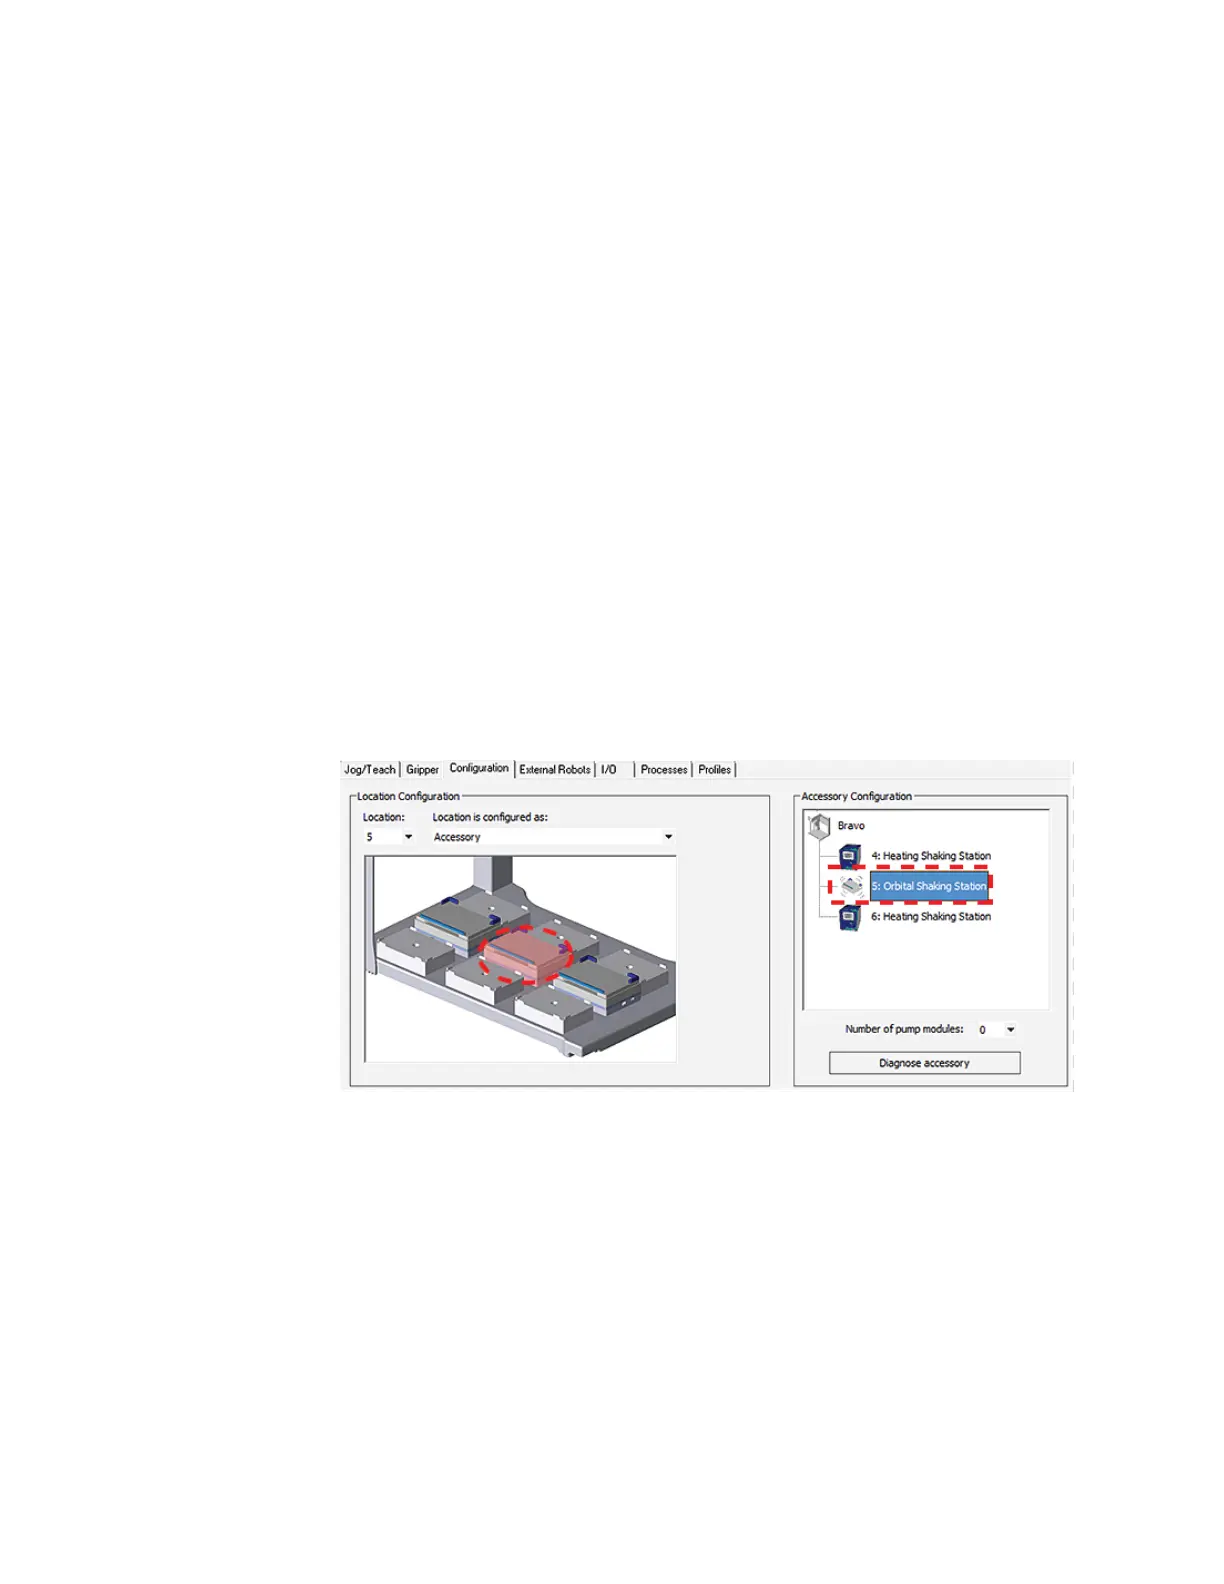
Configuring the Orbital Shaking Station in Bravo Diagnostics
To configure the Orbital Shaking Station:
1 In Diagnostics, click the Profiles tab, and verify that the correct profile is initialized.
2 In the Configuration tab, select the Location of the Orbital Shaking Station.
3 Under Location is configured as, select Accessory. The Bravo Accessories Wizard
opens.
4 Follow the instructions in the Accessories Wizard to:
a Verify the Location of the installed Orbital Shaking Station.
b Choose the Orbital Shaking Station accessory.
c Select the controlling computer Serial Port that connects to the Orbital Shaking
Station.
Note: The Serial Port parameter is automatically defined when a USB-to-
serial adapter is connected to the computer. You might need to look up the
port number assigned to this device in the Microsoft Windows Device
Manager.