Do you have a question about the Allen-Bradley ControlLogix 1756-ENBT and is the answer not in the manual?
| Brand | Allen-Bradley |
|---|---|
| Model | ControlLogix 1756-ENBT |
| Category | Control Unit |
| Language | English |
Lists the key features of the 1756-ENBT module, including protocol support and operational capabilities.
Explains the primary tasks of the 1756-ENBT module, focusing on real-time I/O control and messaging.
Details compatible firmware versions and software releases required for using the 1756-ENBT module.
Describes how the 1756-ENBT module supports both Rack Optimized and Direct Connections for data transfer.
Explains the ability to use Rack Optimized and Direct Connections simultaneously for different I/O modules.
Explains the Control and Information Protocol (CIP) and its role in EtherNet/IP communication.
Describes the producer/consumer networking model, contrasting it with traditional master/slave systems.
Explains how to set the RPI for data update rates, crucial for network performance.
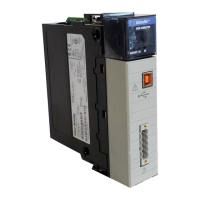
Identifies the physical external features of the 1756-ENBT module through diagrams and labels.
Details the necessary steps to prepare the ControlLogix chassis and power supply before module installation.
Guides on selecting an appropriate slot location within the ControlLogix chassis for the module.
Provides step-by-step instructions for physically installing the 1756-ENBT module into the chassis.
Outlines the procedure for safely removing or replacing an existing 1756-ENBT module.
Explains how to install or remove the module while the chassis power is active, with safety warnings.
Illustrates the pinout for wiring the RJ45 connector used for EtherNet/IP network connections.
Guides on physically connecting the 1756-ENBT module to the EtherNet/IP network using an RJ45 cable.
Details the procedure for applying power to the ControlLogix chassis after module installation.
Guides on verifying the module's operational status using LED indicators and the alphanumeric display.
Provides a foundational overview of Ethernet and its supporting network protocols for communication.
Explains the TCP/IP protocol suite and its application in explicit messaging for configuration and data transfer.
Describes UDP as a simple, fast transport protocol ideal for real-time I/O messaging applications.
Explains EtherNet/IP as the industrial protocol layer over Ethernet, enabling interoperability.
Details SNMP's role in network management, monitoring, and controlling devices.
Outlines essential configuration parameters including IP address, gateway, and subnet mask for module setup.
Explains IP addressing conventions, network classes, and the requirement for unique IP addresses.
Describes how gateways connect different networks and facilitate data transfer between them.
Explains subnet masking for extending IP addressing capabilities across multiple physical networks.
Provides step-by-step instructions for using the Rockwell BootP utility to configure the module.
Explains how to reconfigure a device's IP settings using the Force IP Renew feature.
Guides on saving the BootP utility's relation list for future reference and configuration.
Details how to configure the 1756-ENBT module using RSLinx communication software.
Explains the process of configuring the module using an external BootP server and tab file.
Discusses configuring the module with DHCP, highlighting potential compatibility issues and precautions.
Introduces an example of using rack optimized connections for I/O data.
Guides on setting up the necessary hardware components for the rack optimized I/O example.
Provides steps to create the example application project using RSLogix 5000 software.
Instructions for adding the local 1756-ENBT module to the controller's I/O configuration.
Steps to add the remote 1756-ENBT module as a child of the local Ethernet bridge.
Guides on adding remote digital input and output modules to the I/O configuration.
Specific steps to add a remote 1756-IB16I digital input module to the configuration.
Specific steps to add a remote 1756-OB16I digital output module to the configuration.
Details how to create and edit controller tags for use in the ladder program.
Guides on creating the ladder logic program to test the I/O configuration.
Explains the process of downloading the created program to the Logix 5550 controller.
Procedures to test the functionality of the rack optimized I/O example application.
Introduces an example of adding an analog output module using a direct connection and varying its output.
Guides on setting up the hardware for the analog I/O direct connection example.
Steps to create the analog I/O example application, modifying a previous project.
Instructions for adding the 1756-OF8 analog output module to the I/O configuration.
How to create controller tags for the analog output module to control its signal.
Guides on modifying the ladder program to generate a varying signal from the analog output.
Explains the process of downloading the modified ladder program to the controller.
Procedures to test the analog output module by measuring its voltage signal.
Introduces an example of data messaging between controllers using produced and consumed tags over EtherNet/IP.
Guides on setting up the hardware for the producer-consumer tags example.
Steps to create the producer application project using RSLogix 5000.
How to create producer tags and designate them for data production.
Guides on creating the producer ladder program to generate test data.
Explains the process of downloading the producer application to the controller.
Steps to create the consumer application to receive data.
How to create the consumer controller in a separate RSLogix 5000 session.
Instructions for adding the producer controller to the consumer's I/O configuration.
Adding the local Ethernet bridge to the consumer's I/O configuration.
Adding the remote Ethernet bridge as a child of the local bridge in the consumer's I/O.
Adding the producer controller as a child of the remote Ethernet bridge in the consumer's I/O.
How to create consumer tags to receive data from the producer.
Explains how to download the configuration to the consumer controller.
Procedures to verify data messaging by monitoring consumed tags in the consumer.
Introduces an example of communicating with FLEX I/O modules using a 1756-ENBT module and adapter.
Guides on setting up the hardware for interfacing with FLEX I/O modules.
Steps to create the FLEX I/O example application using RSLogix 5000.
Guides on configuring the I/O for FLEX I/O modules, adding bridges and adapters.
Adding the local 1756-ENBT module to the FLEX I/O configuration.
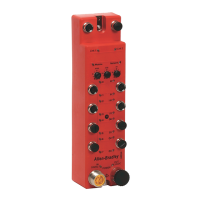
Instructions for adding the 1794-AENT FLEX I/O adapter to the configuration.
Guides on adding FLEX digital input and output modules to the configuration.
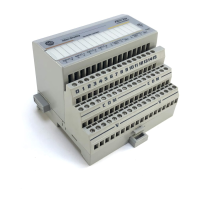
Specific steps to add a FLEX I/O digital input module (1794-IB16).
Specific steps to add a FLEX I/O digital output module (1794-OB16).
How to create controller tags for the FLEX I/O modules in the application.
Guides on creating the ladder logic program to test FLEX I/O functionality.
Explains the process of downloading the FLEX I/O program to the controller.
Procedures to test the functionality of the FLEX I/O example application.
Explains how to interpret the alphanumeric display and LED status indicators on the 1756-ENBT module.
Details the various states and meanings of the NET status LED for network connectivity.
Describes the states and meanings of the Link Status LED indicating network communication activity.
Explains the states and meanings of the OK Status LED, indicating module operational status.
Guides on accessing and understanding diagnostic information related to connections and module status.
Provides general information about TCP connections, including active and limit counts for the module.
Details speed, duplex mode, and packet rates for Class 1 CIP connections on the module.
Offers specific information regarding Class 1 CIP connections, including type, trigger, and remote address.
Provides specific details on Class 3 CIP connections, such as client/server type and state.
Steps to install the RSLinx software package on a computer for network configuration.
Detailed instructions for configuring the AB_ETH Ethernet driver within RSLinx software.
Illustrates a basic system configuration with local and remote chassis and I/O modules.
Depicts an expanded system configuration that includes FLEX I/O modules.
Presents examples of larger control networks utilizing multiple ENBT modules and chassis.
Explains Ethernet settings and autonegotiation requirements for connecting to switches.