154 Rockwell Automation Publication 750-UM006C-EN-P - March 2022
Chapter 5 Drive Maintenance
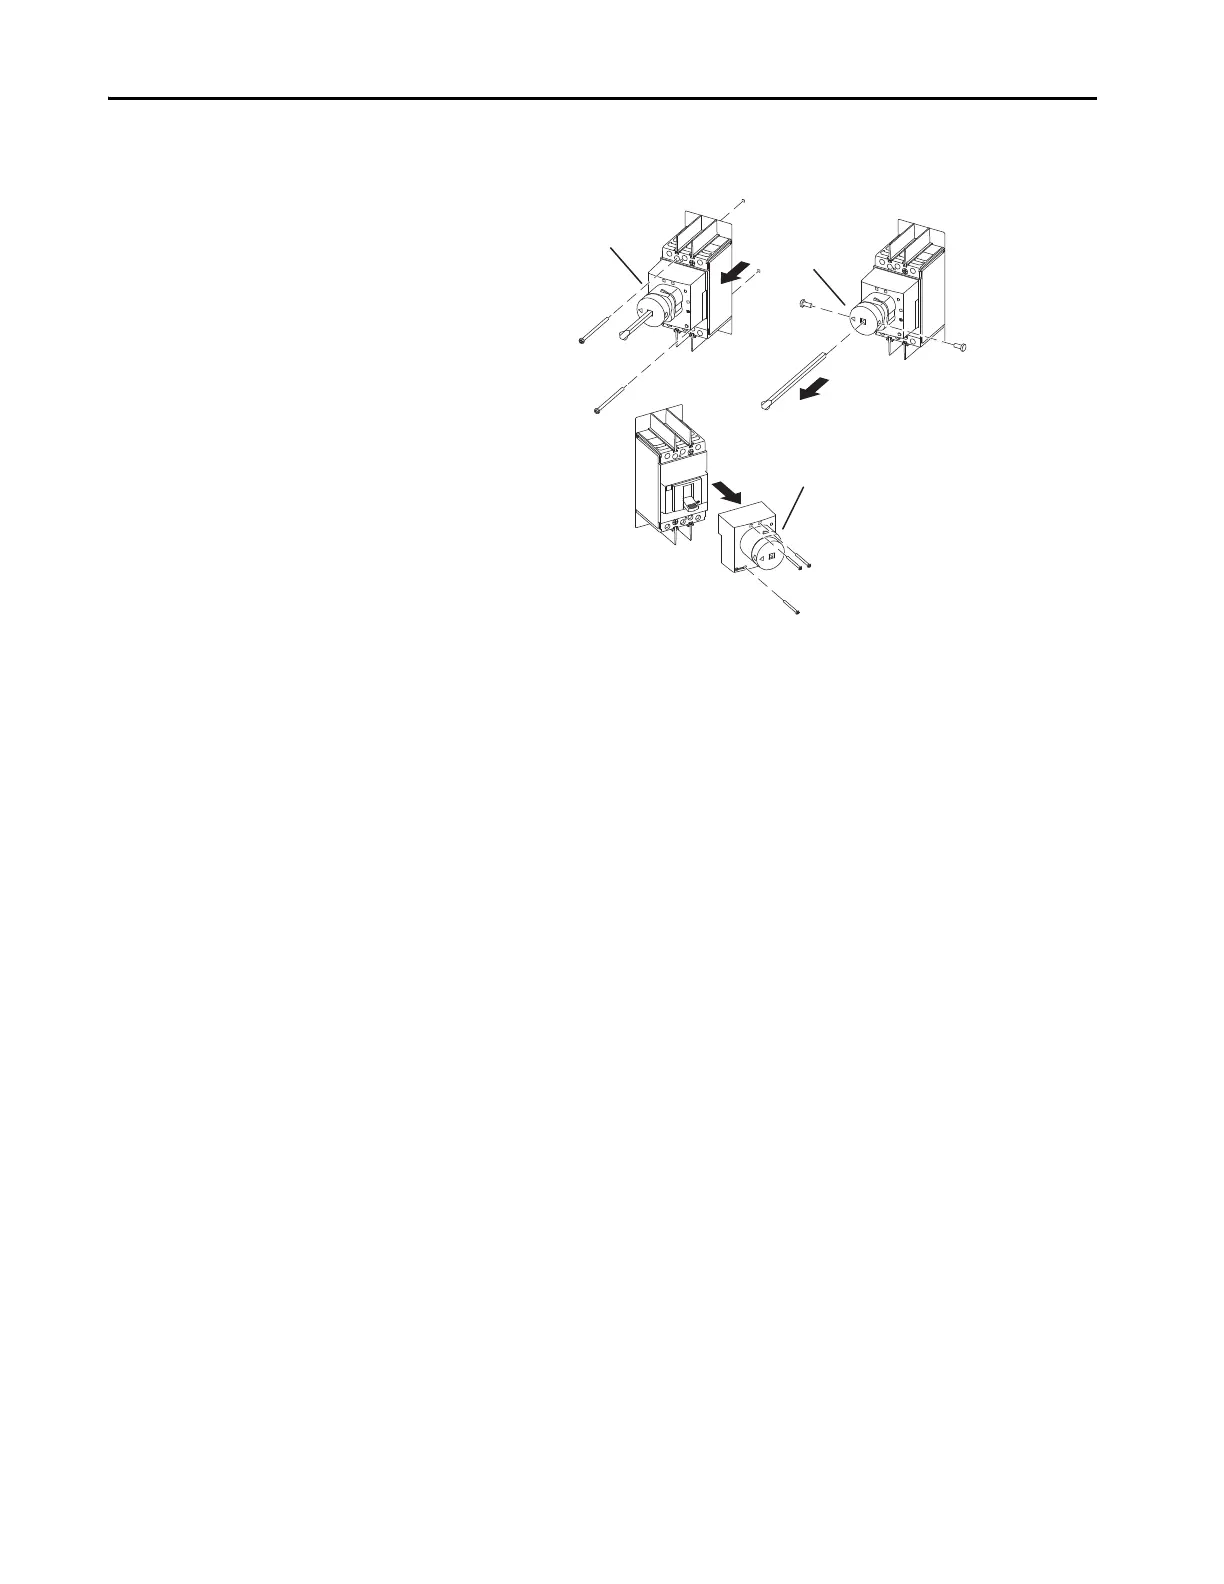
4. Use a Phillips screwdriver to remove the two screws that fasten the
main circuit breaker to the enclosure.
5. Use a Phillips screwdriver to remove the two screws that hold the
circuit breaker shaft in the main circuit breaker assembly.
6. Use a miniature Phillips screwdriver to remove the three screws from
the rotary mechanism of the main circuit breaker.
This separates the circuit breaker from the internal rotary mechanism of
the main circuit breaker.
7. Use a T20 torque bit to remove the two screws that connect the rotary
disconnect switch to the front cover.
8. Unpack and inspect the new main circuit breaker and / or rotary
mechanism.
9. Use the three M3 x 36 mm screws and the miniature Phillips
screwdriver to attach rotary mechanism of the main circuit breaker to
the circuit breaker.
Torque screws to 9.73 lb•in.
10. Use the two supplied screws and the Phillips screwdriver to attach the
circuit breaker shaft to the main circuit breaker assembly.
TIP If the rotary disconnect switch is not damaged, it is not required to replace
the switch on the front cover.

 Loading...