Rockwell Automation Publication 750-UM006C-EN-P - March 2022 159
Drive Maintenance Chapter 5
For more information on repair or replacement of the drive, see PowerFlex
750-Series AC Drives Installation Instructions, publication 750-IN001
.
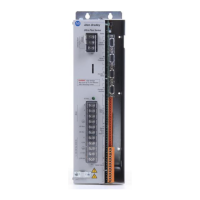
13. Unpack and inspect the new drive.
14. Use the 14 10/16 x 1 1/4 in. screws and T20 torque bit to attach the
drive to the enclosure.
Torque screws to 25-30 lb•in.
15. Refer to step 3
to remove drive covers.
16. Attach the EMC Kit. See Replace the EMC Kit (1CH030)
on page 163
for additional information
17. Install the option modules into the same slots of the drive from which
they were removed. See the electrical schematics and Replace Option
Modules on page 160 for more information.
18. Connect the terminal blocks to the applicable option modules.
19. Use a #2 Pozidriv, M3 x 7 tool to connect all power wires listed in
step 9
. Refer to the electrical schematics for more information.
Torque terminal screws to 5 lb•in.
20. Use a 7 mm hex deep socket to connect all ground wires.
Torque screws to 12 lb•in.
21. Lower the faceplate and use a flathead screwdriver to tighten the two
screws.
22. Attach the front cover of the drive.
23. Follow the instructions to Attach the Front Cover
on page 169.
TIP If you are replacing the drive heatsink fan, go to Replace the PowerFlex
Frame 2 Heatsink Fan on page 160 now. You can return to these steps after
the heatsink fan has been replaced.
TIP If you are replacing option modules, go to Replace Option Modules
on
page 160 now. You can return to these steps after the option modules have
been replaced.
ATTENTION: All terminal connectors should be fed through the bottom of
the drive. Failure to properly route cables and connectors could result in
personal harm or equipment damage.

 Loading...