158
ML-2050A/2051A/2150A
3. Maintenance of the Laser Oscillator Section
3
Installing the Laser Chamber
(1) Install the assembled upper chamber according to the lower chamber. Adjust the
pin hole of the upper chamber to the pin of the lower chamber and x it with 4
bolts.
⇒
Tighten the 4 bolts with the standard tightening torque of 500 cN•m (50 kgf•cm).
⇒
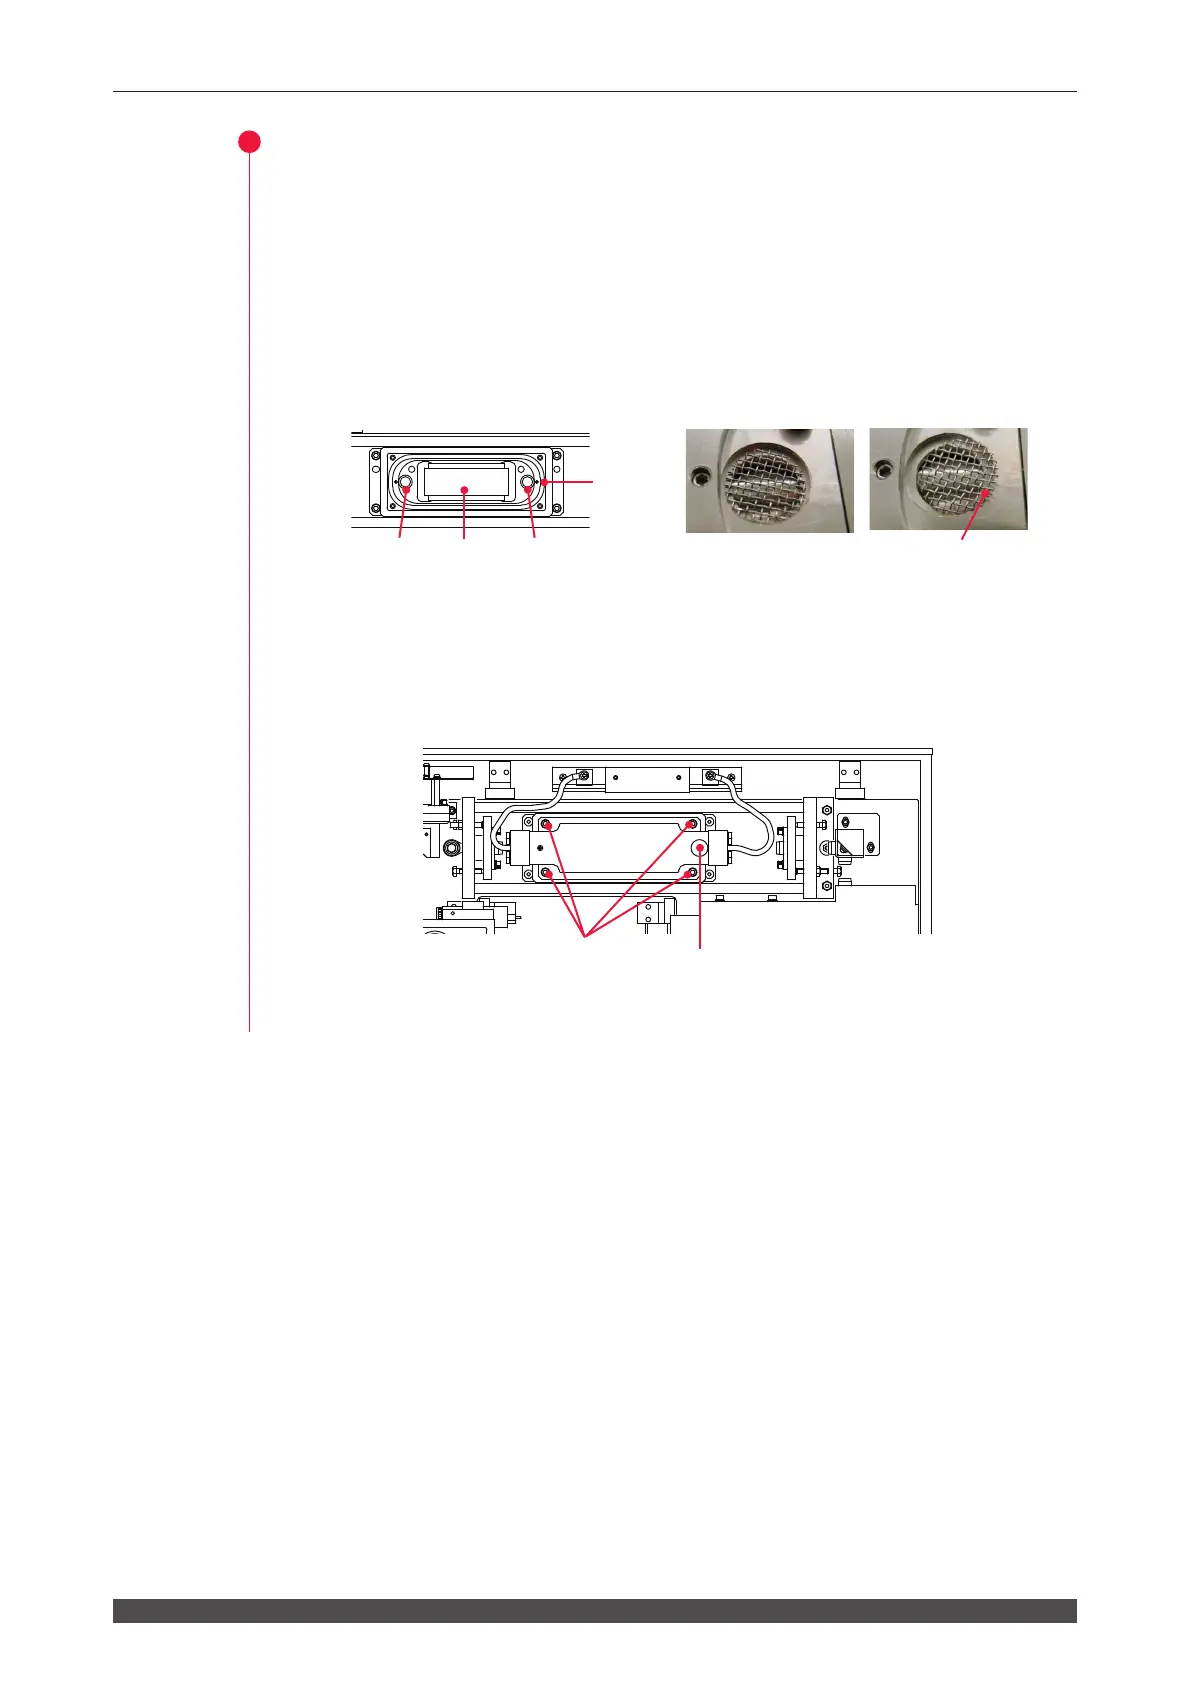
Make sure that the glass plate is put on the upper part of the reector of the lower
chamber, that the O-ring is free from any aw, and that the mesh, and that O-ring
are properly set in the groove.
(2) Connect the lead wires of the ashlamp to the screw terminals, then install the
electrode cover.
(3) Make sure that the 4 bolts xing the upper chamber and lower chamber and the
set screw of the water drain hole of the upper chamber are tightened.
(4) Install the oscillator cover.
Do Don't
The mesh is shifted from the groove.
Lower chamber
Mesh Mesh
Glass plate
O-ring
Set screw
4 bolts


 To Next Page