3. Maintenance of the Laser Oscillator Section
157
ML-2050A/2051A/2150A
Chapter 1 How to Perform Maintenance
Introduction Part
Installation and
Preparation Part
Operating Part Maintenance Part Appendixes
2
Replacing the Flashlamp
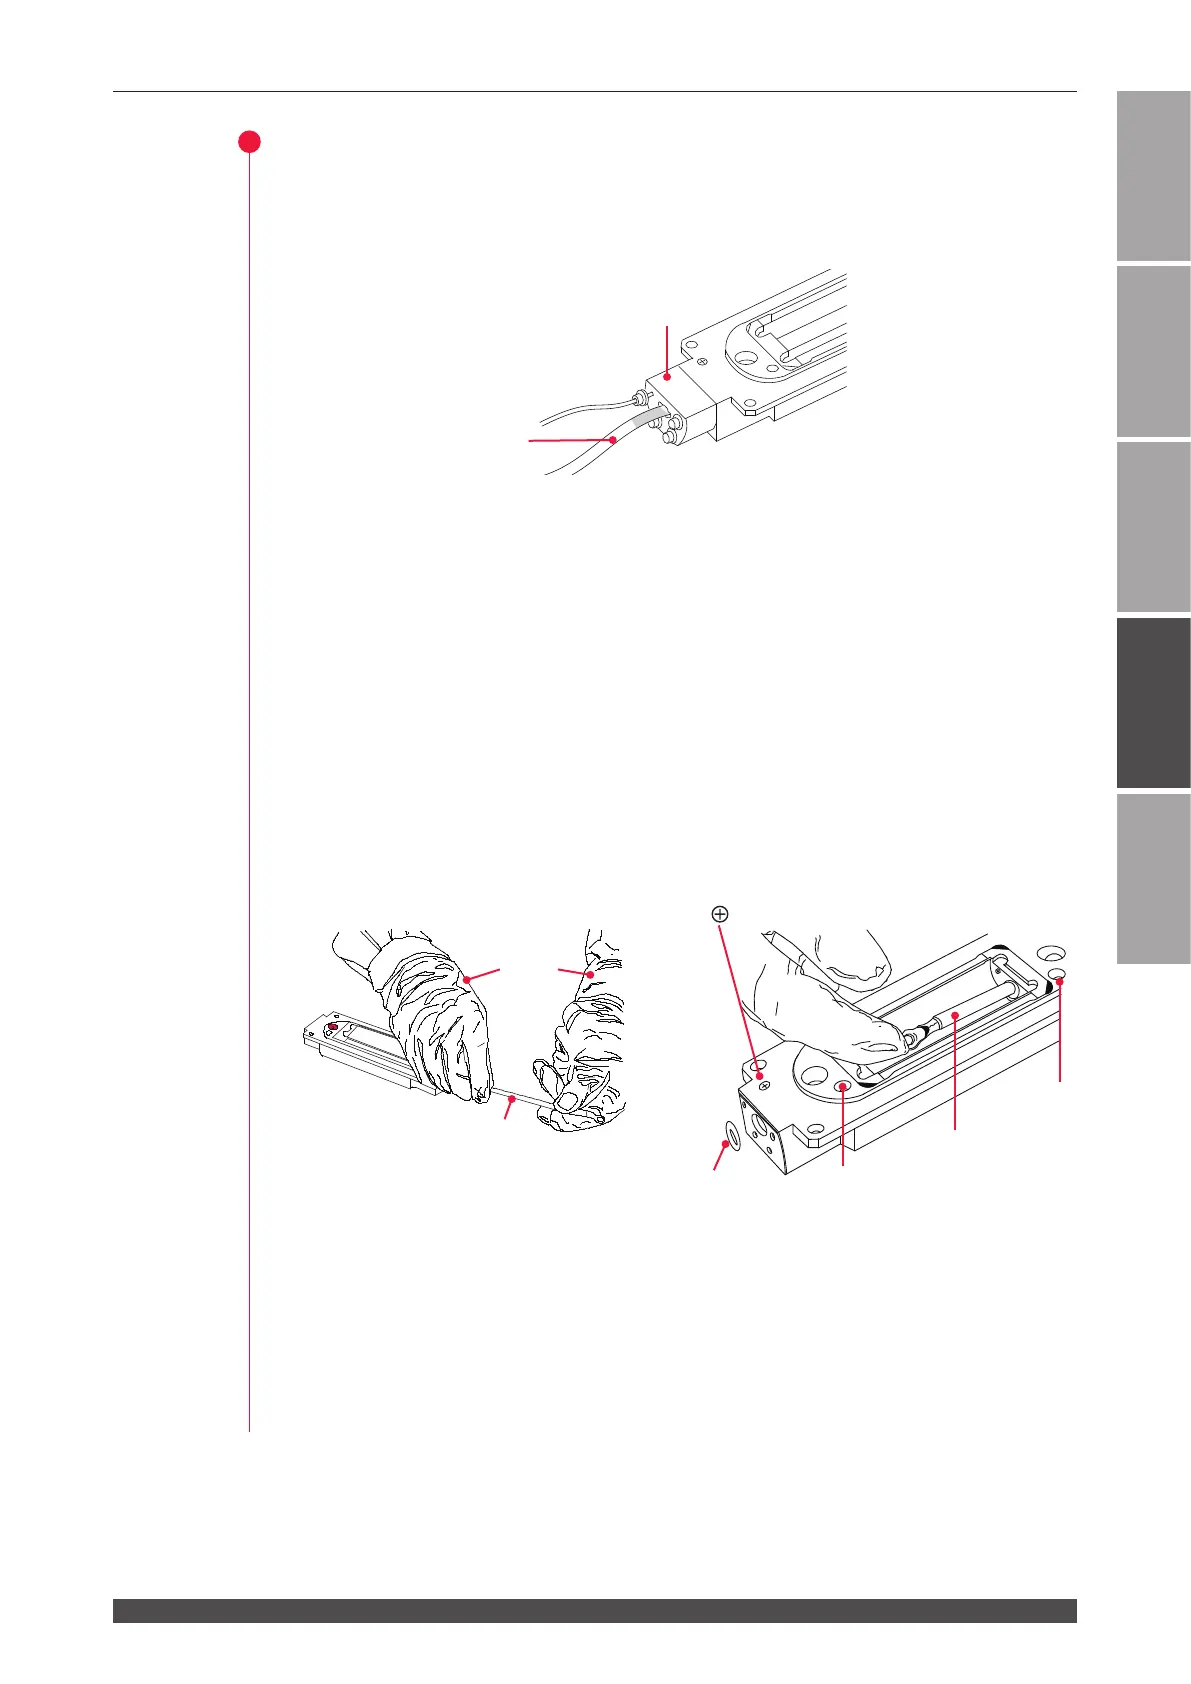
(1) Remove the lamp holders on both sides. Straighten the lead wire of the
ashlamp and pull out the lamp holder along the lead wire. Pull out the O-rings
on both sides of the ashlamp in the same way.
(2) Slowly pull out the flashlamp from either side. At this time, straighten the lead
wires so that their terminals will not scratch the reector panel.
<Notes>
- Take care not to blemish the reector surface by terminal of the lead wire.
- Take care not to damage the flashlamp by striking it against the metal
portion of the chamber.
(3) Straighten the lead wires of the new flashlamp and insert them in the upper
chamber.
⇒
Set the polarity of the lamp correctly. Set it so that the terminal of the lead wire
marked in red may be positioned on the + side of the upper chamber. If the
polarity of the lamp is reversed at installation, the service life will be shortened.
Be sure to check the polarity.
(4) Pass the O-ring attached to the ashlamp from the lead wires on both sides and
set each of them in the ashlamp.
⇒
Make sure that the O-ring is not damaged. If the O-ring is damaged, water
leakage will occur. In such a case, replace the O-ring with a new one.
(5) After pushing the O-ring by the lamp holder, install the lamp holders on both
sides in the same way. After making sure that the O-ring is set in the groove,
tighten the bolt.
Lamp holder
Lead wire
Gloves
Lead wire
Lead wire
Pin hole
Pin hole
O-ring
Side


 To Next Page