3. Connecting the Optical Fiber
45
ML-2050A/2051A/2150A
Chapter 2 Connections and Preparations of Each Section
Introduction Part
Installation and
Preparation Part
Operating Part Maintenance Part Appendixes
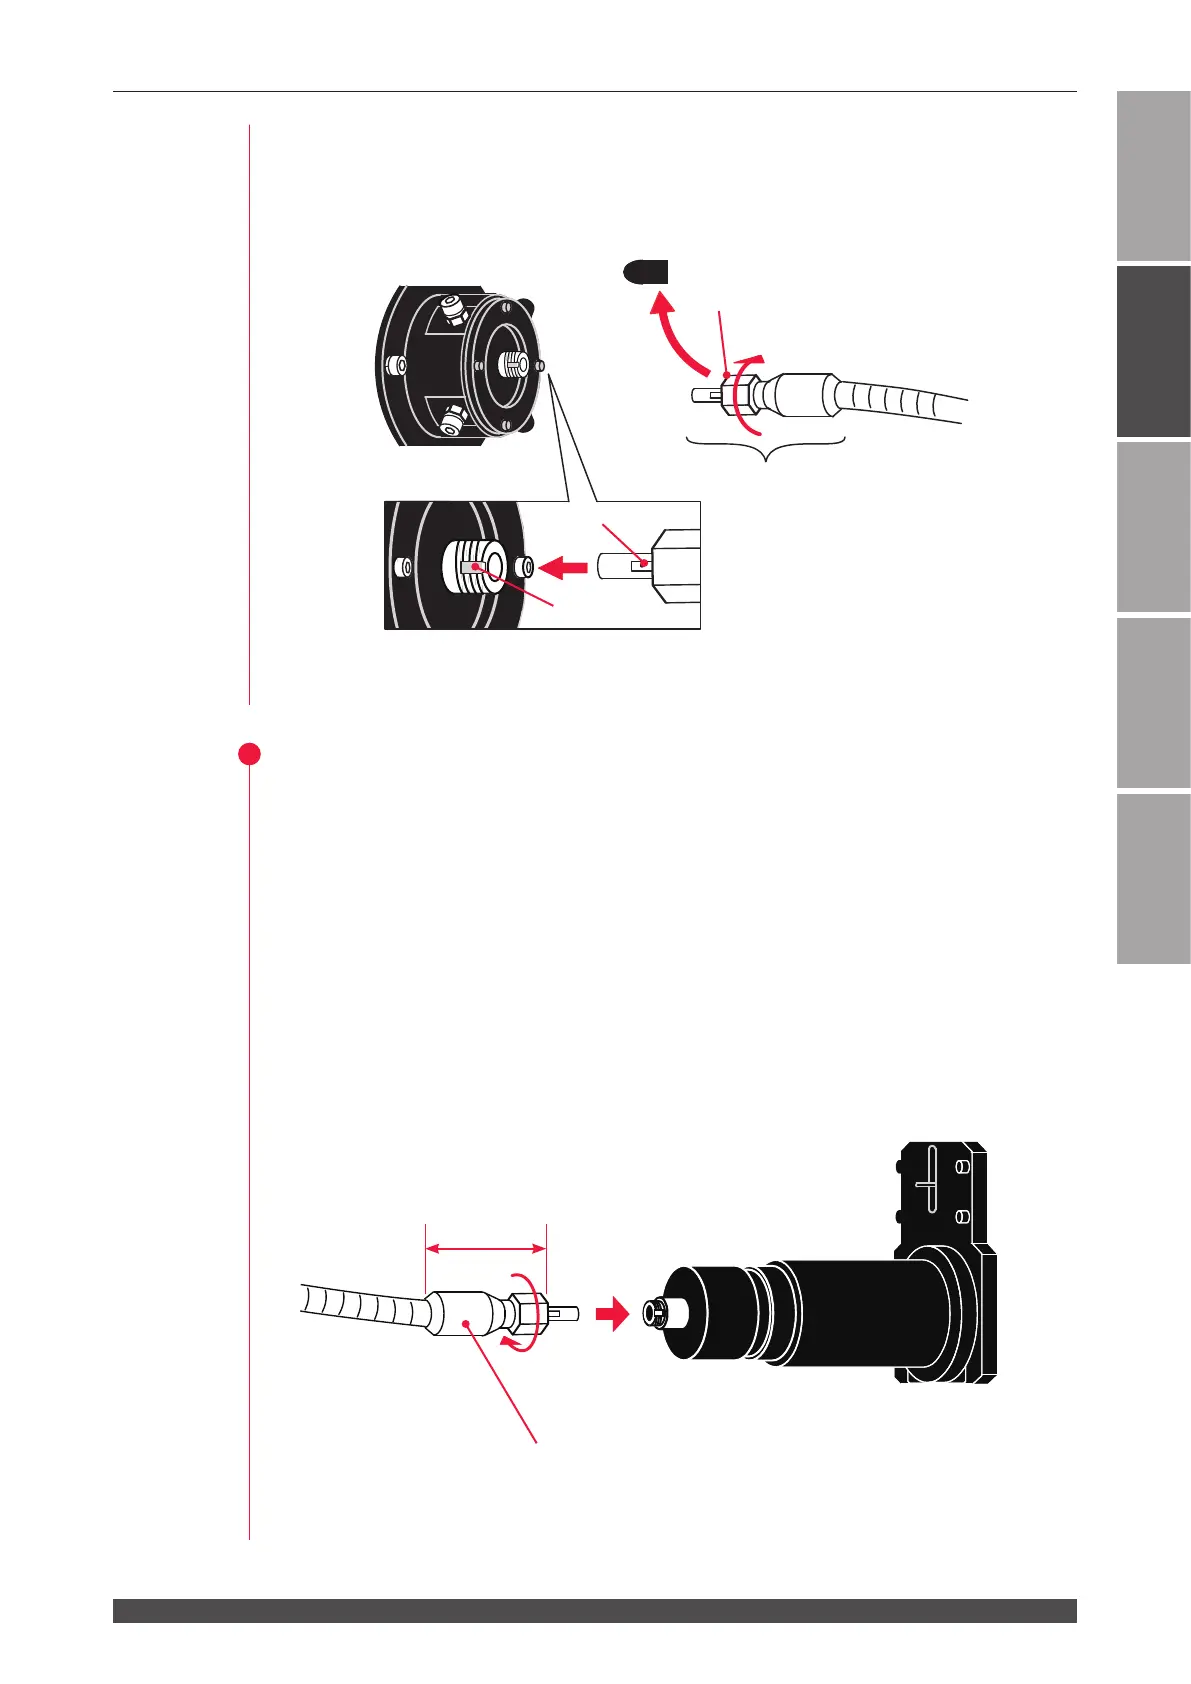
(5) Turn the outer-side ring of the plug in the direction of the arrow to x the optical
ber.
⇒
Tighten the ring by hand without using a tool.
(6) Return the head cover and x them.
2
Connecting to Laser Beam Output Unit
(1) Remove the cap at the end of the optical ber and blow o dust by using the air
blow.
(2) Insert the key provided on the optical ber plug along the groove on the output
unit side.
(3) Turn the outer-side ring of the plug in the direction of the arrow to x the optical
ber.
⇒
Tighten the ring by hand without using a tool.
⇒
The connector section cannot be bent. Take care not to give excessive force to
this section.
⇒
Keep the recover cap in a clean place in custody. If a dirty cap is mounted again,
this will cause seizure.
Key
Groove
Laser Beam Input Unit
Cap
Ring
Turn
Plug
Turn the outer ring of the plug
in the direction of arrow to x.
Optical ber
Output unit
Approx. 40mm
Connector section