64
ML-2050A/2051A/2150A
1. Setting Welding Schedules
(6) To perform multiple outputs for one second, move the cursor to "REPEAT" and
set the number of laser light outputs in the range of 00 to 30 pps (pulse per
second).
⇒
When 0 is set, a single output is performed.
(7) To output laser output repeatedly, move the cursor to "SHOT" and set the number
of laser light outputs in the range of 0000 to 9999.
⇒
When "REPEAT" is not set to 0 and "SHOT" is set to 0, laser light is continuously
output until a laser stop signal is input.
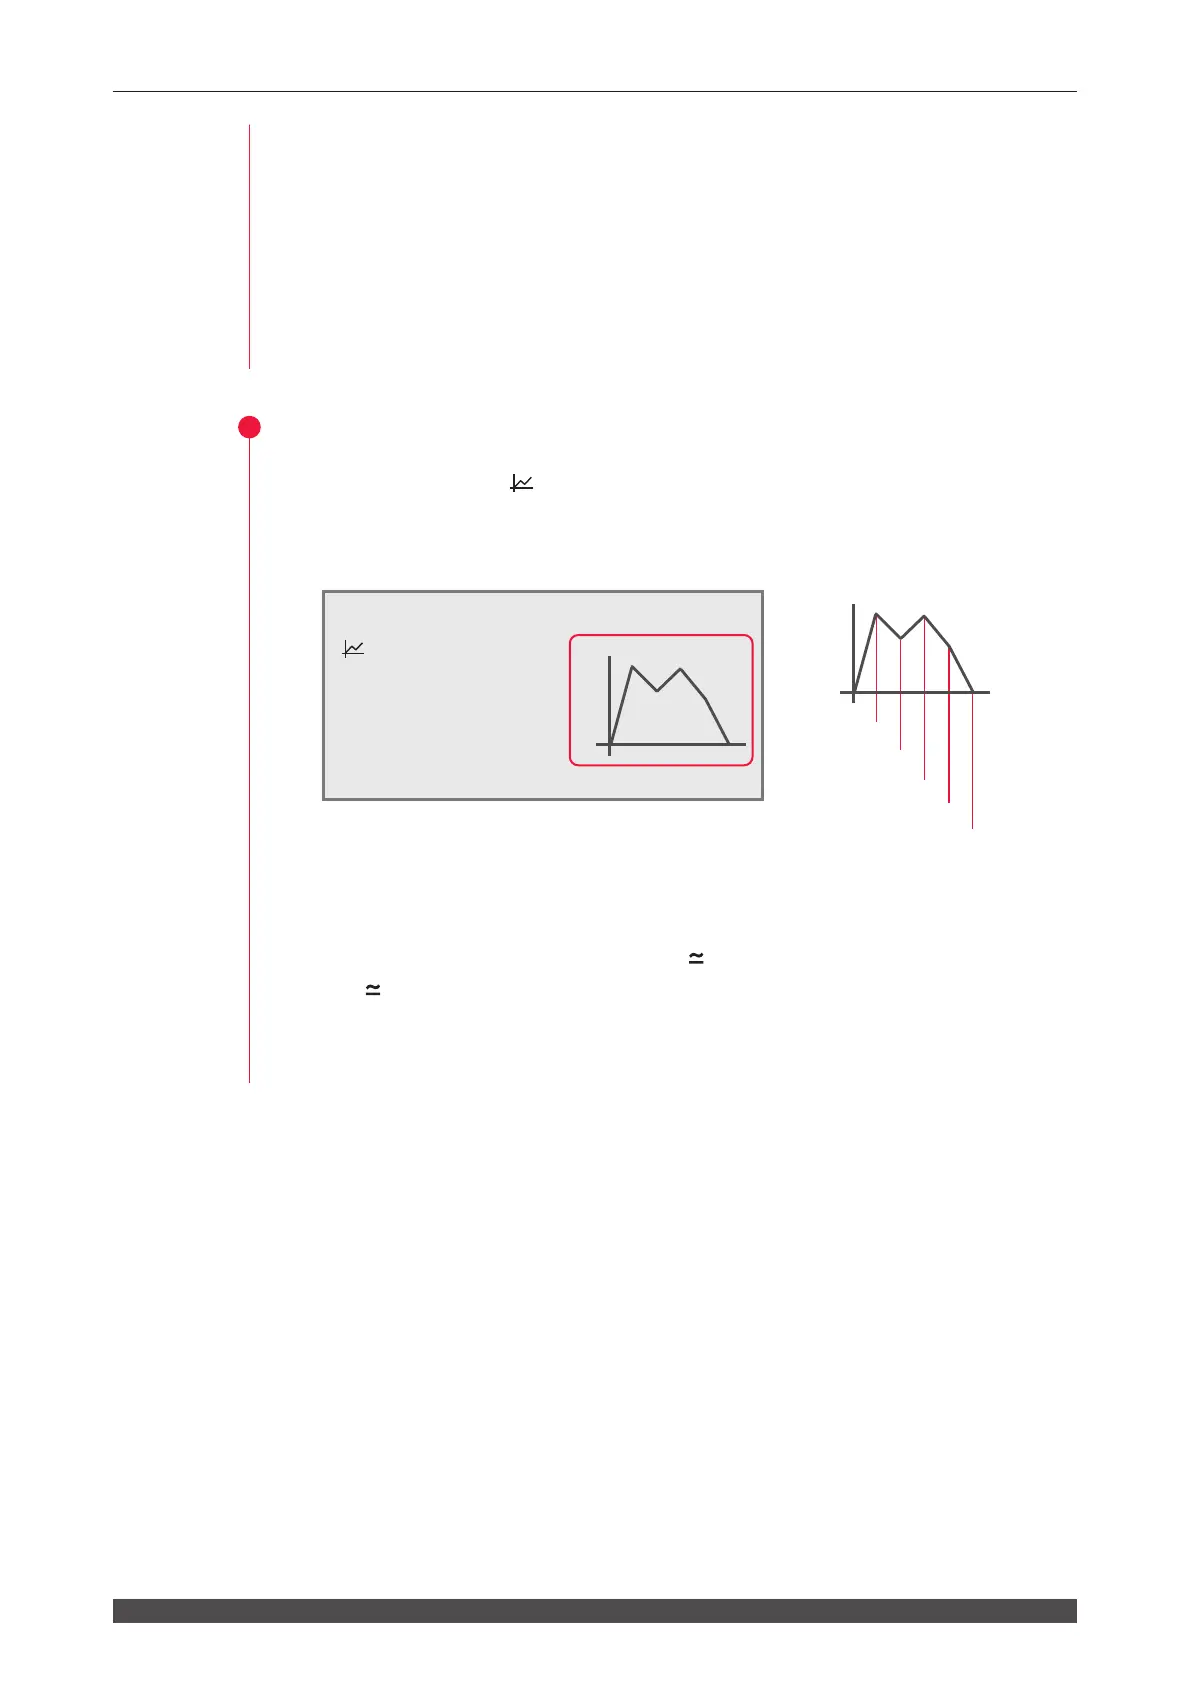
2
Checking Output Schedules
(1) Move the cursor to " " and press the ON key.
The set laser output time and laser output value are graphically displayed so that
the output laser light can be checked as a waveform.
100%
5ms
Point1 1ms
Point2 1ms
Point3 1ms
Point4 1ms
Point5 1ms
⇒
At the leading edge of waveform, an overshoot (higher form than the set value)
may occur. In this case, extend "Point" by 0.1 to 1.0 ms.
(2) Check the output energy displayed in "
."
⇒
In " ", the forecast value of laser output energy based on the set output
schedules is displayed. This value is a little dierent from the actually measured
value (measured value displayed on the POWER MONITOR screen) provided at
laser welding. However, use it as reference.
-SCH.#01 [FORM:FLEX]
≃
12.5J WATER 28˚C
:
ON PEAK=04.00kW 100%
p
Point1
01.0ms 090.0%
Point2 01.0ms 070.0%
Point3
01.0ms 088.0%
Point4
01.0ms 065.0%
q
Point5
01.0ms 000.0% 5ms
HV:OFF POSI.BLINK:OFF POSITION:OFF