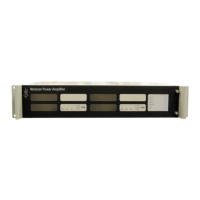
iPAM400 – Product Manual
U-0629-0171.doc – Issue: 04 complete, approved
Page 87 of 138
Menu To
5. Test 1. Play 1k
tone
{output list}
Play a 1 [kHz] test tone for approx. 30
seconds to a local output of the user's
choosing.
C. Cancel
Return to previous menu.
2. Play pink
noise
{output list}
Play pink noise (“static”) for approx. 30
seconds to a local output of the user's
choosing.
C. Cancel
Return to previous menu.
3. Play
1k/pink test
{output list}
Play a 1 [kHz] test tone followed by the pink
noise to a local output of the user's choosing
in a continuous loop.
User can stop the test by pressing ENTER.
C. Cancel
Return to previous menu.
4. Play test
message to an
output
{output list}
Play the test message
(/dva/msgs/test.wav) to a local output
of the user's choosing.
C. Cancel
Return to previous menu.
5. Play test
message to
zone
{zone list}
Play test message to zone of user's
choosing.
Zone can either be a local output or any
configured remote output.
C. Cancel
Return to previous menu.
6. Play
message from
stick to a
zone
{DVA
list}
{zone
list}
Play a message of the user's choosing from
an attached USB memory stick to zone of
the user's choosing.
Zone can either be a local output or any
configured remote output.
C. Cancel
Return to previous menu.
C. Cancel
Return to previous menu.
7. Restart software (with no logging)
Restart the DVA processes.
8. Restart software (with logging)
Restart the DVA processes with debug
logging enabled, i.e. log files will be created
in the /dev/shm/ directory.
C. Cancel
Return to main menu.
6. File
Management
1. Delete logs
Erase all currently existing log files in the
/dev/shm/ directory.
Note that all log files will be deleted in the
event of a reboot.
2. Copy logs and configs to stick
Copy all log files in the /dev/shm/
directory, and all xml and cfg configuration
files in the in the /dva/config/ directory
to the root of an attached USB memory
stick.
3. Collate DVA filenames to USB flash
drive
Create a directory named after the host in
the root of the attached USB memory stick
and create a file ‘msgs’ in that directory
containing a list of all DVAs that reside in
the /dva/msgs directory and sub-
directories.
C. Cancel
Return to main menu.
7. X400 1. Clear configuration
Clear amplifier mainframe configuration.
See Note 4).
C. Cancel
Return to main menu.