Page 87 of 479
Note: Number of digital inputs shown one the DI screen depends on number of Digital input cards inserted
in the paperless recorder.
Example:
After pressing a “Start” switch, latch ON Digital Ouput1, after pressing a “Pause” switch, latch Off
Digital Output1.
Start Timer, Stop Timer, Reset Totalizer, Reset Counter, Reset MaxMinAve values of all the
channels etc...
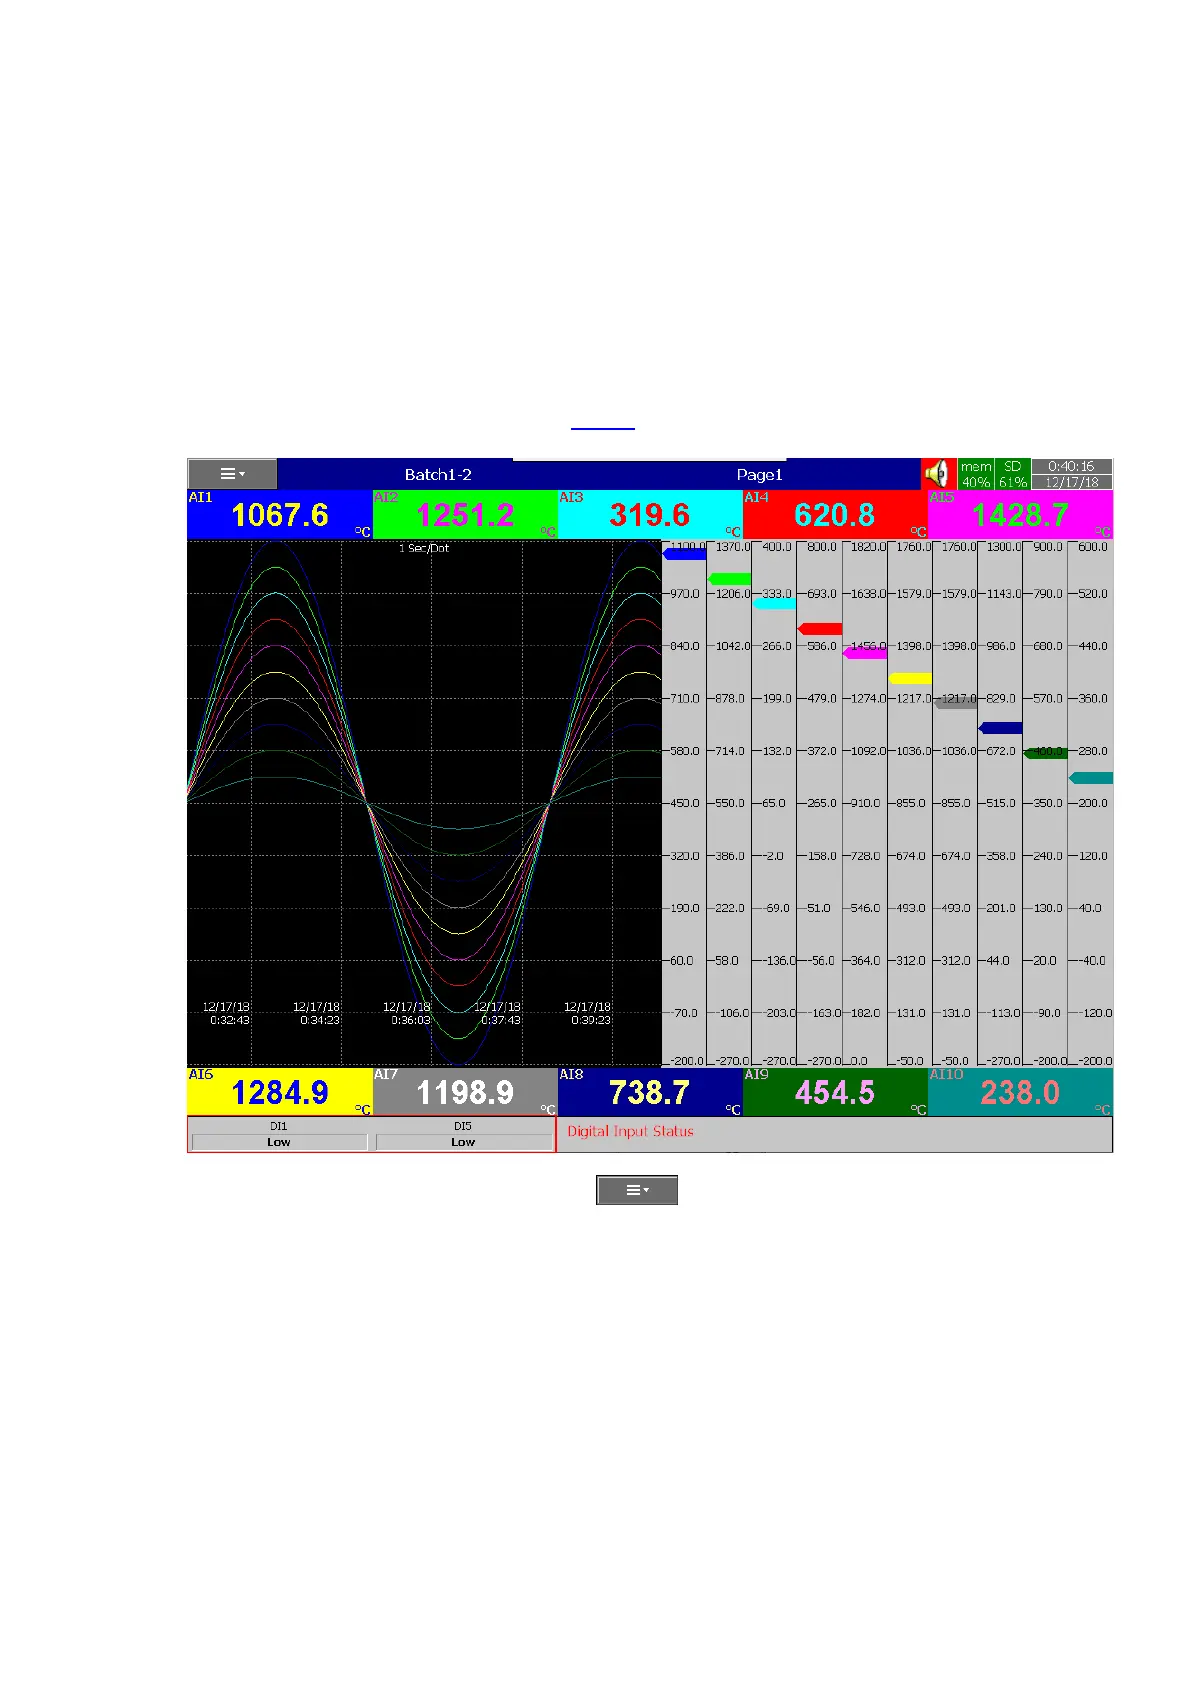
It is possible to display Digital input status via status bar on any display page in the paperless
recorder. If digital input is not enabled then it shows as “Low”. If digital input is enabled then it shows as
“High”. To configure status bar, refer section Display
Digital Input status can also monitored from the (Menu). Press “Status” and then select “DI”, it will
show the Digital Input Status as follows.