3-47
Confidential
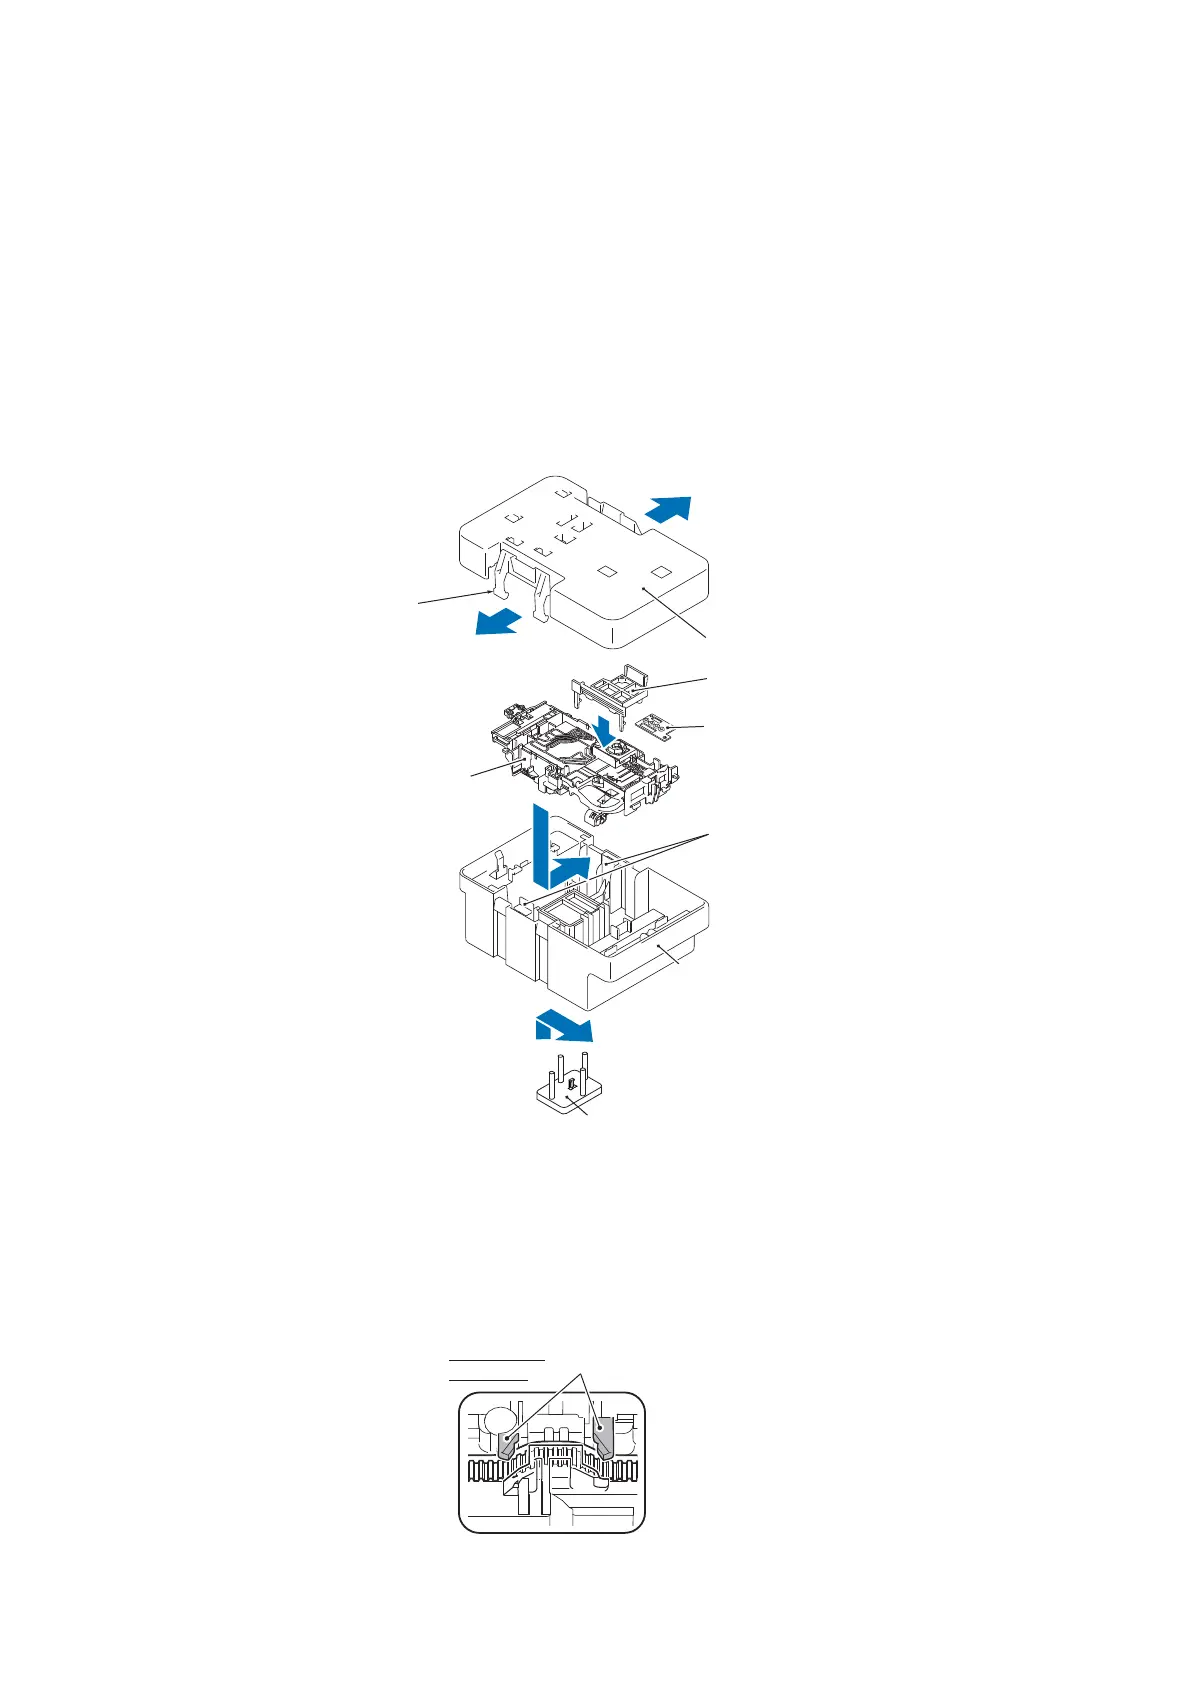
Note: When storing the removed head/carriage unit for a long period, put it in the head
casing correctly using the following steps. Leaving it out of the casing causes the head
nozzles and ink supply ports to dry up so that the head/carriage unit can no longer provide
the original performance.
When taking the head/carriage unit out of the casing, reverse the storage order.
1) Set the head/carriage unit in the lower head casing and slide it to the right.
2) Release the latch of the cap holder and use it to press the head to seal up the head
nozzles.
3) Set the joint cap on the head joint rubber.
4) Mount the upper head casing.
5) Fit the cap stopper into the lower head casing and slide it towards you to secure the head/
carriage unit.
Assembling Note: Mount the head/carriage unit, using the following steps.
1) Set the leveler roller ASSY. (See page 3-45.)
2) When mounting a new head/carriage unit, apply the specified lubricant to the specified
points on the unit, referring to Section 3.5.
3) When mounting the CR timing belt, insert it into the slit provided in the head/carriage unit
so that the toothed side faces inwards as shown below. Make sure that the belt is fully
inserted inside the latches.
Cap stopper
Joint cap
Cap holder
Head joint rubber
(3_013)
Head/carriage unit
Latch
Head casing (lower)
Head casing (upper)
Latches
Viewed from
the bottom
(3_013_1)

 Loading...