3-48
Confidential
4) First fit the front end of the head/carriage unit over the CR support chassis and then set the
rear end onto the CR guide rail.
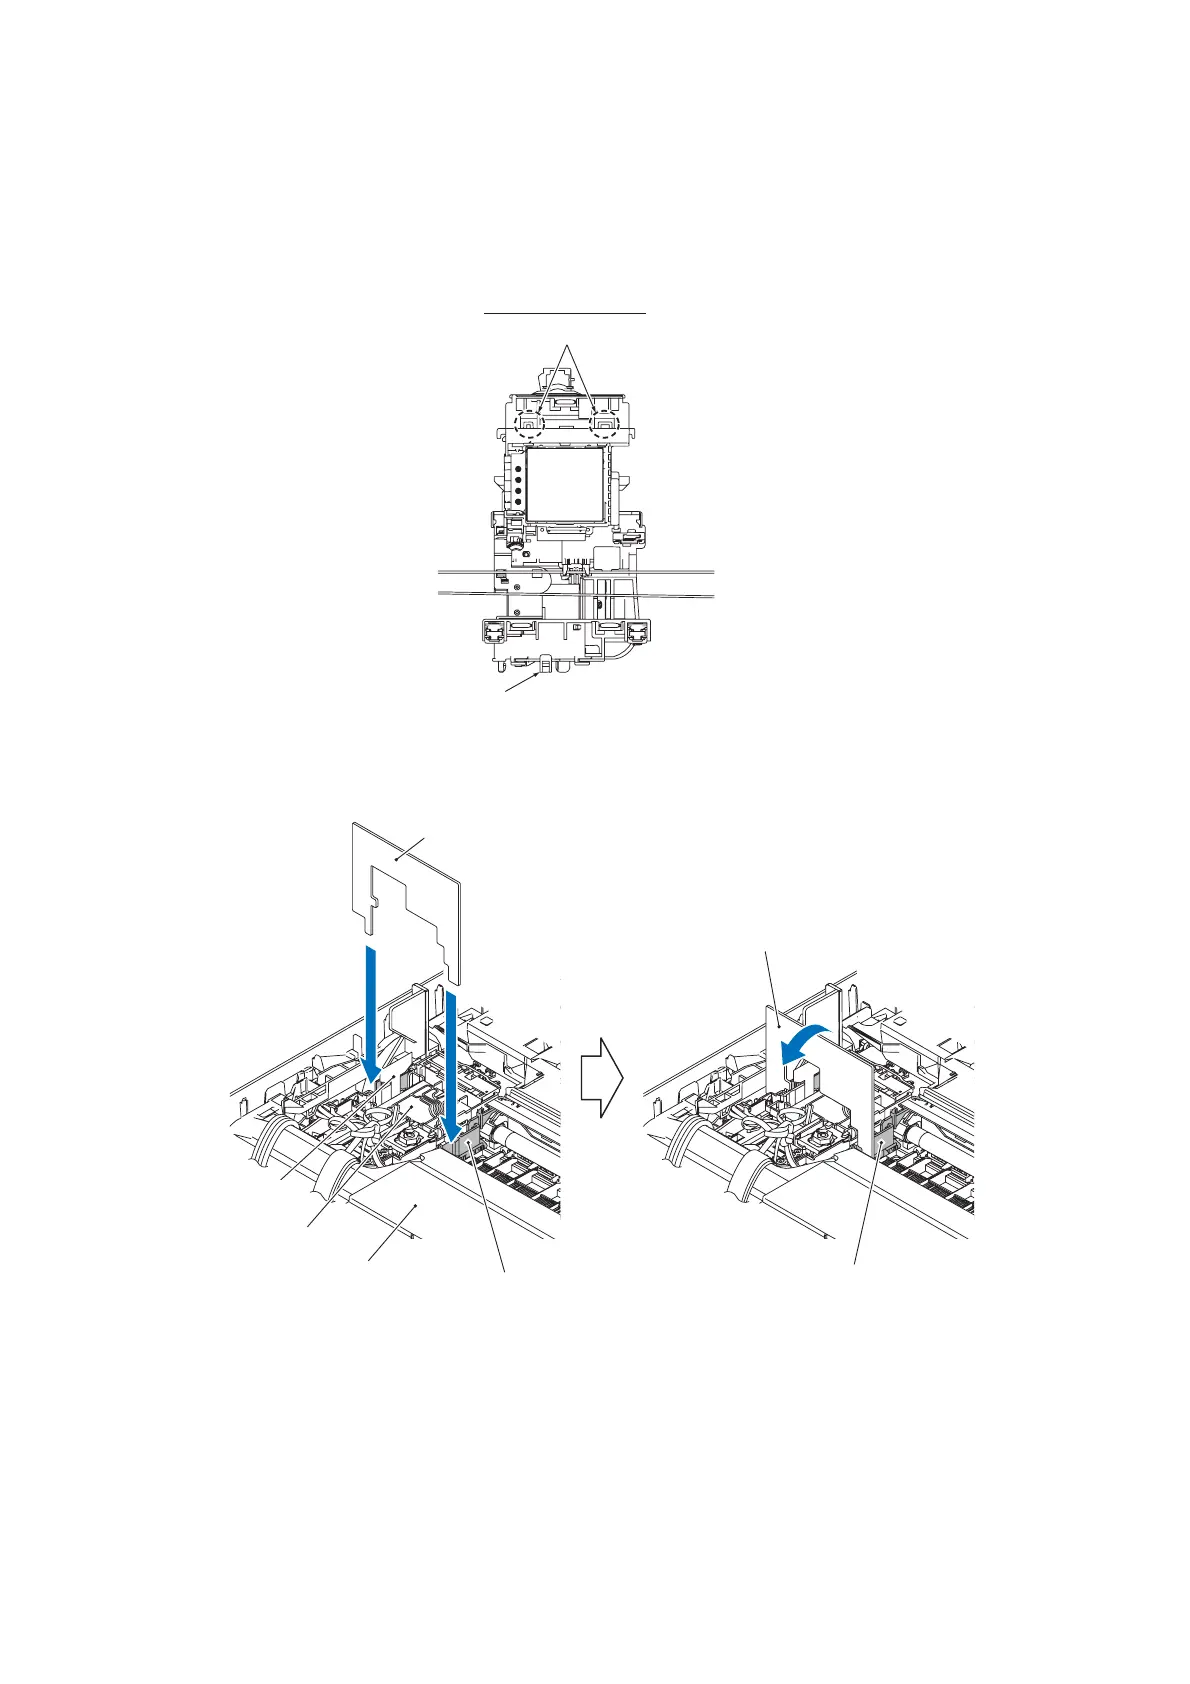
Make sure that the hook (see below) provided on the bottom of the head/carriage unit
catches the front edge of the CR support chassis and the two rear bosses are fitted in the two
cutouts (shown on page 3-45) in the CR guide rail.
5) Set the LR (Leveler Roller) fitting jig on the head/carriage unit vertically and then tilt it
towards you, as shown below. This pushes the leveler roller (LR) ASSY rearwards and
upwards, fitting it over the head/carriage unit.
6) Slide the head/carriage unit by hand to check that it moves smoothly. If it does not move
smoothly, the leveler roller (LR) ASSY is not in place. Go back to step 5).
Viewed from the bottom
Hook
(3_015)
Rear bosses
(3_018)
Leveler roller (LR) ASSY
Leveler roller (LR) ASSY
LR fitting jig
Carriage-head
flat cable
Head/carriage unit
Upper cover
LR fitting jig

 Loading...