3-96
Confidential
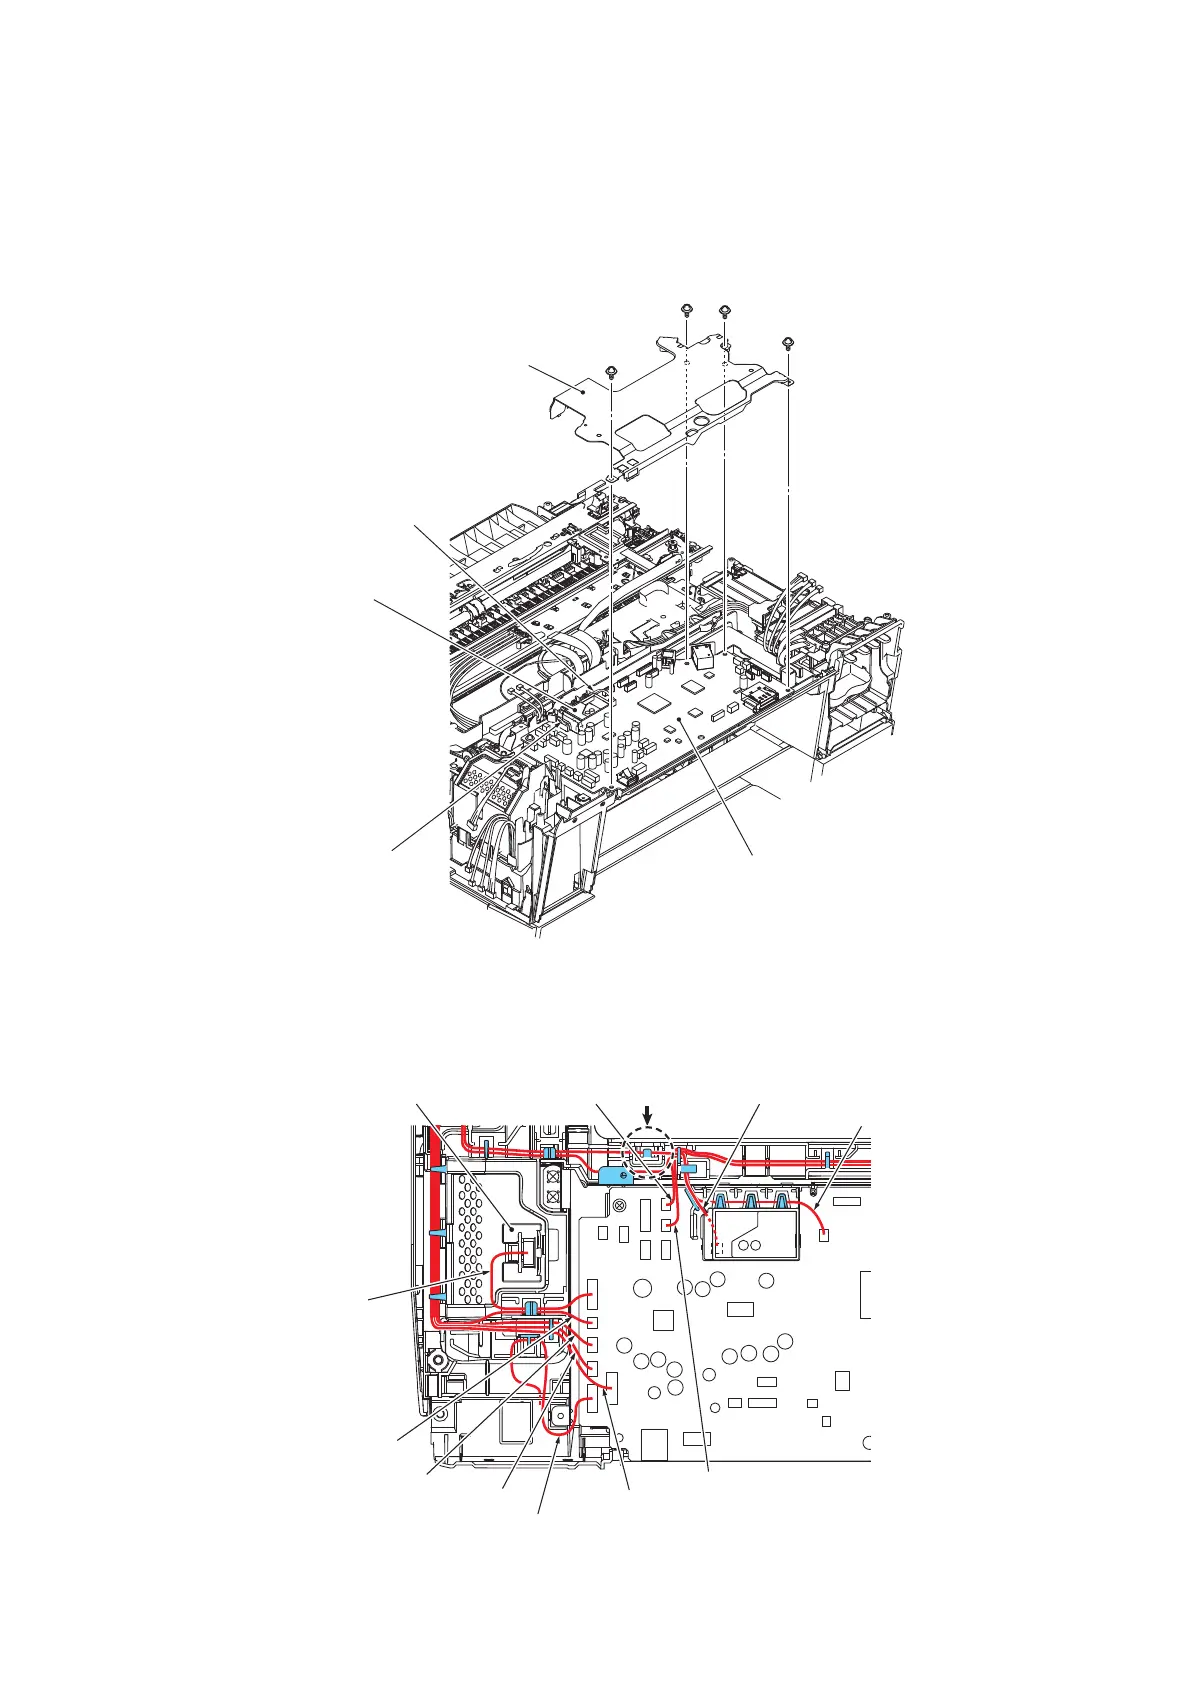
(2) Remove the four screws from the main PCB shield and lift it up.
(3) Disconnect the main-MJ (EXT) harness (2-wire, black) from the main PCB and release it
from the cable guides provided on the SDAA enclosure.
(4) Unlatch the SDAA enclosure by pinching its right and left sides and remove it from the
main PCB.
(5) Disconnect the main-MJ (LINE) harness (2-wire, yellow) from the main PCB.
Assembling Note: Before securing the main PCB shield, route the harnesses on the top of the
lower cover as shown below. Make sure that the main-MJ (EXT) harness
and main-MJ (LINE)
harness
are routed through the SDAA enclosure. Gather the slack of the main-MJ (LINE)
harness around section "X" shown below. (See the illustration given on page 3-101 for the
routing of those harnesses on the left side of the lower cover.)
(3_060)
Main PCB
Taptite, cup S M3x6
Main PCB shield
Main-MJ (EXT) harness
Main-MJ (LINE) harness
SDAA enclosure
(3_062)
ASF motor harness
Power supply harness
Paper feed motor harness
Registration sensor harness
Switchback paper detection
sensor harness
Wireless LAN PCB harness
PF encoder/PF sensor harness
Carriage motor harness
Main PCB
Main-MJ (EXT) harness (black)
Main-MJ (LINE) harness (yellow)
Power harness holder
Section "X"

 Loading...