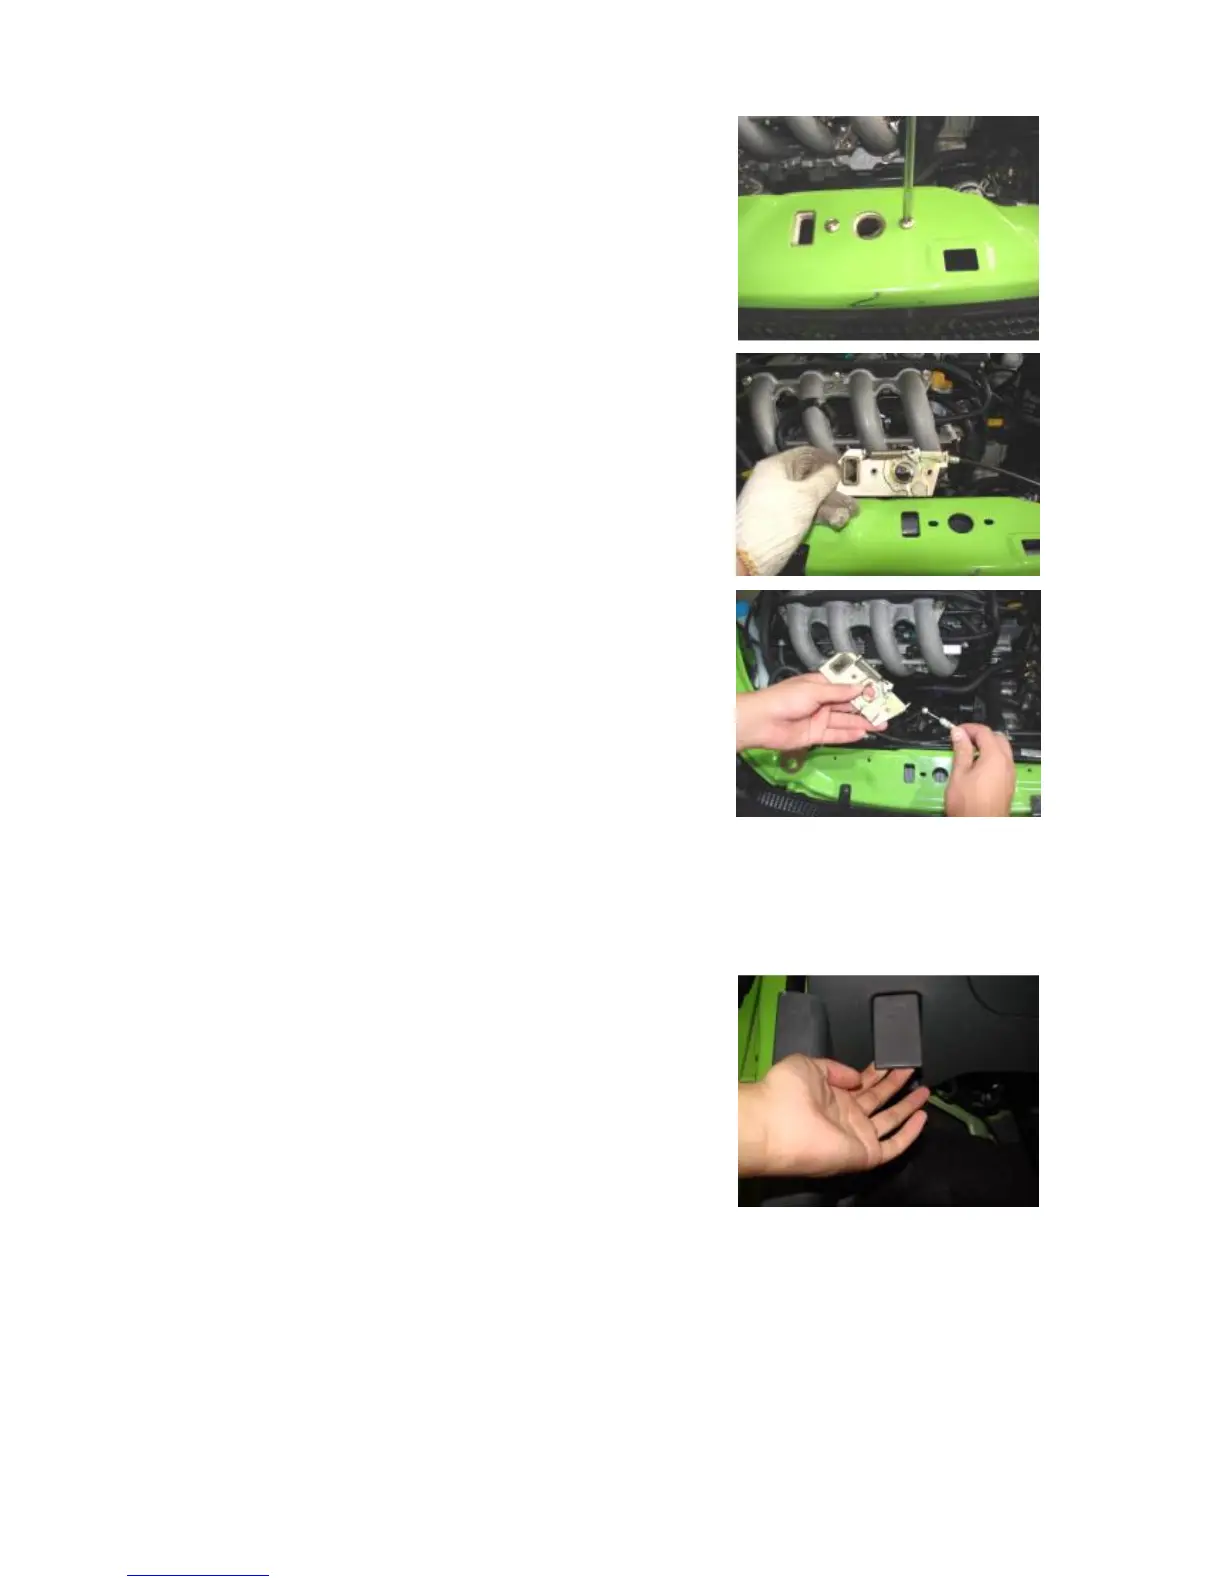
6. Removal of Front Hood Lock
6.1. Removal Steps
6.1.1. Turn and remove two screws off the front hood to take down
its lock.
6.1.2. Remove the front hood lock cable off the front hood lock
assembly.
6.2. Installation Steps
The installation steps are reverse to those for removal.
7. Removal & Adjustment of of Hood Cable
7.1. Removal & Adjustment of Steps
7.1.1. Remove the plastic nut behind the front hood handle in
driver’s cab.And you can also regulate the cable by adjusting this
nut.