5. Removal and Installation of Front Ceiling
light
5.1. Removal Steps
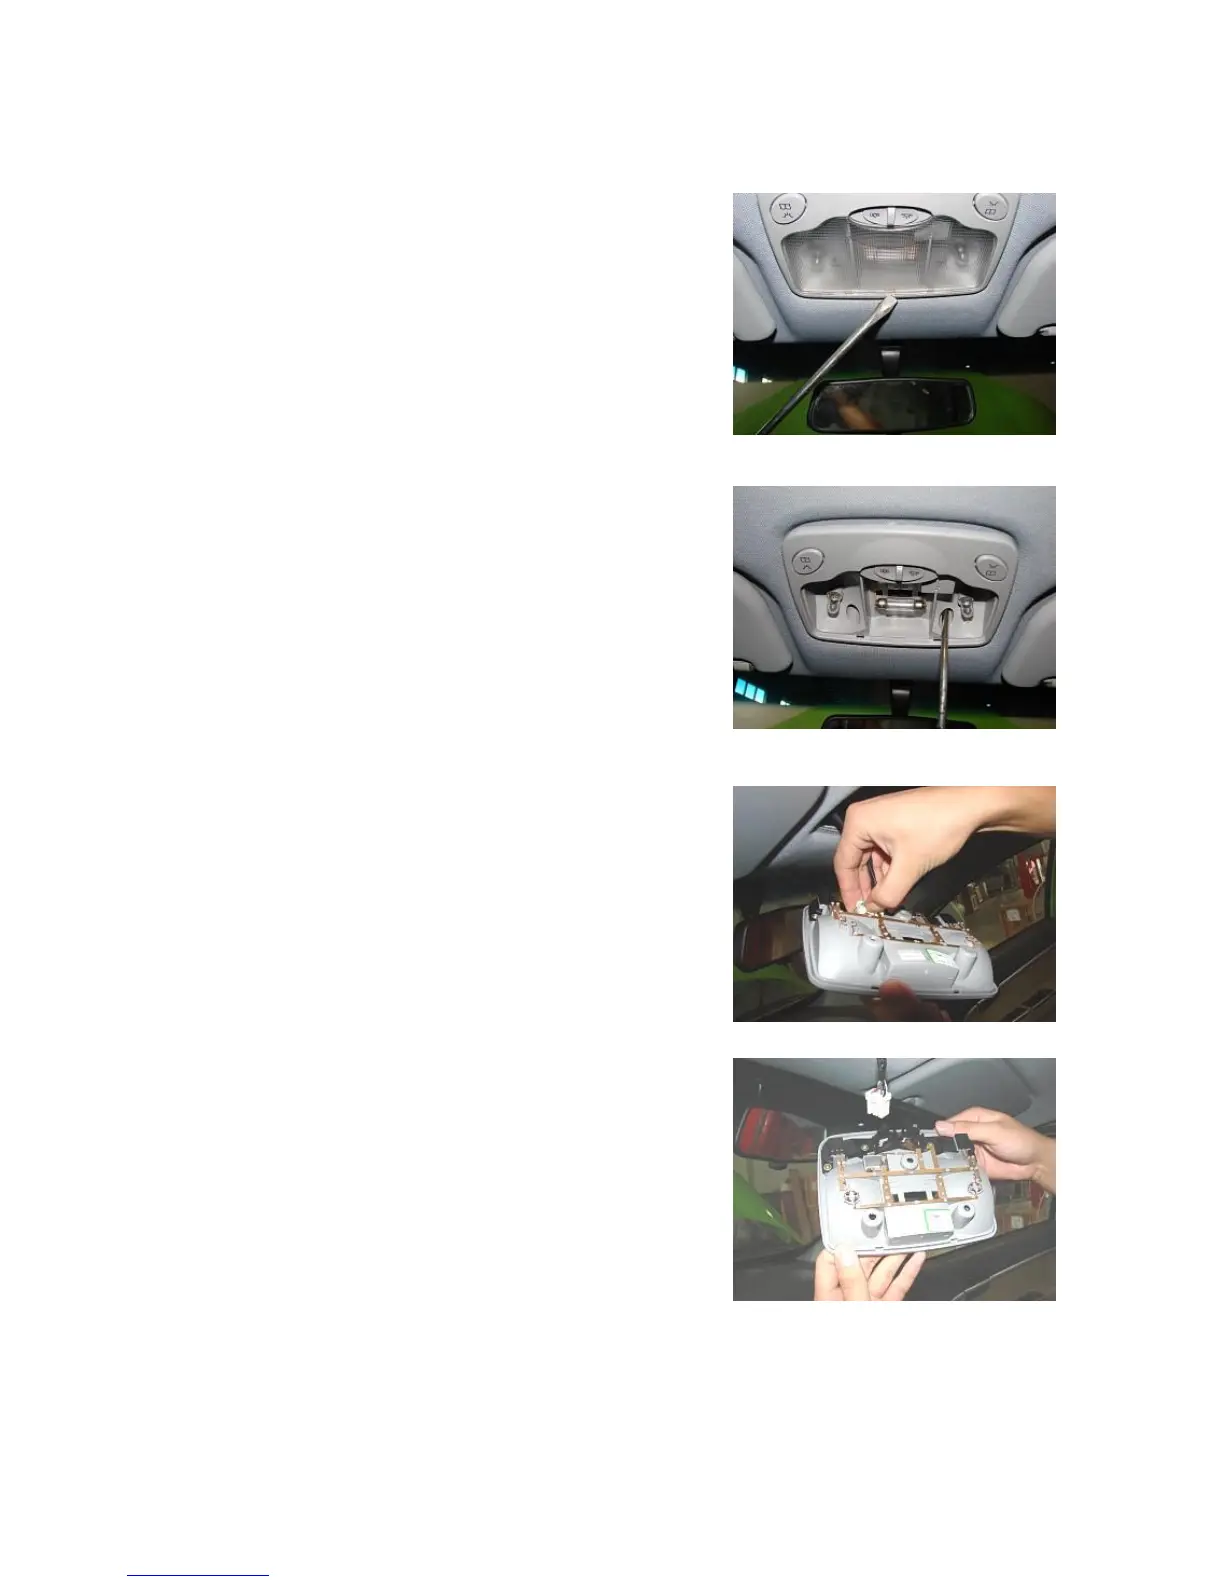
5.1.1. Align a flat head screwdriver with the groove along the ceiling
light edge to pry it open, as shown in the figure:
Note: Do not scratch part surface.
5.1.2. Remove the three fixing screws of the the front ceiling light.
Torque: 1.5±0.5Nm
5.1.3. Unplug the harness and disassemble the front ceiling light
assembly.
5.2. Installation Steps
The installation steps are reverse to those for removal.