7. Installation & Adjustment of Headlights
7.1. Installation Steps for the Headlights
The installation steps of headlights are reverse to those for removal.
7.2. Functions of Headlights
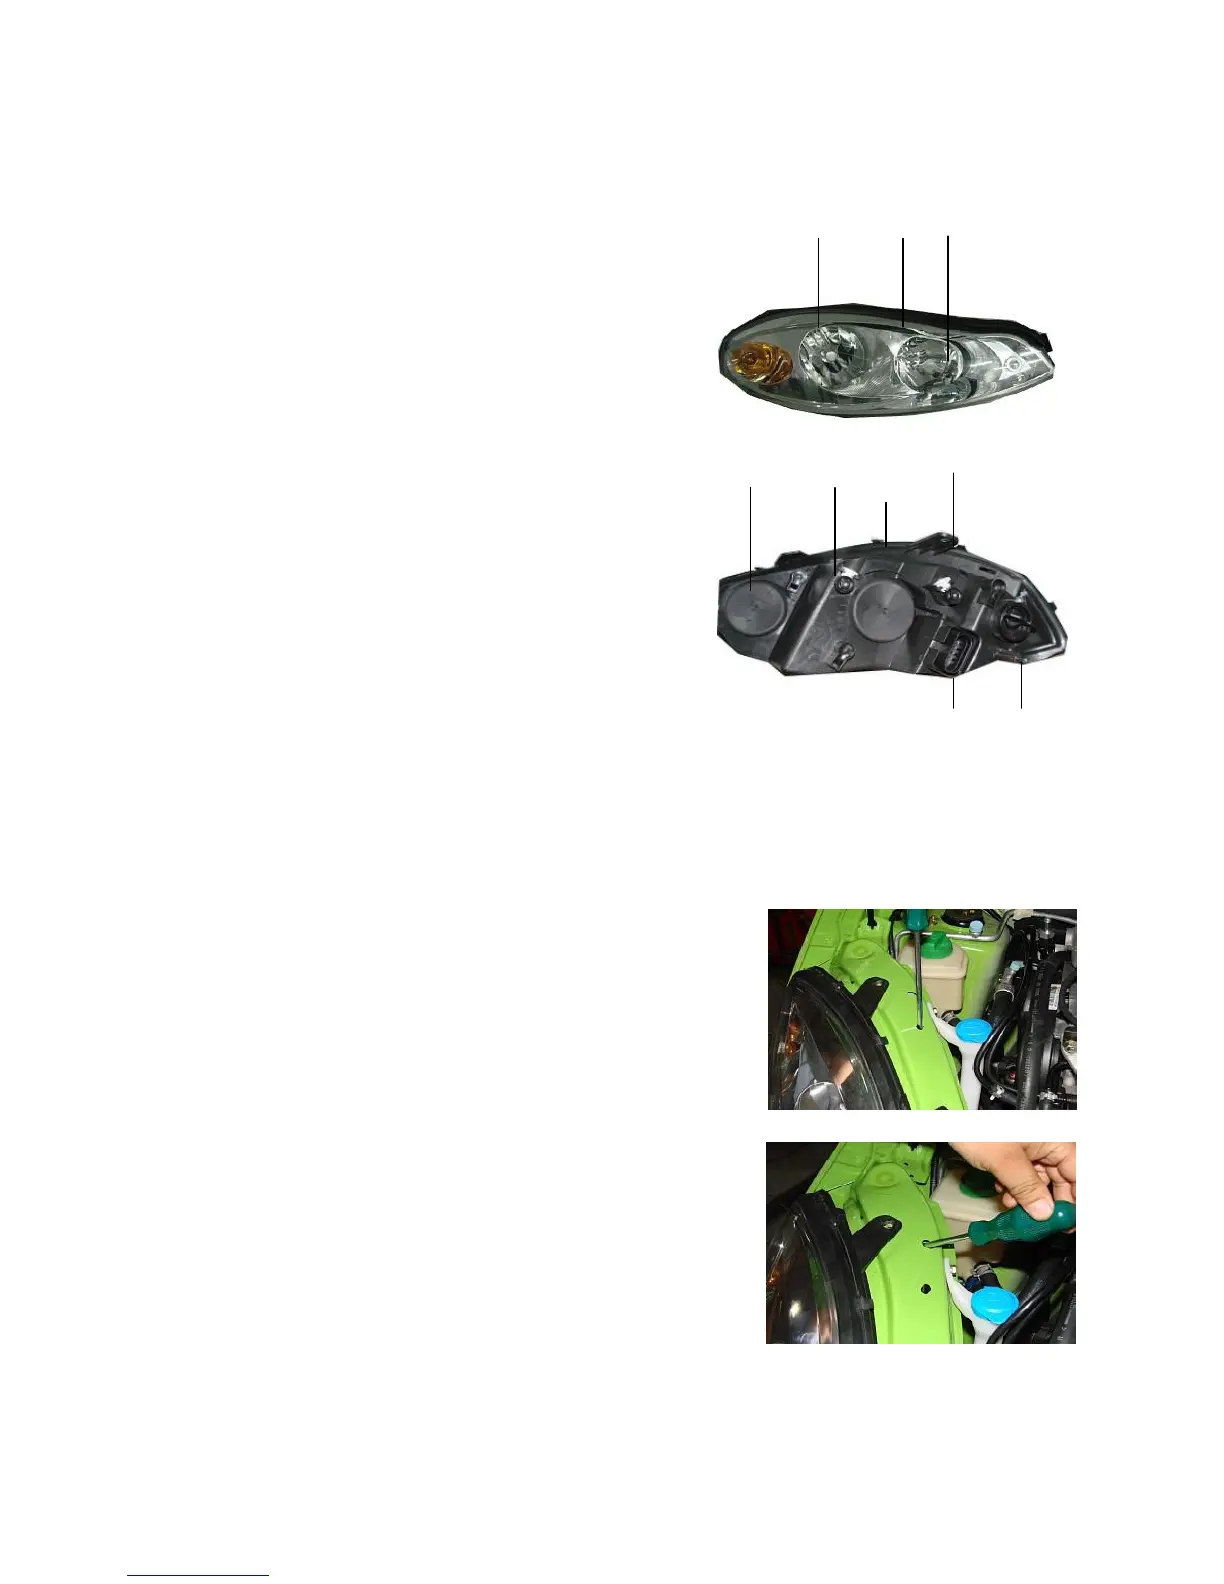
7.2.1. Front view
See right figure:
1 High beam light
2 Position light
3 Low beam light
4 Turn light
7.2.2. Back view
1 High beam light holder
2 High beam adjusting nut
3 Low beam light holder
4 Low beam adjusting nut
5 High beam, low beam, position and turning light plugs
6 Turning light holder
8.3. Adjustment of Headlights
8.3.1 Pay attention to law and regulations and verify the following
items before adjustment:
1). The tire air pressure should comply with the related
standard;
2). Vehicle is unloaded (except for spare tire and equiping
tools, and include driver’s weight for sedan);
3). The vehicle should be parked on level and smooth road or
field;
4). The matched mirror surface of the headlight should be fresh
of dirt;
5). The power supply should work normally and the bulb
should be properly installed.
8.3.2. Insert a cross head screwdriver into related adjusting hole to
adjust the light.
2
3
4
5
6
4
3
2
4