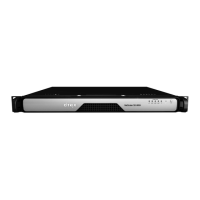
Citrix SD-WAN Platforms
• Ensure that the power source can handle the appliance’s maximum power consumption rating
with no danger of an overload.
• A reliable ground must be maintained always. Therefore, the rack should be grounded. Pay
particular attention to power supply connectionsother than the direct connection to the branch
circuit (for example, connections to power strips).
Warning
There is a risk of Explosion, if the battery is replaced with an incorrect battery type.
Desktop mount
Citrix SD-WAN appliances can be desktop mounted using the rubber feet shipped in the appliance
package.
Rack mount the appliance
The rackmount chassis of for SD-WAN appliances fits a standard rack and takes 1U of racking height.
The appliance can be placed on any flat surface, or mounted in any standard rack unit with the pro-
vided rack-mount brackets and screws.
To install the appliance into a rack:
1. Ensure that the appliance is placed on a stable surface before rack-mount installation.
2. Attach the provided rack-mount brackets to the sides of the appliance using the provided
bracket screws.
• If you are installing the appliance into a four-post rack, attach the rack-mount brackets
with the handles aligned with the front of the appliance.
• If you are installing the appliance into a two-post rack, attach the rack-mount brackets
with the handles aligned with the middle of the appliance.
3. Position the appliance in the rack. Ensure there is enough room around the device to allow for
suicient air flow.
4. Line up the rack-mount bracket holes to the holes on the rack and ensure that the SD-WAN 1100-
SE and PE appliance are level.
5. Finger tighten four rack-mount screws to attach the appliance to the rack.
6. Tighten the rack-mount screws with an appropriate screwdriver.
7. Plug the provided power cable.
Rack mount the appliance:
© 1999-2021 Citrix Systems, Inc. All rights reserved. 50
 Loading...