Citrix SD-WAN Platforms
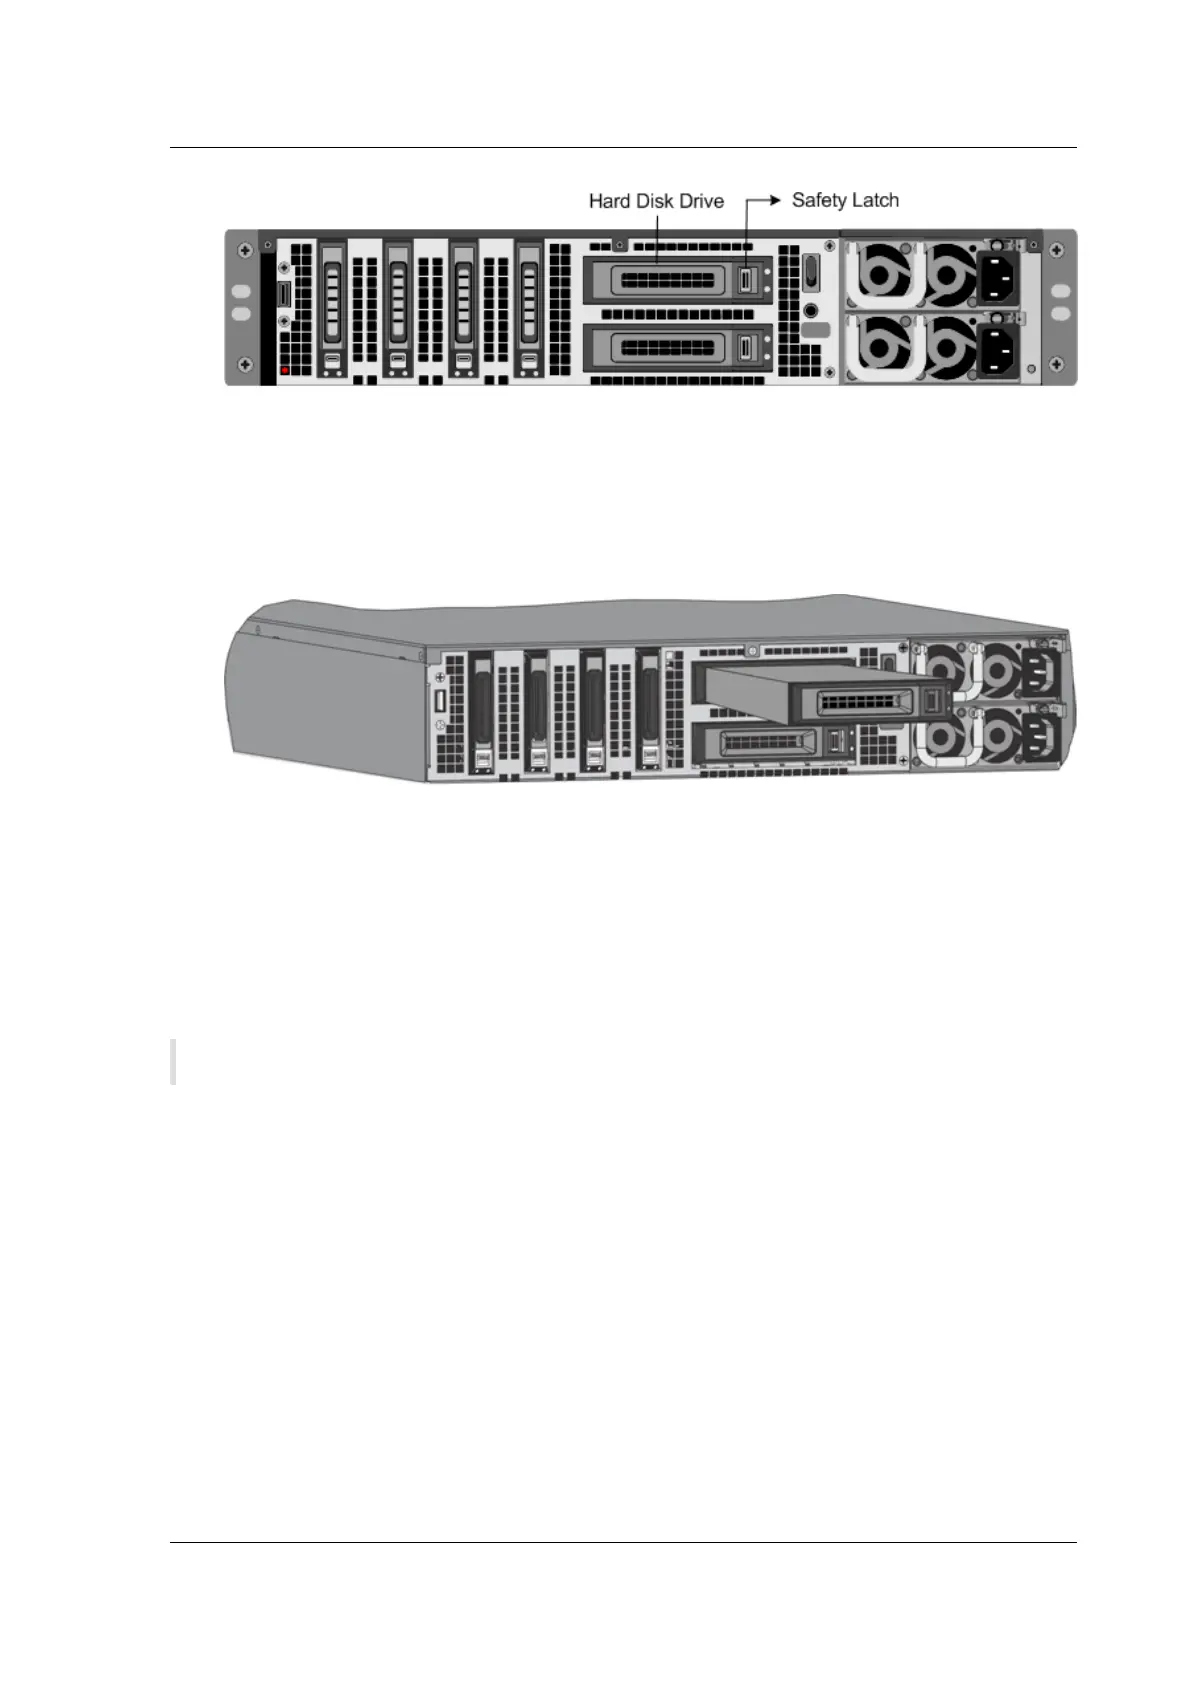
4. Pick up the new disk drive, open the drive handle fully to the le, and insert the new drive into
the slot as far as possible. To seat the drive, close the handle flush with the rear of the appliance
so that the hard drive locks securely into the slot.
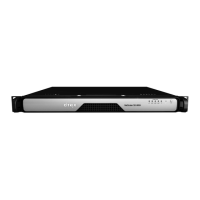
Important: When you insert the drive, make sure that the Citrix product label is at the top.
Figure 2. Inserting the Replacement Hard Disk Drive
5. Turn on the appliance.
Install and Remove 1G SFP Transceivers
May 23, 2019
Note: Some SD-WAN 4000/5000 appliances do not require SFP transceivers.
A Small Form-Factor Pluggable (SFP) is a compact transceiver that can operate at speeds of up to 1 gi-
gabit per second and is available in both copper and fiber types. Inserting a 1G SFP copper transceiver
converts the 1G SFP port to a 1000BASE-T port. Inserting a 1G SFP fiber transceiver converts the 1G SFP
port to a 1000BASE-X port. Auto-negotiation is enabled by default on the 1G SFP port into which you
insert your 1G SFP transceiver. When a link between the port and the network is established, the speed
and mode are matched on both ends of the cable.
Insert 1G SFP transceivers into the 1G SFP ports on the front panel of the appliance. Frequent instal-
lation and removal of transceivers shortens their life span. Follow the removal procedure carefully to
avoid damaging the 1G SFP transceiver or the appliance.
© 1999-2021 Citrix Systems, Inc. All rights reserved. 418
 Loading...