CTERA C400 Specifications and Installation 3
CTERA C-Series User Guide 21
Installing the CTERA C400
To install the CTERA C400
1 Install at least one hard drive in the appliance.
See Installing a SATA Hard Drive in the CTERA C400 (on page 21).
2 Connect one end of the Ethernet cable to the LAN0 port, and connect the other end to
your Ethernet LAN switch or hub.
3 Connect the provided power supply cable to the AC power input socket, and connect the
other end to the wall outlet.
4 Turn the power switch at the back of the appliance to the ON position.
The appliance will start up, and the Power LED will turn green.
The appliance automatically obtains an IP address using DHCP.
If a DHCP server is not available, then after one minute, the appliance will use the
IP address 192.168.192.5.
If you need to unplug the appliance, you must first shut it down as described in
Shutting Down the CTERA Appliance (on page 333). Failure to do so could result
in data loss.
Installing a SATA Hard Drive in the CTERA C400
To install a SATA hard drive
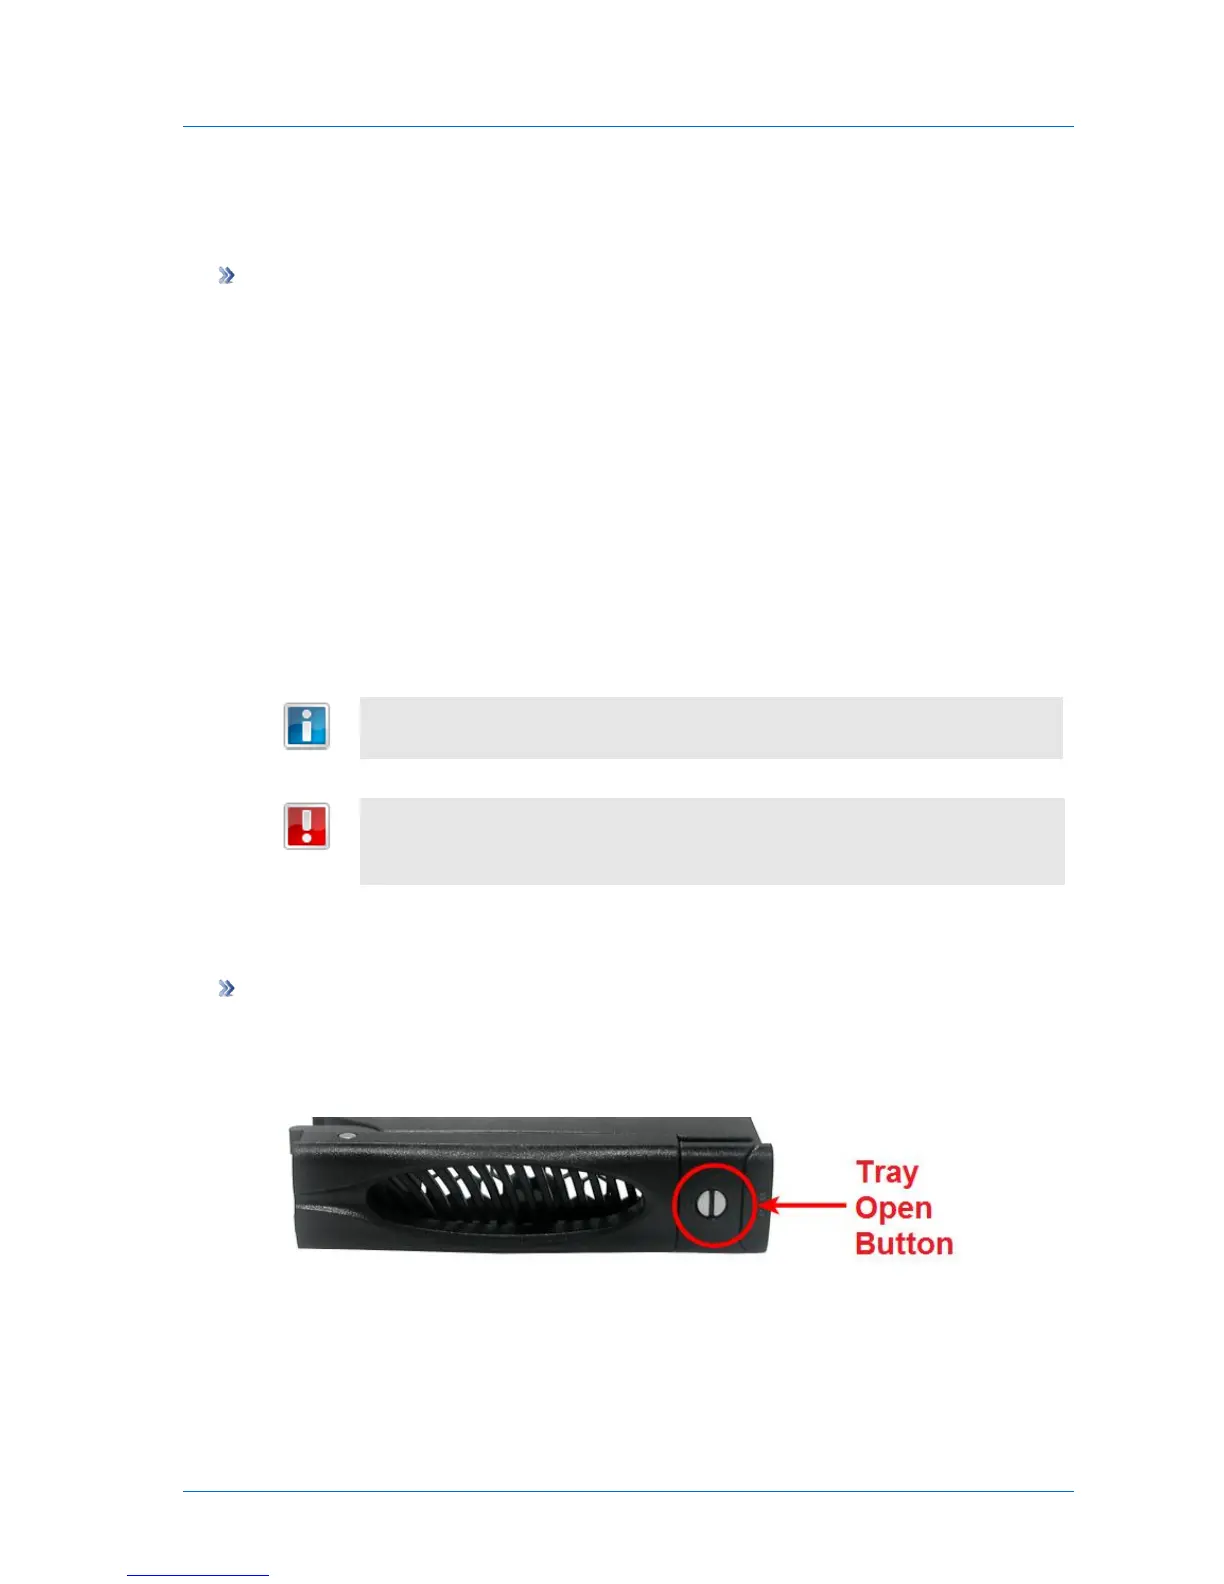
1 If the desired disk tray's Tray Open Button indicates that the disk tray is locked (that is,
the groove is horizontal), then unlock the disk tray by using a flat-head screwdriver to
turn the groove until it is vertical.
2 Press the disk tray's Tray Open Button.