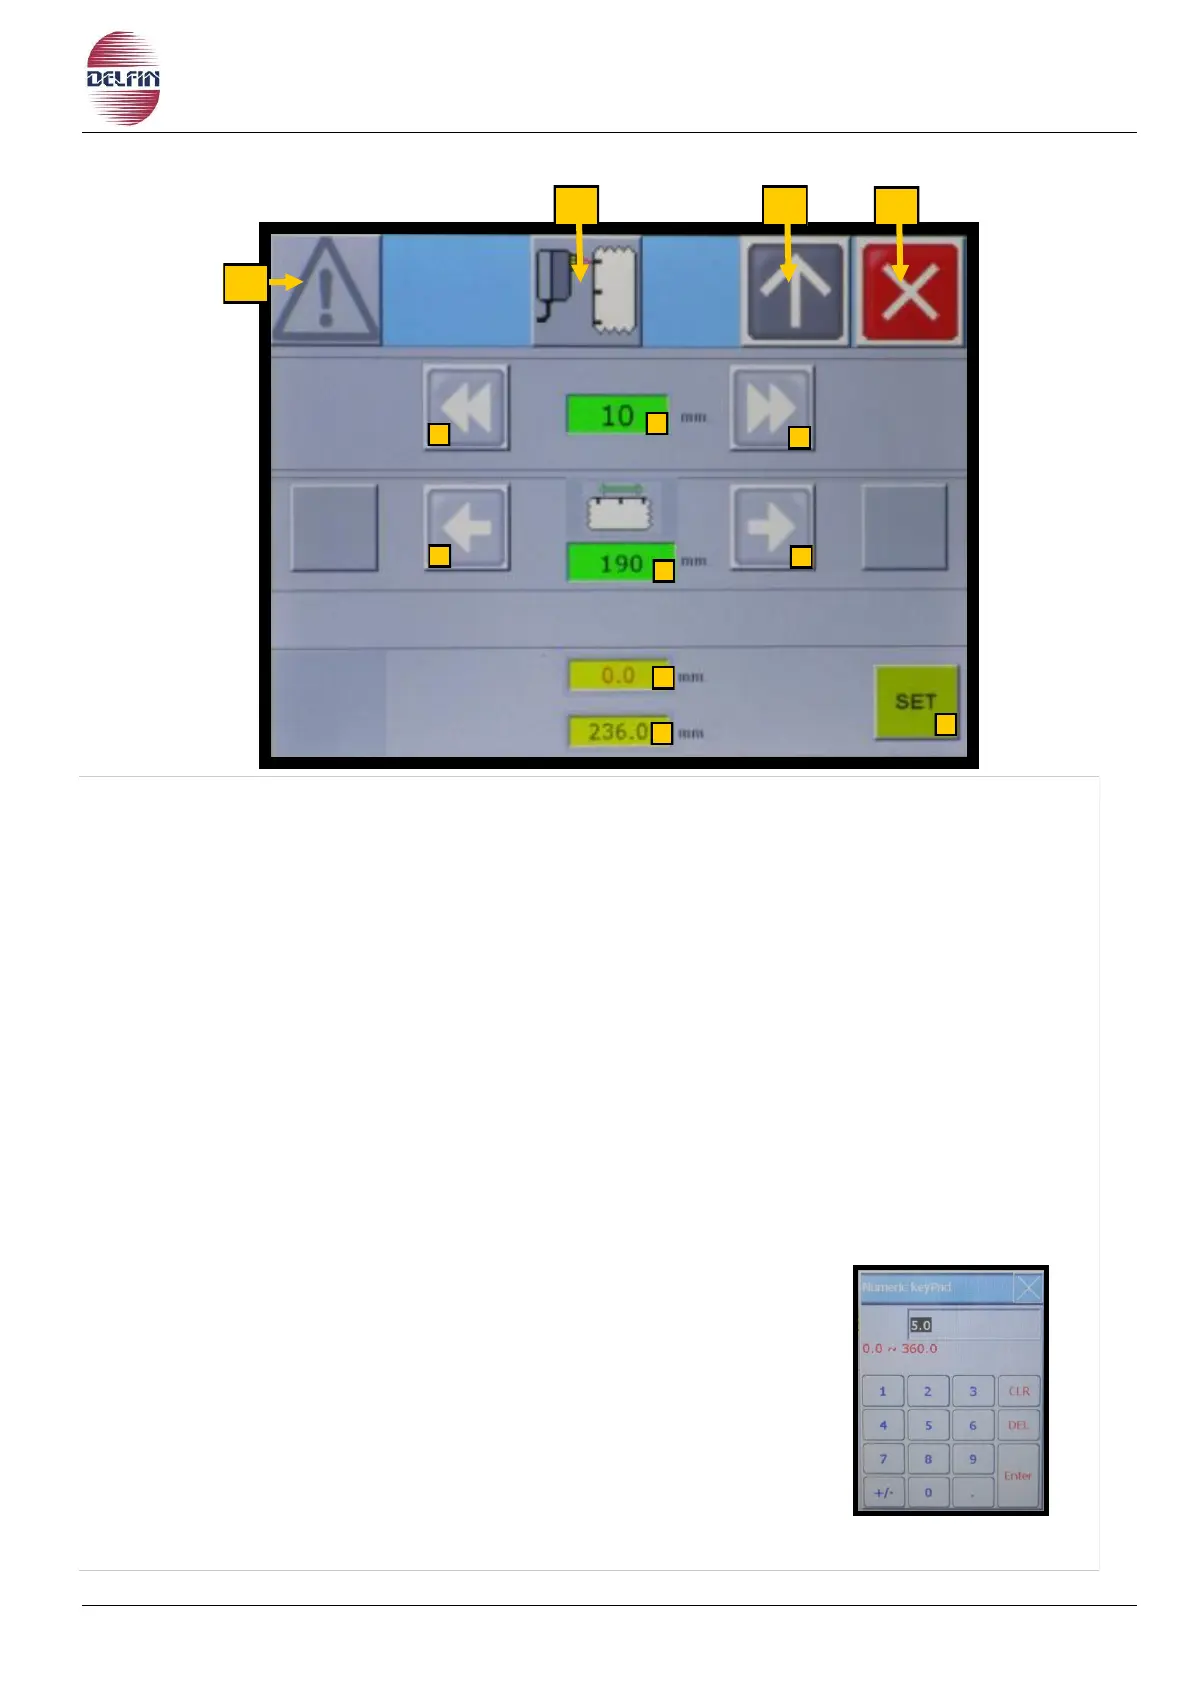
1) Button position 1 to go to page with list of alarms. If an alarm is active the colour of the
triangle will be yellow
2) Button to switch ON/OFF photocell for print-registered film. When the button is green =
ON, when it is grey = OFF.
3) Button position 3 to go back to the previous page.
4) Button to close the page photocell for print-registered film.
5) If, for example, the cutting of the packaging is outside of 30 mm with respect to its
right location.
- Press the 5 button
- A table of figures appears, type 30
- Confirm with ENT
6) Press the 6 button, you move forward the notch of film
of 30 mm
7) Press the 7 button, moves back the notch of film of 30 mm
8) Press the 8 button, each time you press this button
moves forward in the notch of the film of 1 mm.
9) Press the 9 button, each time you press this button
moves in behind the notch of the film of 1 mm.
10) Pressing the 10 button, moves until reaching the cutting point (11) of the film.
WARNING, it only works at a standstill.
11) Setting the cutoff point film.
To set the desired value, proceed as follows:
- Press the button 11.
- A table number will appear, enter the data.
- Confirm with Enter.
13) Display error reading photocell, value expressed in millimeters.
14) Display step notch, value expressed in millimeters.