EasyManua.ls Logo

Digital Projection Titan 930 User Manual

Digital Projection Titan 930
215 pages
To Next Page IconTo Next Page
To Previous Page IconTo Previous Page
Page #107 background imageLoading...
Page #107 background image
Digital Projection Titan Quad / 930 / 800 Series COMMAND GUIDE Remote Communications Guide
99
Rev H October 2013
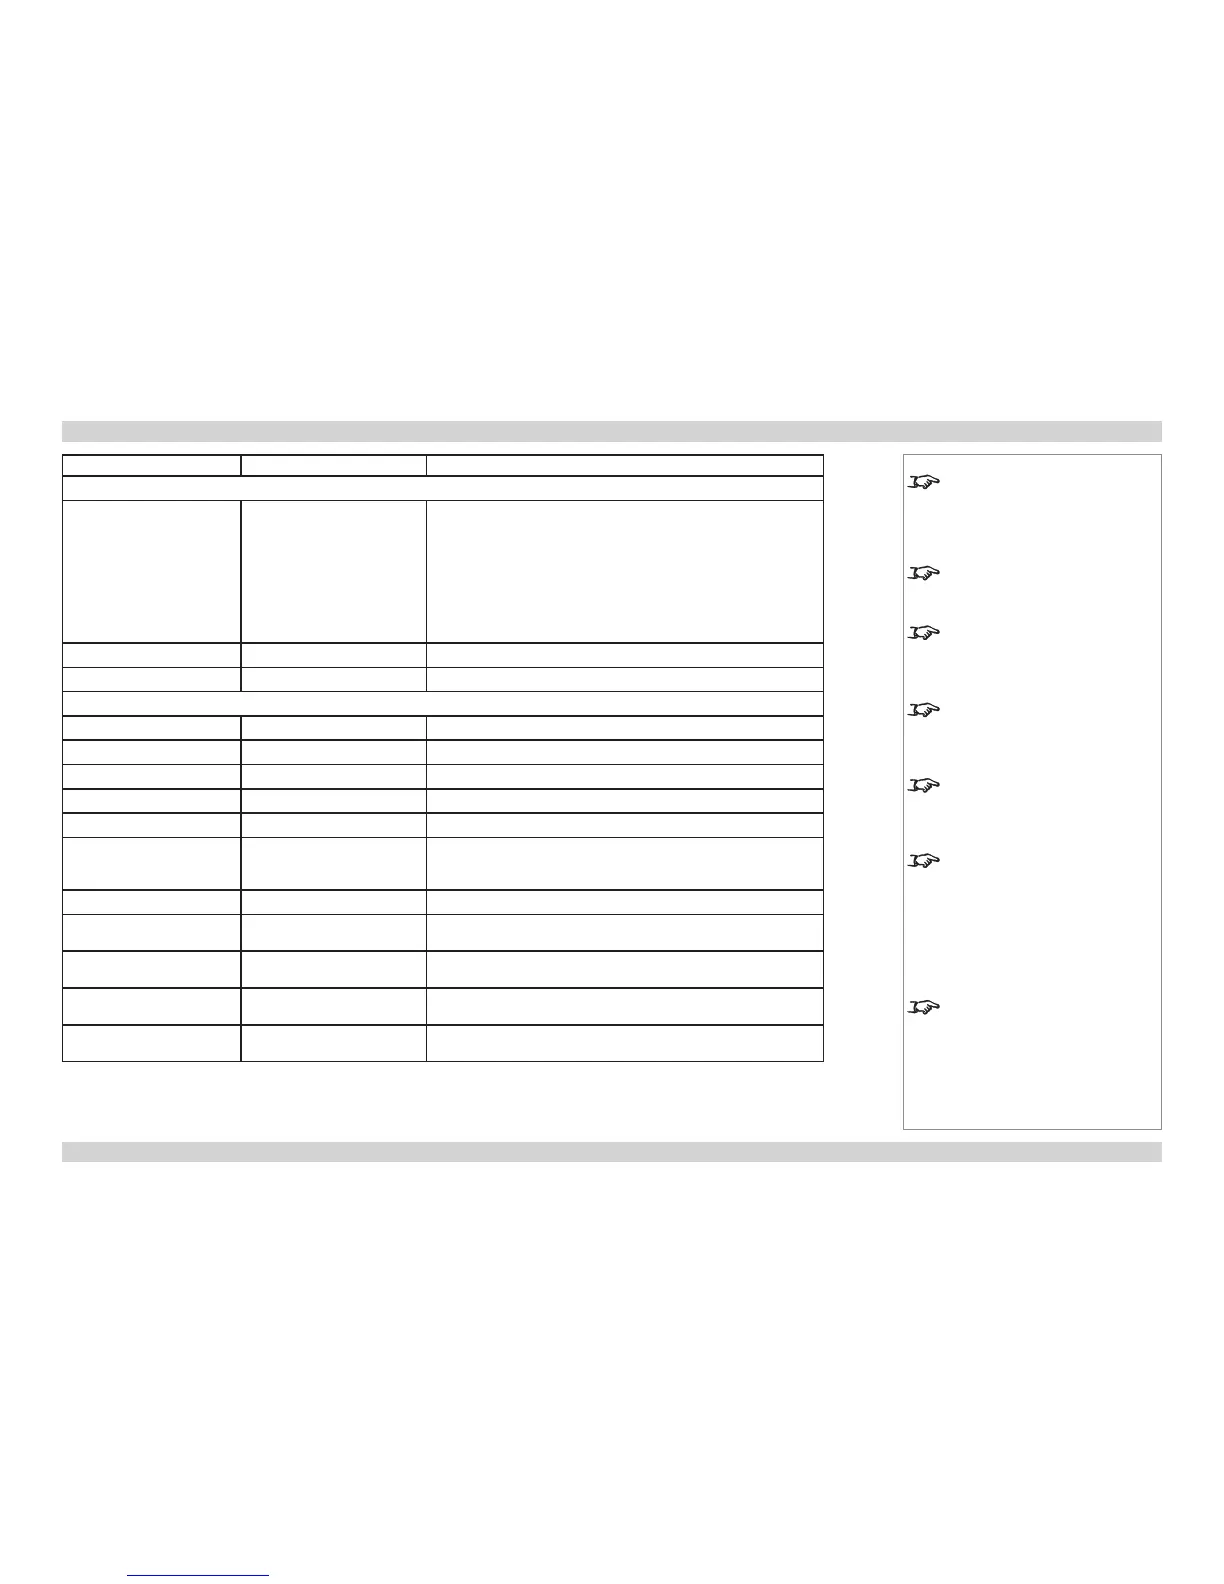
<command> <operator> <values>
Geometry menu (continued)
4corner.ulx
4corner.uly
4corner.urx
4corner.ury
4corner.llx
4corner.lly
4corner.lrx
4corner.lry
= ?
-1000 to +1000
rotation = ?
-180 to 180 (integer)
warp.map = ?
0 to 8 (integer)
Edge Blend menu
array.width = ?
1 to 4 (integer)
array.height = ?
1 to 4 (integer)
array.hset = ?
0 to 3 (integer)
array.vset = ?
0 to 3 (integer)
scurve.value = ?
10 to 25 (integer, corresponding to real values of 1.0 to 2.5)
blending = ?
0 = Off
1 = On
2 = Alignment Pattern
segmentation = ?
On, Off
eb.top = ?
0 to a value of up to 720, depending on eb.bottom
(integer, pixels)
eb.bottom = ?
0 to a value of up to 720, depending on eb.top
(integer, pixels)
eb.left = ?
0 to a value of up to 1280, depending on eb.right
(integer, pixels)
eb.right = ?
0 to a value of up to 1280, depending on eb.left
(integer, pixels)
Notes
The 4corner commands provide
X and Y adjustment for each corner
of the image. They are identical to
the settings within the Geometry >
Cornerstone menu.
warp.map is identical to the Warp
Map setting in the Geometry menu.
Set to 0 to switch this off.
The array.width and array.
height commands set the width
and height of the segmented array
respectively.
array.hset and array.vset
set the horizontal and vertical
position of the projector within the
segmented array.
scurve.value affects the shape
of the S-curve which is applied to
gradually reduce the brightness in
the overlapped regions.
eb.top and eb.bottom are
identical to the Top Blend Region
and Bottom Blend Region settings
from the Edge Blend > Blend
Width menu.
The maximum value for one region
will equal 720 minus the pixels
already applied to the other region.
eb.left and eb.right are
identical to
Left Blend Region and
Right Blend Region from the Edge
Blend > Blend Width menu.
The maximum value for one region
will equal 1280 minus the pixels
already applied to the other region.

Table of Contents

Question and Answer IconNeed help?

Do you have a question about the Digital Projection Titan 930 and is the answer not in the manual?

Digital Projection Titan 930 Specifications

General IconGeneral
BrandDigital Projection
ModelTitan 930
CategoryProjector
LanguageEnglish

Summary

INSTALLATION AND QUICK-START GUIDE

About This Document

Explains the purpose and structure of the manual and symbols used.

Introduction

Provides an overview of the projector's key features and benefits.

What’s In The Box?

Lists all the components included with the projector package.

Connecting The Power Supply

Details the procedure for safely connecting the projector to a power source.

Projector Overview

Identifies the main physical parts of the projector using front and rear views.

Control panel indicators

Explains the function of the power and shutter indicator lights on the control panel.

Connection panel indicators

Describes the status indicators on the projector's rear and side connection panels.

Remote Control

Introduces the projector's remote control devices and their infrared reception.

Positioning The Screen And Projector

Guides on optimal placement of the screen and projector for viewing.

Fitting The Lens

Step-by-step instructions for securely installing a lens onto the projector.

Operating The Projector

Covers the basic procedures for turning the projector on and off.

Selecting an input signal or test pattern

Explains how to choose between input sources and display test patterns.

Adjusting the lens

Details how to adjust zoom, focus, and shift for optimal image positioning.

Adjusting the image

Covers image adjustments like orientation, keystone, and picture settings.

CONNECTION GUIDE

Signal Inputs and Outputs

Describes the various video and audio input/output connectors on the projector.

Side connection panel on 3D projectors

Details the inputs available specifically on 3D projector models.

3D connections

Explains how to connect various 3D video sources to the projector.

Control Connections

Outlines how to connect the projector for remote control via LAN or RS232.

OPERATING GUIDE

Using The Menus

Explains how to navigate and interact with the projector's on-screen display menus.

Using The Projector

Provides an overview of the main projector functions accessible via the menu system.

Lens menu

Details the controls for adjusting zoom, focus, and saving lens presets.

Image menu

Covers adjustments for brightness, contrast, video filters, and VGA setup.

Color menu

Explains how to adjust color gamut, black levels, and gain.

Geometry menu

Details settings for aspect ratio, overscan, size, position, and geometry engine.

Edge Blend menu

Explains how to blend images from multiple projectors for seamless large displays.

PIP menu

Describes how to combine two images on screen using Picture-in-Picture modes.

3D menu

Details settings for enabling and configuring 3D display modes and parameters.

Lamps menu

Covers projector lamp operation, power settings, and compensation.

Setup menu

Explains how to configure orientation, latency, input settings, and network.

Information menu

Provides access to projector status, lamp hours, and configuration details.

REMOTE COMMUNICATIONS GUIDE

Introduction

Explains projector control via external systems using RS232 or LAN interfaces.

Remote communications commands

Defines the format and syntax for controlling the projector via commands.

Command Guide

Lists available commands for controlling projector functions via serial or network interfaces.

WEB CONFIGURATION UTILITY

Describes how to use the projector's web interface for configuration and control.

REFERENCE GUIDE

The DMD™

Explains the Digital Micromirror Device technology used in the projector.

Choosing A Lens

Guides the user on selecting the appropriate projector lens based on screen and throw distance.

Screen Requirements

Details requirements for screen size and projector placement to ensure proper image display.

Aspect Ratios Explained

Explains how different aspect ratios affect the projected image appearance.

Frame Rates And Pulldowns Explained

Discusses interlaced vs. progressive scan and film-to-video pulldown techniques.

Appendix A: Lens Part Numbers

Lists part numbers for the various available projector lenses.

Appendix B: Lens Charts

Provides charts to help select the correct lens based on screen size and throw distance.

Appendix C: Supported Signal Input Modes

Lists all supported 2D and 3D video input standards and resolutions.

TECHNICAL SPECIFICATIONS

Models

Lists projector models covered by the specifications and their key features.

Inputs and outputs

Details the types, connectors, and quantities of projector input/output ports.

Lamps

Provides information on lamp types, part numbers, and typical lamp life.

Lenses

Describes the lens mount capabilities and information sources for lenses.

Mechanical mounting

Outlines the various mechanical mounting options and features for the projector.

Electrical and physical specifications

Lists power requirements, consumption, dimensions, and environmental operating conditions.

Safety & EMC regulations

Lists the safety and electromagnetic compatibility certifications the projector complies with.

Accessories

Lists optional accessories available for purchase for the projector.

Related product manuals