Remote control 105-023 Rev A
1
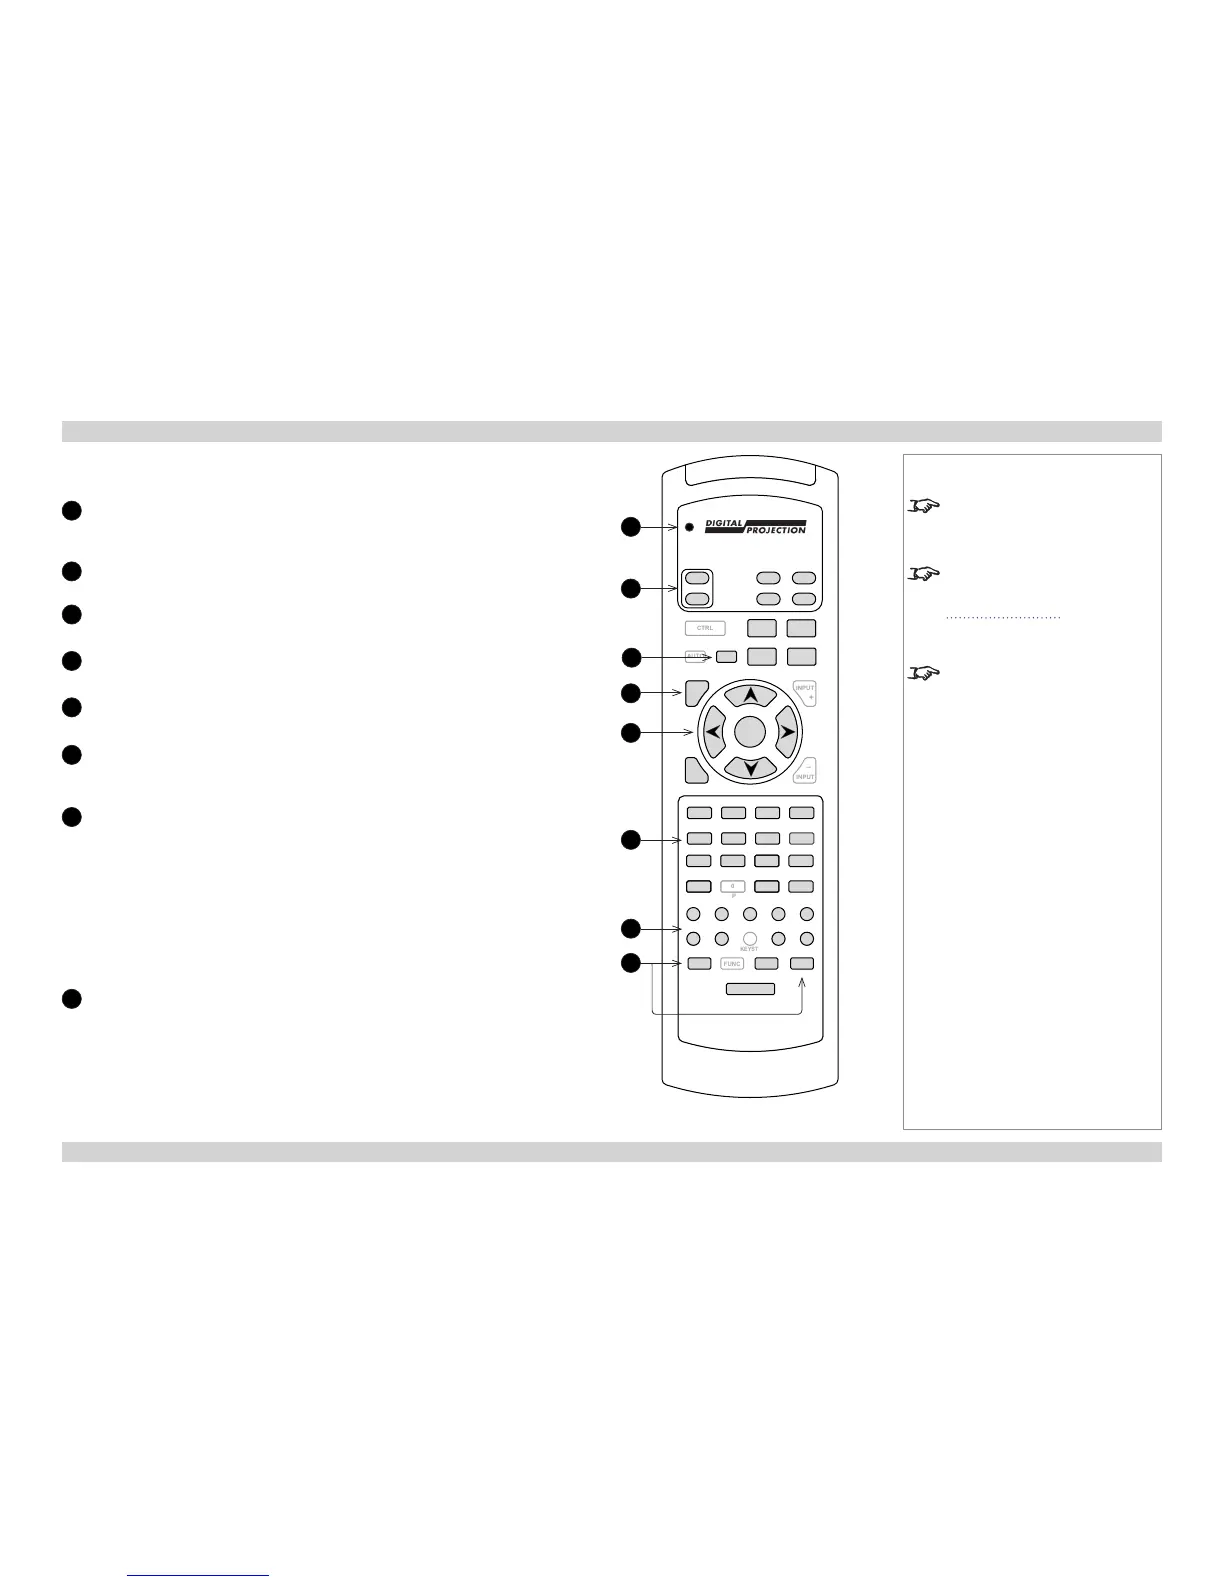
Transmit indicator
Flashes when the remote control sends a signal to the projector.
Lights solidly when the projector is in LENS ADJUSTMENT mode.
2
Power ON / OFF
3
INFO
Open the Information menu.
4
MENU
Access the projector OSD (on-screen display).
5
Navigation
Navigate through the menus with the arrows, conrm your choice with OK.
6
Input selection
Select input source.
9, 10+ and # are not used on 2D projectors.
7
Settings
These buttons allow you to change various settings directly from the remote,
without opening the OSD:
• BRI, CON, SAT - adjust brightness, contrast and saturation
• PHASE - adjust phase for VGA signals
• MAGNIFY, POS, PAN - access the Size and Position menu
• OSD - edit OSD settings
• ASPECT - change the aspect ratio
8
Lens presets
To recall a preset, press and hold PRESET, then press a number button 1 to 5.
To save a preset, press and hold SAVE, then press a number button 1 to 5.
continues on next page...
CTRL FOCUS
AUTO
INFO
SHIFT
ZOOM
MENU INPUT
OK
EXIT
INPUT
1 RGB1 3 DVI RED
4 SDI 5 VID 6 SVID GREEN
7 COM 8 9 BLUE
PRESET
FUNC ADDR SAVE
LIGHT
BRI
10+ 0 # TEST
OFF
ON
OSD
ON
OFF
POWER
OPEN
CLOSE
SHUTTER
+
_
2 RGB2
PRESET
SAVE
CON SAT MAGNIFY PHASE
A B C D
J K L M
E F G H
N P R S
OSD POS
KEYST
PAN ASPECT
RPY
Remote control 105-023 Rev A
1
2
5
6
7
4
3
8
Notes
Only the controls shown highlighted
are used on this projector.
For more information about
LENS ADJUSTMENT mode, see
Adjusting the lens further in this
guide.
Input selection buttons:
• 1 selects VGA (input 1)
• 2 selects HDMI (input 2)
• 3 selects DVI (input 3)
• 4 selects 3G-SDI (input 4)
• 5 selects Composite 1 (input 5)
• 6 selects S-Video (input 6)
• 7 selects Component (input 7)
• 8 selects Composite 2 (input 8)
• 9 selects Main/DVI (input 9, side
connection panel)
• 10+ selects Dual Pipe (both
inputs 9 and 10, side connection
panel)
• 0 selects Sub/HDMI (input 10,
side connection panel)
 Loading...


