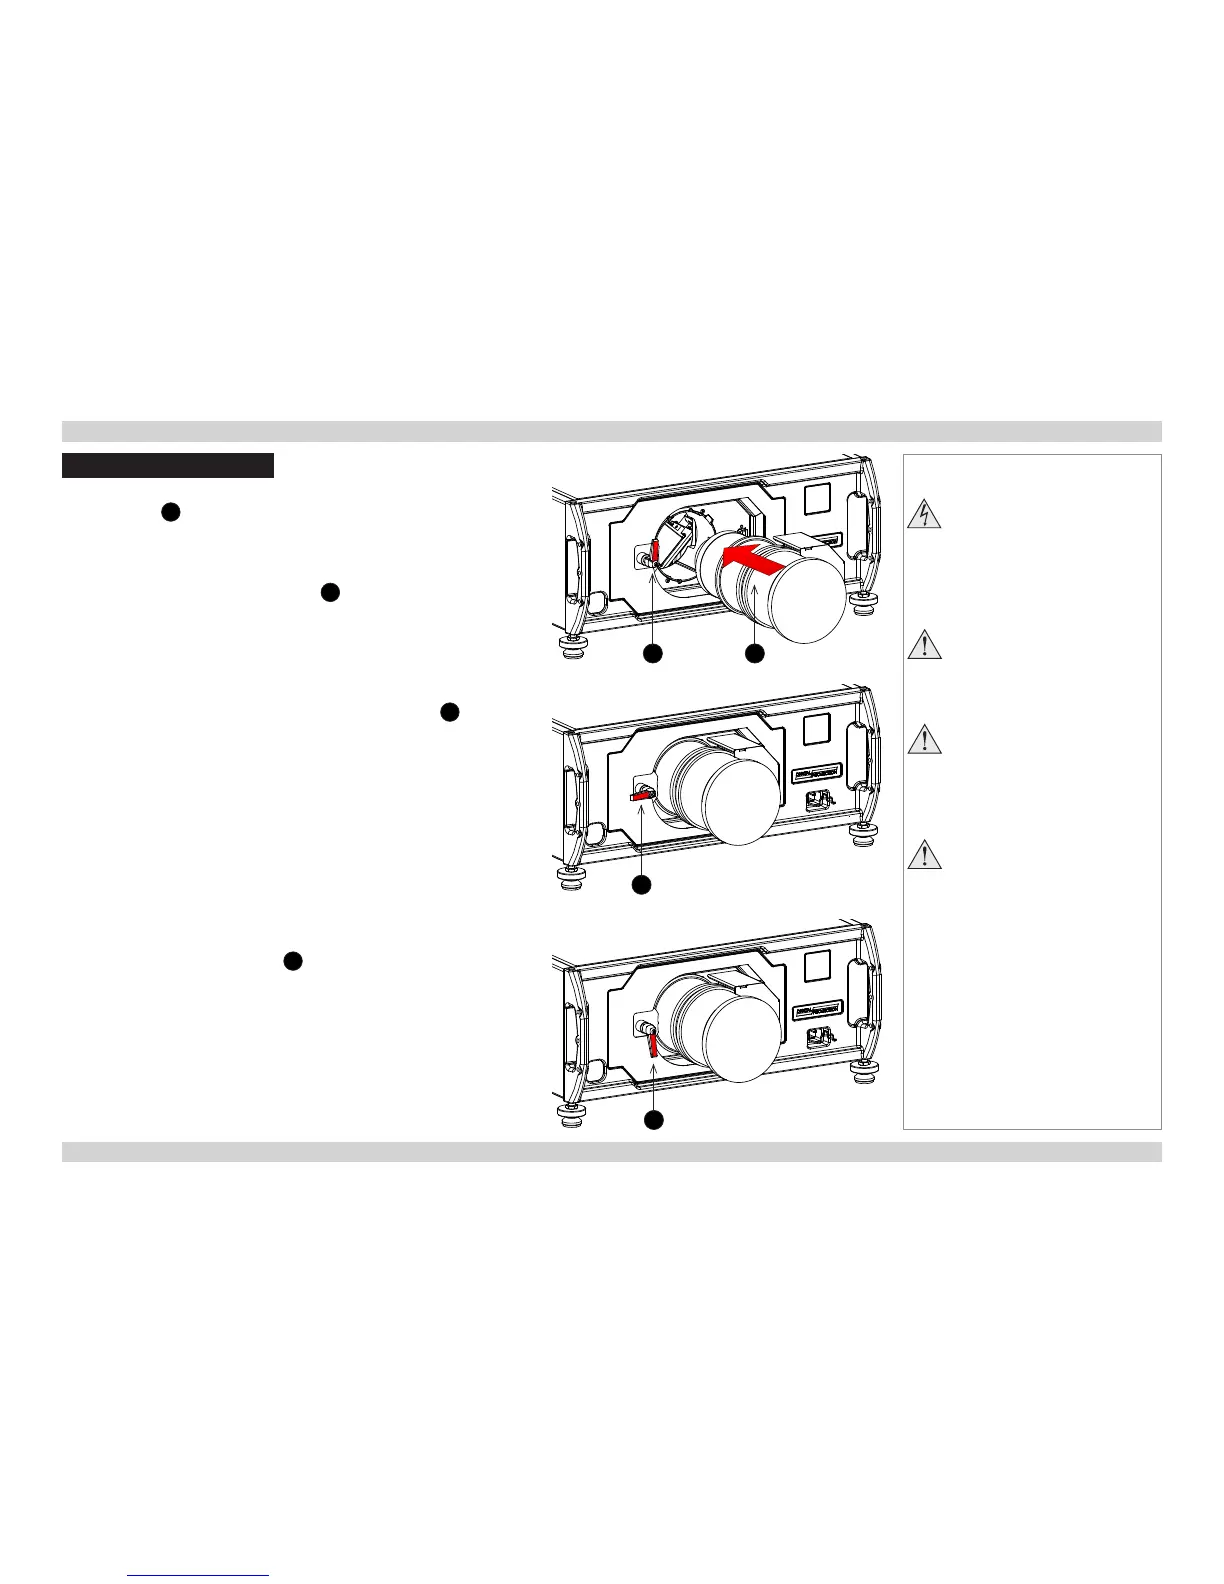
Fitting The Lens
1. Turn the lens release lever clockwise so that it is pointing upwards, to open
the lock fully.
1
2. Remove the rear lens cap from the lens.
3. Insert the lens into the lens aperture, making sure that the plug on the zoom
drive mechanism lines up with the socket on the front of the projector, then
push the lens in rmly as far as it will go.
2
4. Turn the lens release lever anti-clockwise to the mid-position.
3
5. The lens can now be pushed in further. Push the lens in rmly as far as it will
go.
6. Turn the lens release lever fully anti-clockwise so that it is pointing
downwards, to close the lock fully.
4
Notes
Before changing the lens,
always make sure the projector
is switched off and fully
disconnected from its power
supply.
Always allow the projector
to cool for 5 minutes before
disconnecting the power or
moving the projector.
The lens release lever should
always be set to the locked
position to prevent the lens from
falling out.
Do not place the projector with its
front panel down on a surface, as
this may damage the lens or the
lens release lever.
1 2
3
4
 Loading...


