Geometry Engine (continued)
Keystone settings
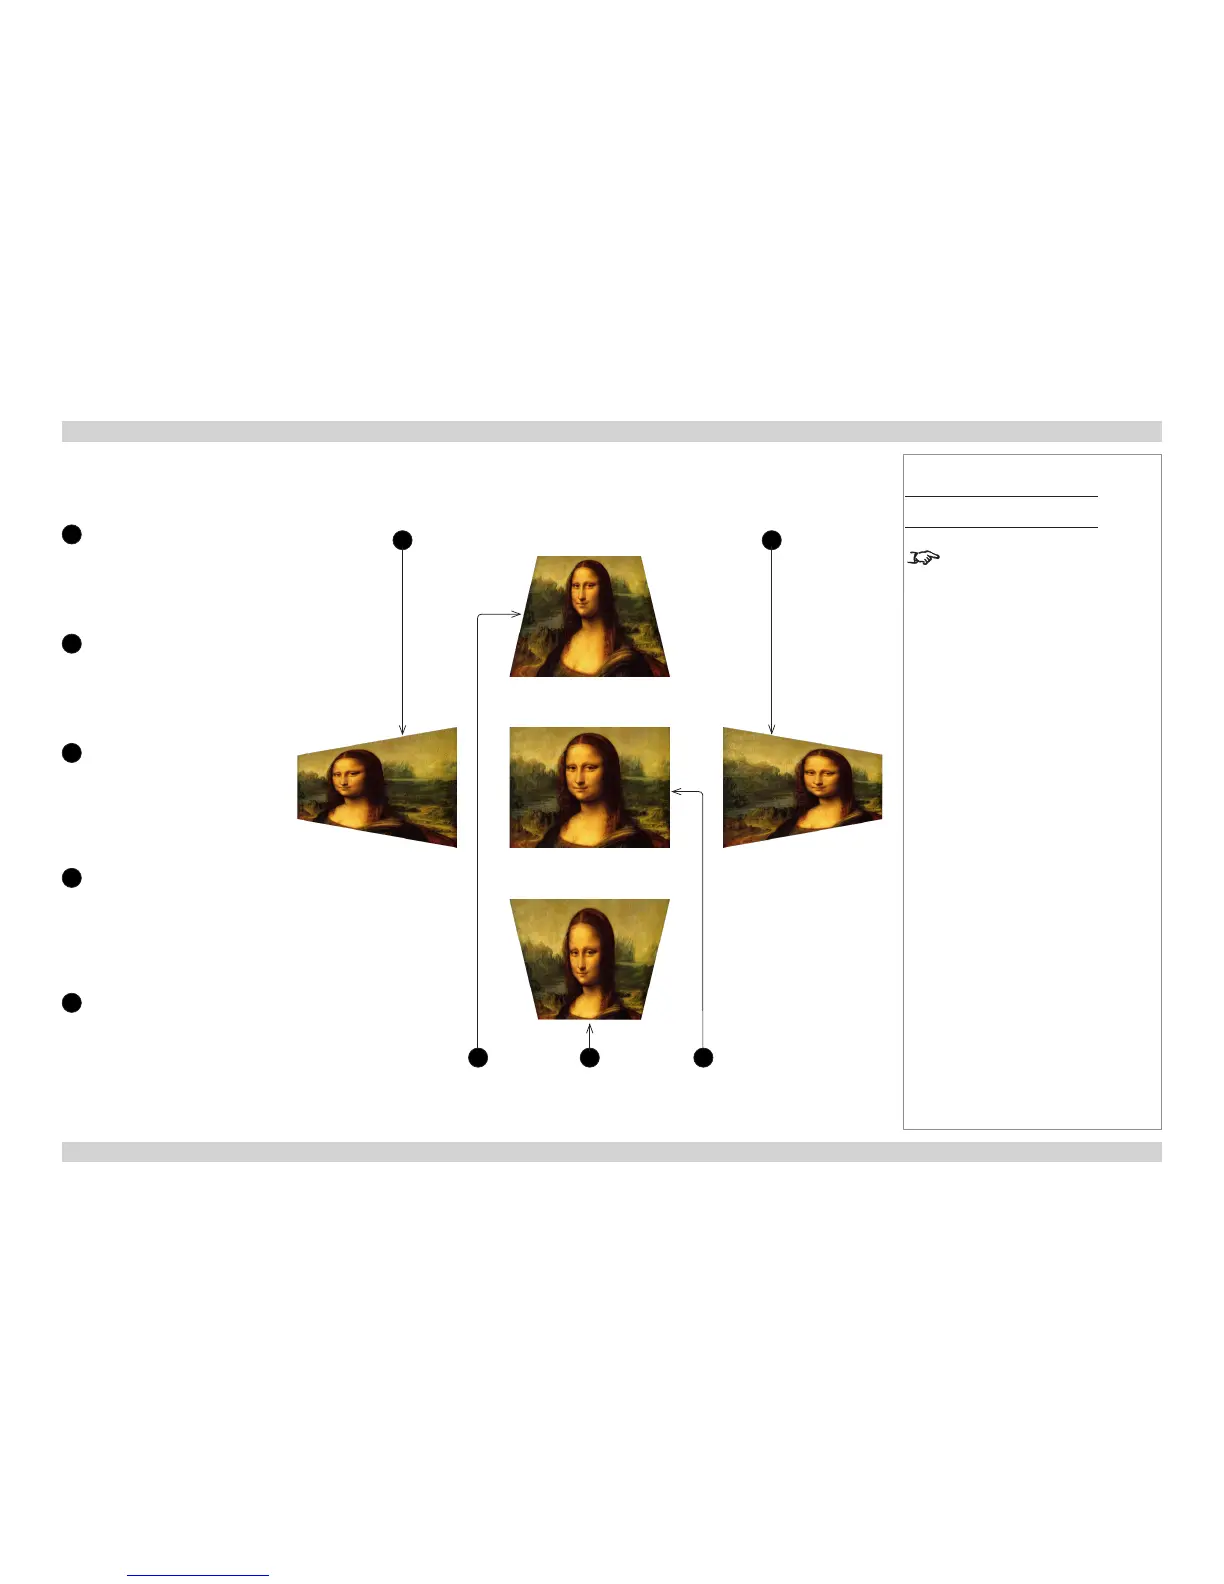
1
Projector to the left
The projector is positioned
to the left of the screen.
To correct, apply a positive
H Keystone value using
the RIGHT arrow button.
2
Projector to the right
The projector is positioned
to the right of the screen.
To correct, apply a negative
H Keystone value using
the LEFT arrow button.
3
Projector high
The projector is positioned
above the screen at a
downward angle.
To correct, apply a negative
V Keystone value using
the LEFT arrow button.
4
Projector low
The projector is positioned
below the screen at an
upward angle.
To correct, apply a positive
V Keystone value using
the RIGHT arrow button.
5
Projector straight
The projector is directly
opposite the screen at a
right angle both horizontally
and vertically.
No correction is needed.
Notes
Main Menu
Geometry
If possible, position the projector
facing the screen at a right angle to
avoid geometry corrections.
Horizontal and vertical keystone corrections
1
4
2
53
 Loading...


