Edge Blend procedure (continued)
5. Deneblendregions.
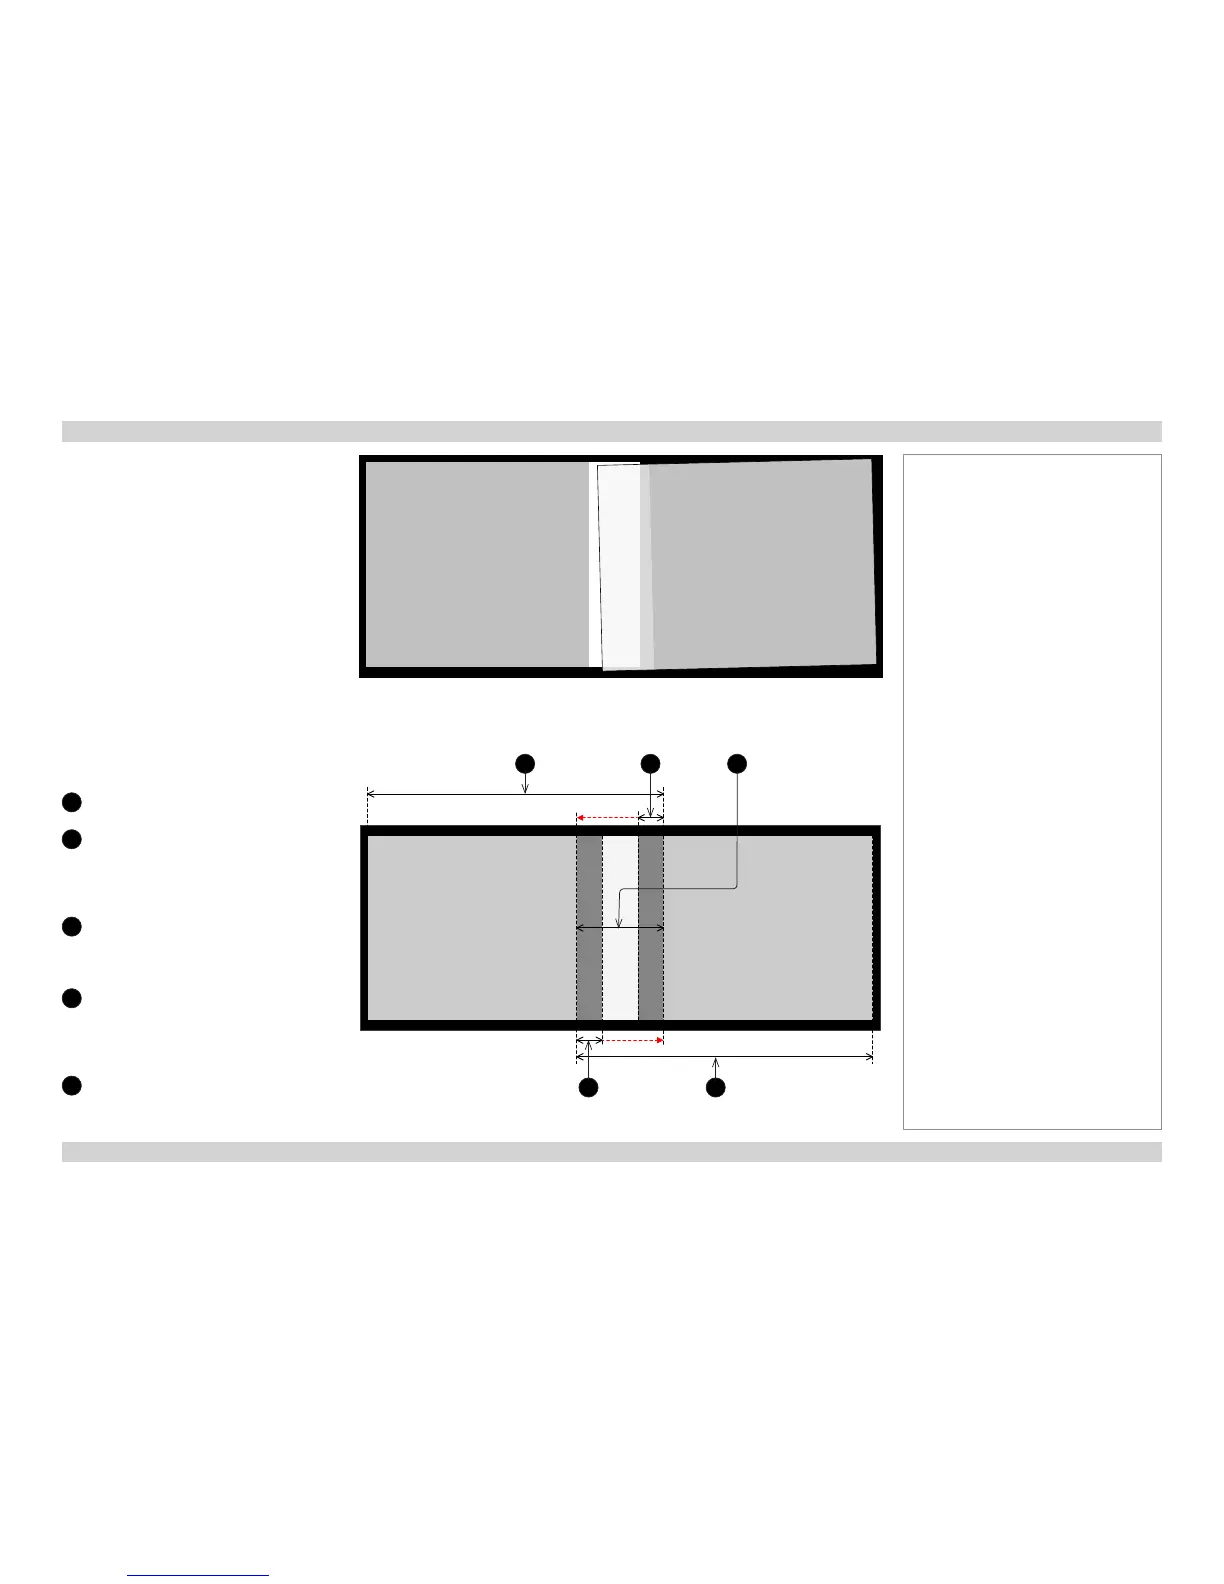
From the Edge Blend menu on all projectors,
set Blending to Align Pattern.
Set up Blend Width on each projector so
that the align patterns overlap perfectly and
completely cover the blend regions (Fig. 2).
If necessary, physically move the projectors
and/or use Lens Shift and Zoom again to
align the array perfectly
Fig. 2
1
Left projector
2
Align pattern of left projector
The red arrow next to the align pattern
shows what correction needs to be made
for the align pattern to cover the whole
blend region.
3
Blend region
The brighter ribbon in the middle is
overlap area not covered by the align
patterns.
4
Align pattern of right projector
The red arrow next to the align pattern
shows what correction needs to be made
for the align pattern to cover the whole
blend region.
5
Right projector
Fig. 1 Align patterns make it easy to see where the overlap is not perfect
Fig. 2 Projectors with align patterns not covering the blend region
21
4 5
3
Notes
 Loading...


