166
Chapter3 Handling
Adjusting Label Detector
When printing on odd-shaped labels such as circle or oval, set the label gap detectors as described below.
1
Remove paper from the printer.
("How to Remove Paper (For the Auto Cutter Model)" on page 59 , "How to Remove Paper (For the
Peeler Model)" on page 60)
2
Turn off the printer.
3
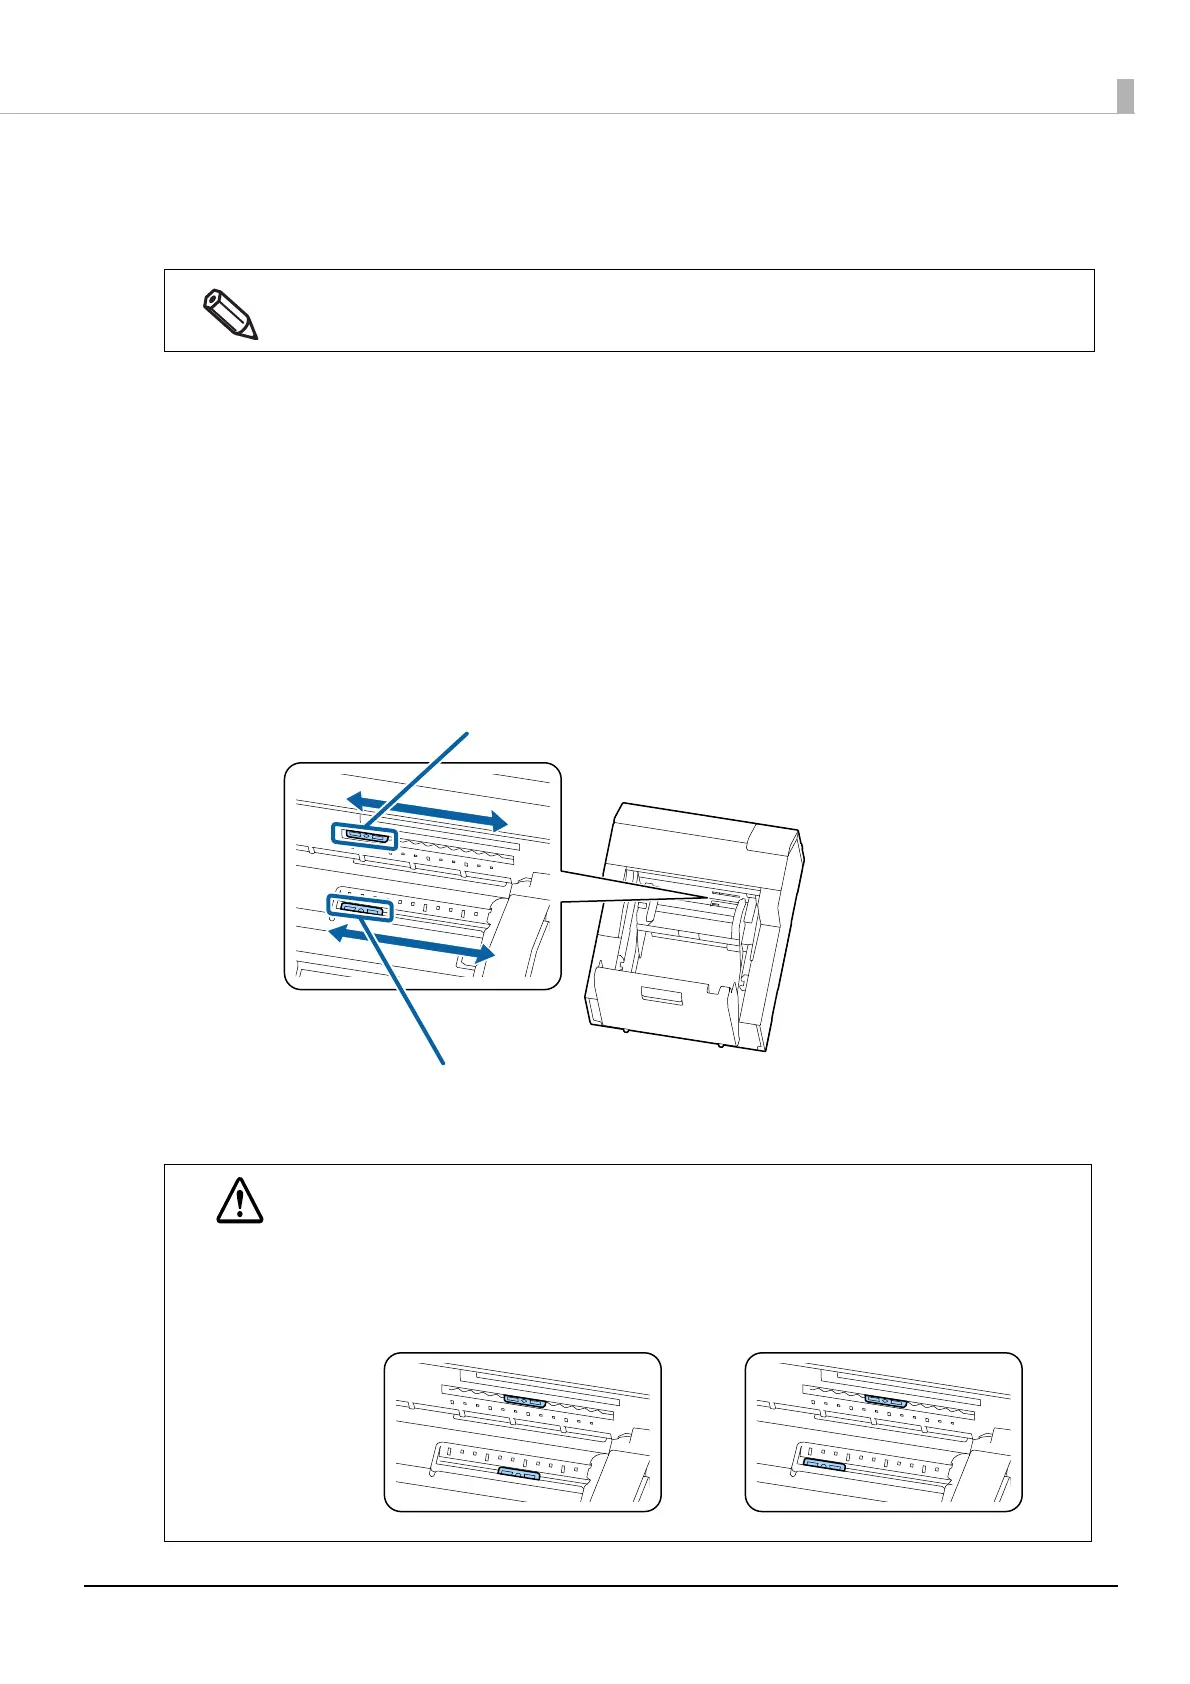
Adjust the detectors by operating the two adjustment tabs.
Push and move the adjustment tab horizontally using a fine-tipped tool such as a pen.
The tab can be moved in increments of 5 mm within the range of 10 to 63 mm from the paper edge.
Align the center of the circle on the adjustment tab with the scale mark.
This adjustment is not required when using labels that are general in shape, such as square labels and
full-page labels.
CAUTION
• Make sure to adjust the detectors before printing on odd-shaped labels.
• Make sure to turn off the printer to adjust the detectors. If you adjust the detectors with the
printer powered on, the detector may malfunction resulting in starting auto paper feeding.
• Make sure to set the two detectors to the same position. If the position is different between the
two detectors, printing will become impossible causing a paper detection error.
Detector adjustment tab (light receiving unit)
Detector adjustment tab (light emitting unit)
 Loading...