Infratec™ 1241 Grain Analyzer
5:60 Service Manual 1001 5015 / Rev. 4
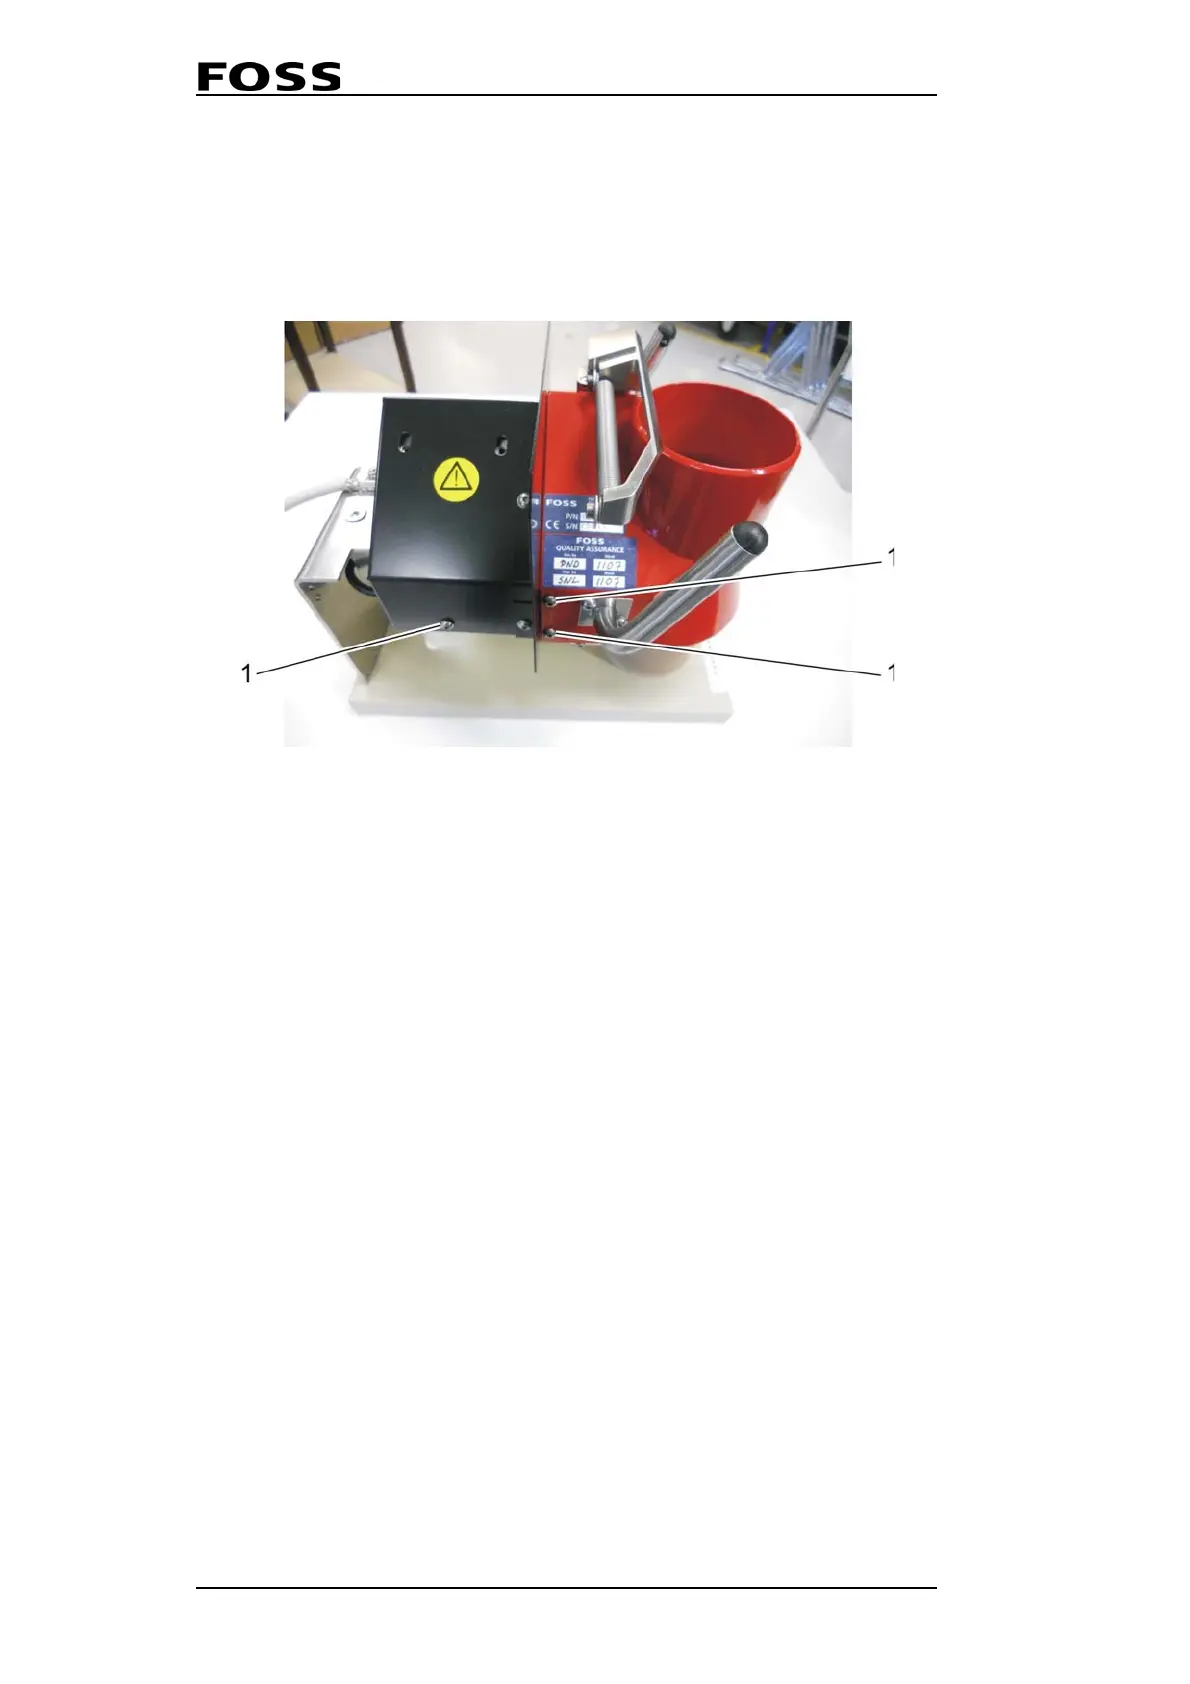
Instruction for shutter motor replacement in the 1241 TWM
1. Take out the TWM module. Don't stress the load cell and handle the module with
care.
2. Remove the three screws 1 (2.5mm) on both sides (see picture).
Fig. 5:60
3. Lift of the black cover.
4. Turn the TWM upside down and remove the 2 allen screws from the side. The
bracket is spring loaded so pay attention when the second screw is removed.
5. Disconnect the motor cable from the interconnect PCB.
6. Remove the 2 Phillips screw and lift out the motor with the bracket.
7. This step is critical. The 2 grub screws holding the so called shutter shaft (see
the Spare Part Manual for reference) are secured with loctite. Heating may have
to be applied to loosen these screws. If the screws are damaged you can use a
Shutter Replacement Kit (p/n 10011744) which includes all parts needed in
addition to the motor.
8. Fit the new motor in the reverse order. Make sure the motor cable falls behind
the interconnect PCB and that the both motor cables are secured with a new tie
wrap.
9. No cable must touch the load cell!
10. Connect the TWM module to the Infratec and start the instrument.
11. During start up the shutter will move to the physical stop and calibrate that
encoder value to represent the home position.
12. Perform a TWM balance calibration, see 5.7.2 TWM Balance Calibration on
page 5:74.
 Loading...