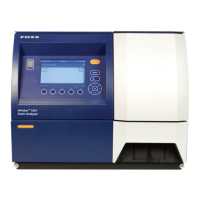
Infratec™ 1241 Grain Analyzer
Service Manual 1001 5015 / Rev. 4 5:11
20. Slide the fibre optic cable protector forward so that it is flush with the collimator.
Tighten the stop screw.
Mounting Fibre Optic Cable to Lamp
21. Loosen the two screws to the upper cover plate of the cooling flange and remove
it. Remove the lamp assembly. Remove the bottom cover plate as well.
22. Being two persons will simplify this task: Push (but do not bend!) the ingoing
fibre optic cable into the cooling flange. Place a hand in the lower opening of the
cooling flange to help guide the ingoing fibre optic cable into the lens holder
located in the middle of the cooling flange. Look from the lamp position. Ensure
that the end of the fibre optic cable is flush with the surface of the lens holder
before tightening the stop screw. Otherwise the stop screw may cause heavy
scratches on the end of the fibre optic cable.
23. Place a 2 mm allen key in the hole located in the middle of the cooling flange
and tighten the stop screw which secures the fibre optic cable.
24. Replace cover screw in the middle of the cooling flange.
25. Replace lamp assembly and re-secure the upper cover plate to the cooling flange.
26. Re-secure the lower cover plate to the cooling flange.
27. Secure the fibre optic cable fasteners with their respective screws and nuts.
Make sure the fibre optic cable is mounted in a way that it is not touched by the
door.
28. Remount the PC-module.
29. Re-connect all cables.
5.2.5 Replacement of Halogen Lamp for Monochromator
Hot Surface
The cover plate and the complete cooling flange for the lamp
assembly both get hot due to the very high lamp temperature.
Be very careful when replacing the lamp so that you avoid burns.
Caution
Do not touch the lamp glass or reflector or let any rough surface
come in contact with the lamp glass. A microscopic scratch in the
glass might cause a lamp explosion later.
Replace the halogen lamp as follows:
1. Switch off the Infratec 1241 Grain Analyzer. Disconnect from mains.
2. The cover plate to the lamp assembly is located on the top of the cooling flanges
on the back side of the instrument, see
Fig. 5:12. Unscrew the two screws 1
fastening the cover plate using the supplied 3 mm allen key.

 Loading...