3 Maintenance
88
Maintenance
3
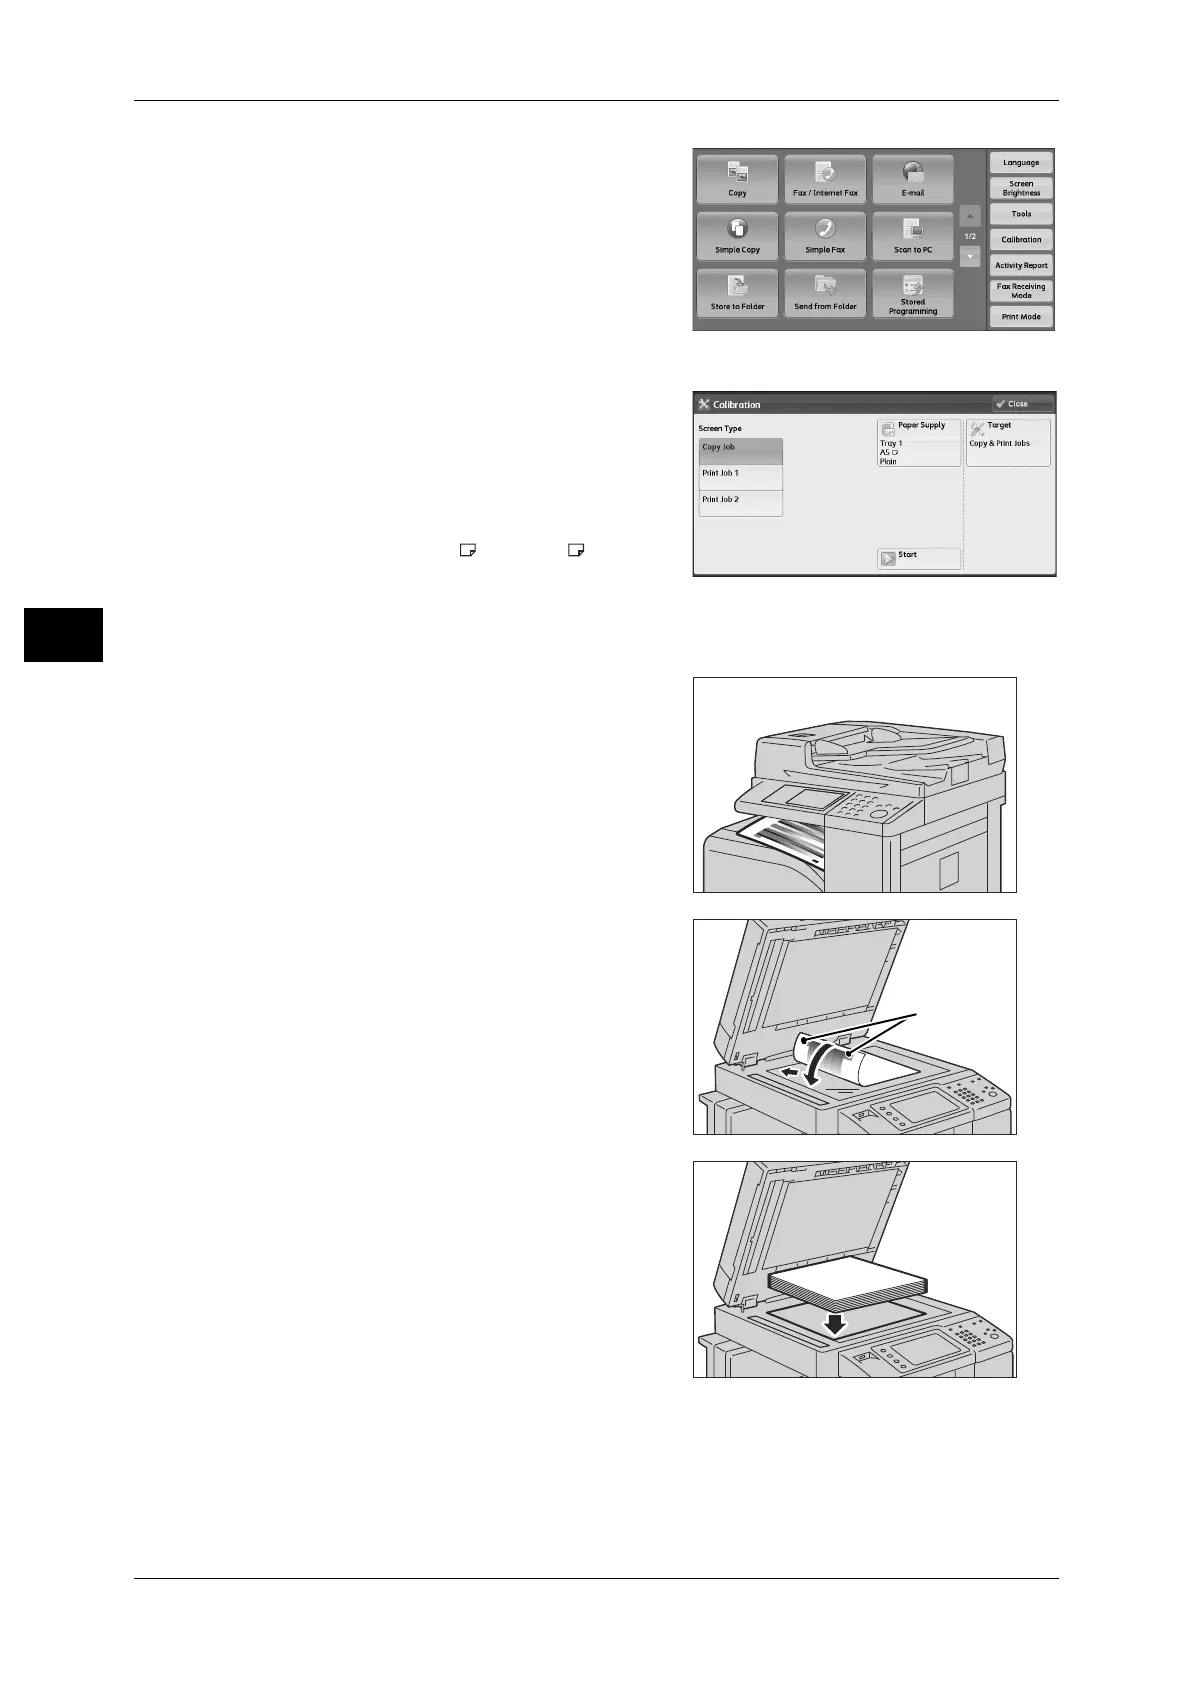
1 Select [Calibration] on the [Services Home]
screen.
Note • When the [Services Home] screen is not
displayed on the touch screen, press the
<Services Home> button.
• You can also access [Calibration] under
[Tools] > [System Settings] > [Common
Service Settings] > [Image Quality
Adjustment] > [Calibration].
•
2 Select [Screen Type], [Paper Supply], and
[Target].
Note • The following describes calibration
procedures using Copy Job, as an
example.
• For Paper Supply, select the paper tray
on which A4 or 8.5 x 11" white paper
is loaded.
• For Target, select from [Copy & Print
Jobs], [Copy Jobs Only], [Print Jobs
Only], and [None].
3 Select [Start].
Note • The message "Outputting the Calibration
Chart... - Copy Job" appears and the
document for calibration (Calibration
Chart) is printed.
4 Align the magenta patch (squares printed at
the top and bottom of the Calibration Chart)
of the printed Calibration Chart against the
left side of the document glass, and load the
chart facing down on the document glass.
Note • Place the Calibration Chart on the
document glass.
5 Place at least five sheets of white paper on
the Calibration Chart to cover the Chart and
close the document cover.
6 Select [Start].
The message “Calibration in progress. - Copy Job” appears and the machine
automatically calibrates the colors. It takes about 10 seconds to complete calibration.
A screen showing the result appears.

 Loading...