1. Using the supplied USB cable, connect the Hydran 201Ti to a host computer
through their USB connector. Refer to Table D - 7 in Appendix D for connection
details.
2. Access the top of the extended menu by pushing ENTER twice (History appears).
Note: Once accessed, the extended menu times out after 30 minutes of keypad
inactivity.
3. Push DOWN five times until Communication appears.
4. Access this menu by pushing ENTER.
5. Modify the Comm Channel by pushing CHANGE.
6. When asked to enter the password #1 (1253), use the UP and ENTER keys.
7. Change the Comm Channel to H201Ti-USB using the UP and ENTER keys.
8. Modify the Default Channel by pushing DOWN and CHANGE.
9. Change the Default Channel to H201Ti-USB using the UP and ENTER keys.
10. Push DOWN four times and ENTER to modify the Gas Monitor ID.
11. Write down the current value of the Gas Monitor ID.
12. Change the Gas Monitor ID to 1 using the UP, DOWN and ENTER keys.
13. When all is done, push END.
14. Start the Hydran Host software. Please refer to the Hydran Host Software Manual.
15. In the opening window, go to the Main Menu and choose Network Setting.
16. Check [ ✓ ] the station No. 1 and uncheck [ ] all the other stations.
17. Return to the Main Menu.
18. Select the Real-Time Logging menu.
19. Set H201Ti List to Same as Network and set Log Rate to 5 seconds.
20. Return to the Main Menu and then to the opening window.
21. Verify that a new line of information is logged on the PC screen once every five
seconds.
22. When the testing is completed, repeat the steps 2 to 13 above but restore the
original communication settings to the following:
• Comm Channel = Supervisory Link.
• Default Channel = Supervisory Link.
• Gas Monitor ID = Initial value noted in the step 11 above.
23. Disconnect the USB cable.
7.2.10 Completing the Verification
This completes the incoming verification of the Hydran 201Ti.
1. Disconnect the H201Ti from the power outlet.
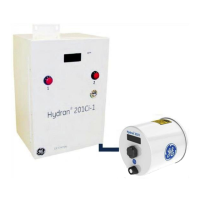
2. If a Hydran 201Ci-C is available, perform the procedure in Section 8.2.
3. If a Hydran 201Ci-1 is available, perform the procedure in Section 9.2.
4. If no H201Ci Controller is available, remove the power and computer cables from
the H201Ti.
5. Close the H201Ti cover.
6. Store the H201Ti in its box, ready for installation.
7. If the H201Ti is not installed immediately, refer to Section 7.1.4 (Storage and
Battery Care).
 Loading...


