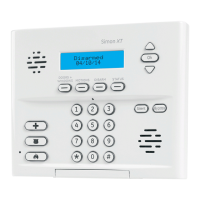
Simon Security System 59
No beeps verify sub-disarms (LED blinks).
One beep indicates the system is disarmed
Two beeps verify that Door/Window sensors are armed.
Three beeps verify that Motion Sensors are armed.
Four beeps verify that both Door/Window and Motion sensors are armed.
• SYSTEM STATUS-Press to determine system status and system time.
• CHIME Doors-Press to enable two beeps that sound from interior sirens, panel
siren, and the X10 powerhorn siren (if set to unit number 9) when a protected door
or window learned into sensor group 10 or 13 is opened. If Option 41: Chime
Voice is on, the panel speaker also announces the sensor name and number.
• CHIME Special Motion- Press to enable three beeps that sound from interior
sirens, panel siren, and the X10 powerhorn siren (if set to unit number 9) when a
Motion Sensor that is programmed as sensor type 25 is activated. If there are no
sensors learned into sensor group 25, this function will not be available. If Option
41: Chime Voice is on, the panel speaker also announces the sensor name and
number.
• LIGHTS Time Activated-Press to enable system controlled lights to turn on/off at
a scheduled time.
• LIGHTS Sensor Activated-Press to enable system controlled lights to turn on for
4 minutes when a specific sensor is tripped.
• AUX, POLICE, FIRE-Press and hold or press twice quickly to activate a non-
medical, police, or fire emergency alarm
Sensor Testing
We recommend that you test the sensors after all programming is completed and
whenever a sensor-related problem occurs.
Note
While the sensor test is a
valuable installation and ser-
vice tool, it only tests sensor
operation for the current
conditions. You should per-
form a sensor test after any
change in environment,
equipment, or programming.
1. Place all sensors in their secured (non-alarm) state.
2. Open the panel cover.
3. Enter the appropriate access code.
4. Press Test.
The panel responds with Sensor test, press again to change or DONE to select.
5. Press DONE.
The panel will prompt you to trip each sensor one at a time. You may follow the panel
voice prompting or test the sensors in any order. Use the “Sensor Tripping Instructions”
table to trip sensors.
1 Disarm the system
2 Arm Doors and Windows
3 Arm Motions
4 Arm Doors, Windows, and Motions
Arming Levels
Arming Level Description of Level
Sensor Tripping Instructions
Sensor Do This
Door/Window Open the secured door or window.
Freeze Remove sensor cover. Apply ice in a plastic bag to the
sensor (for 10-15 minutes). Do not allow the sensor to
get wet.

 Loading...