Label Web Threading Diagram
58
1.10 GB (2019/02/28)
This switch is a disconnector switch that isolates the applicator from the mains in case of a malfunction.
Tap the power button on the applicator display. The colour switches from white to blue.
Manually dispense two to three labels using the dispense button to check that the unit is working
correctly.
If necessary, log in using the password required for your particular task or application. See the “Login”
section.
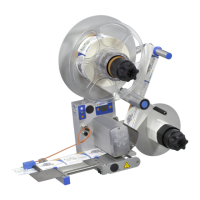
Label Web Threading Diagram
Switch to standby
When the applicator is in ready mode, the transport roller rotates. This poses a danger of pulling in clothing or
body parts. Switch the applicator to standby mode before replacing a roller.
Failure to observe this information could result in serious injuries.
Threading Diagrams
The following example diagrams show how to insert the label web for the most common standard applicator.
Observe the information in the sections corresponding to the various assemblies.
For different applicator configurations, a separate threading diagram is included and may also be attached to the
applicator.
After inserting a new label web, make sure to close all the clamps. This
includes clamps on the unwinder and rewinder, the clamping plate and the
label web brake.
Make sure that the label web is positioned correctly.
If the FS03 label sensor is being used and was previously removed, reposition it.
Move all paper guides back so they are touching the web.
Manually dispense two to three labels using the dispense button to check that the unit is working
correctly.