Settings – Retooling the Product
86
1.10 GB (2019/02/28)
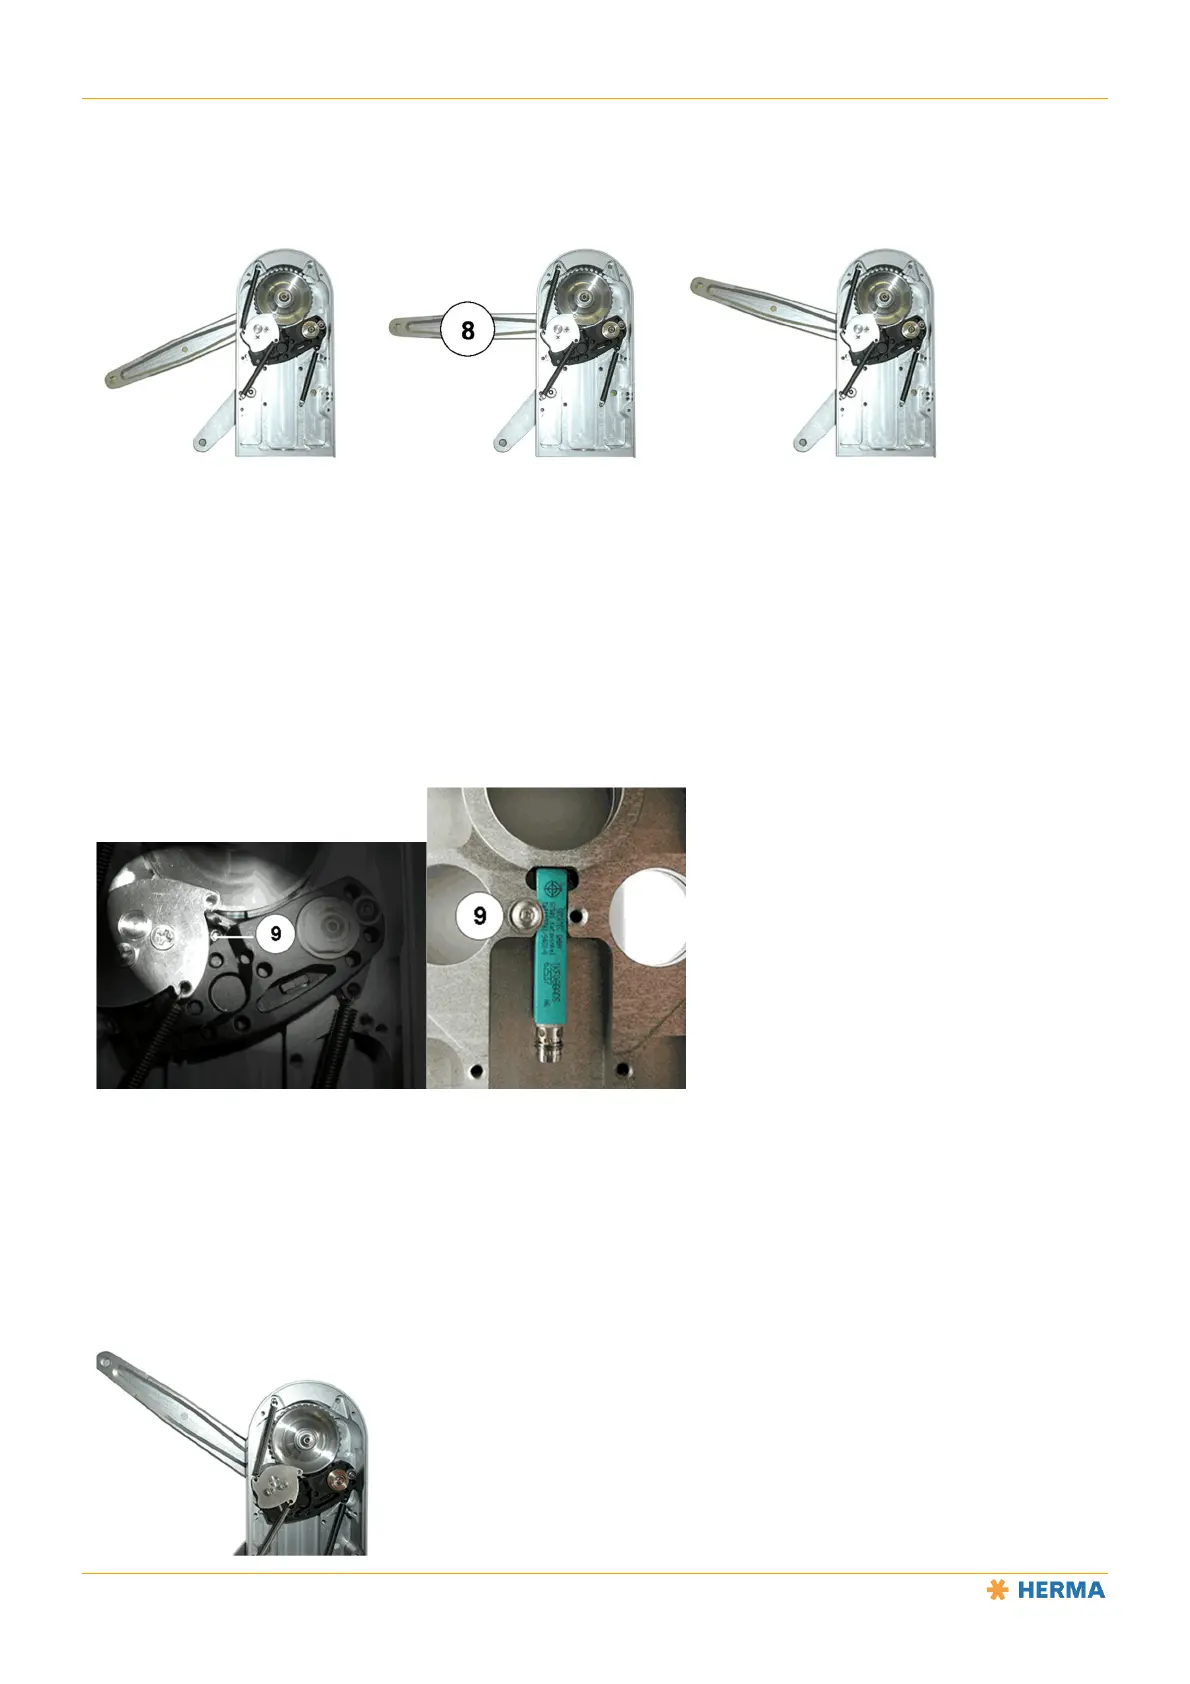
To test the braking point, insert a label reel and rotate the unwinder’s disc until it will no longer turn, i.e. until the
brake is open. Then release the disc. The disc will be braked and you can observe the braking point based on the
position of the pendulum rod.
These figures show the position of the pendulum rod when the braking point is too early, correctly set and too late.
Replacing the Proximity Switch (Unwinder)
If your unwinder is equipped with a proximity switch to detect the end of the label web, observe the following when
replacing a faulty proximity switch:
After opening the cover, loosen the screw 9 on the rear (do not remove it!).
Remove the faulty proximity switch and insert the new one.
Then retighten the screw 9.
The screw 9 is accessible when the pendulum rod is in the home position.
Pendulum rod home position