8.5 Zero Adjustment (When a Multiplexer Unit Has Been Installed)
163
8
Performing scanning zero-adjustment (when the scan function is set to auto or step only)
Zero-adjustment will be performed for all selected channels. If there is a large number of
enabled channels, this operation may take several dozens of seconds. However, the mea-
surement time can be shortened by using a manual measurement range.
Zero-adjustment cannot be performed for channels for which the measuring instrument is
set to an externally connected device.
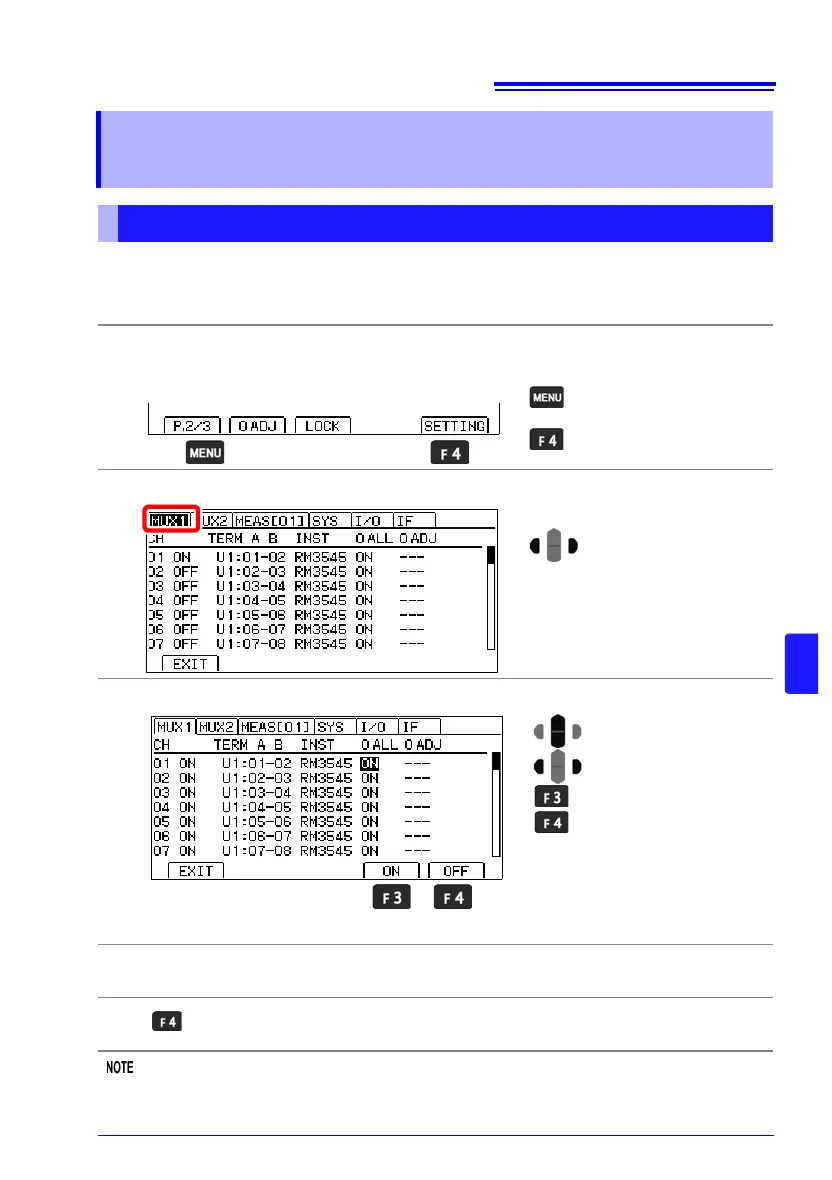
8.5 Zero Adjustment
(When a Multiplexer Unit Has Been Installed)
Performing zero-adjustment
1
Open the Settings Screen.
(If you are already finished configuring settings, proceed to Step 4.)
2
Open the Multiplexer Channel Settings screen.
3
Set the channels for which you wish to perform zero-adjustment.
4
Connect each channel to 0 .
See: "Appendix 6 Zero Adjustment" (p. A7)
5
Perform zero-adjustment.
See: "4.3 Zero Adjustment"(p.68)
The Settings screen
appears.
Switch the function menu
to P.2/3.
1
2
Move the cursor to the
[MUX1] tab with the left and
right cursor keys.
Select the channel to set.
1
2
Perform zero-adjustment.
Do not perform zero-adjust-
ment.
Move to the 0ALL parameter.
3
The 0ADJ column will indicate “DONE”
for channels for which zero-adjustment
has already been performed.
The 0ADJ column will indicate “
---” for
channels for which zero-adjustment has
not yet been performed.