See "6.5 Saving Measurement Conditions (Panel Save Function) (as required)" (p. 106)
See "6.4 Saving Measurement Data (As required)" (p. 102)
See "3.5 Pre-Test Inspection" (p. 41)
See "Chapter 6 Measurements" (p. 79)
Manual : Free-run measurement
(Measurement conditions can be changed during ongoing measurements)
Automatic : Set measurement conditions and measuring time to perform automatic measurements.
See "6.6 Printing Measurement Data (as required)" (p. 108)
See "Connecting the power cord of the equipment under test"
(p. 33)
See "Connecting the instrument power cord" (p. 32)
See "5.1 Connecting the Test Lead" (p. 75)
See "3.1 Power switch, breaker ON/OFF" (p. 31)
See "3.4 Turning Power On and OFF" (p. 38)
See "3.1 Power switch, breaker ON/OFF" (p. 31)
See "3.4 Turning Power On and OFF" (p. 38)
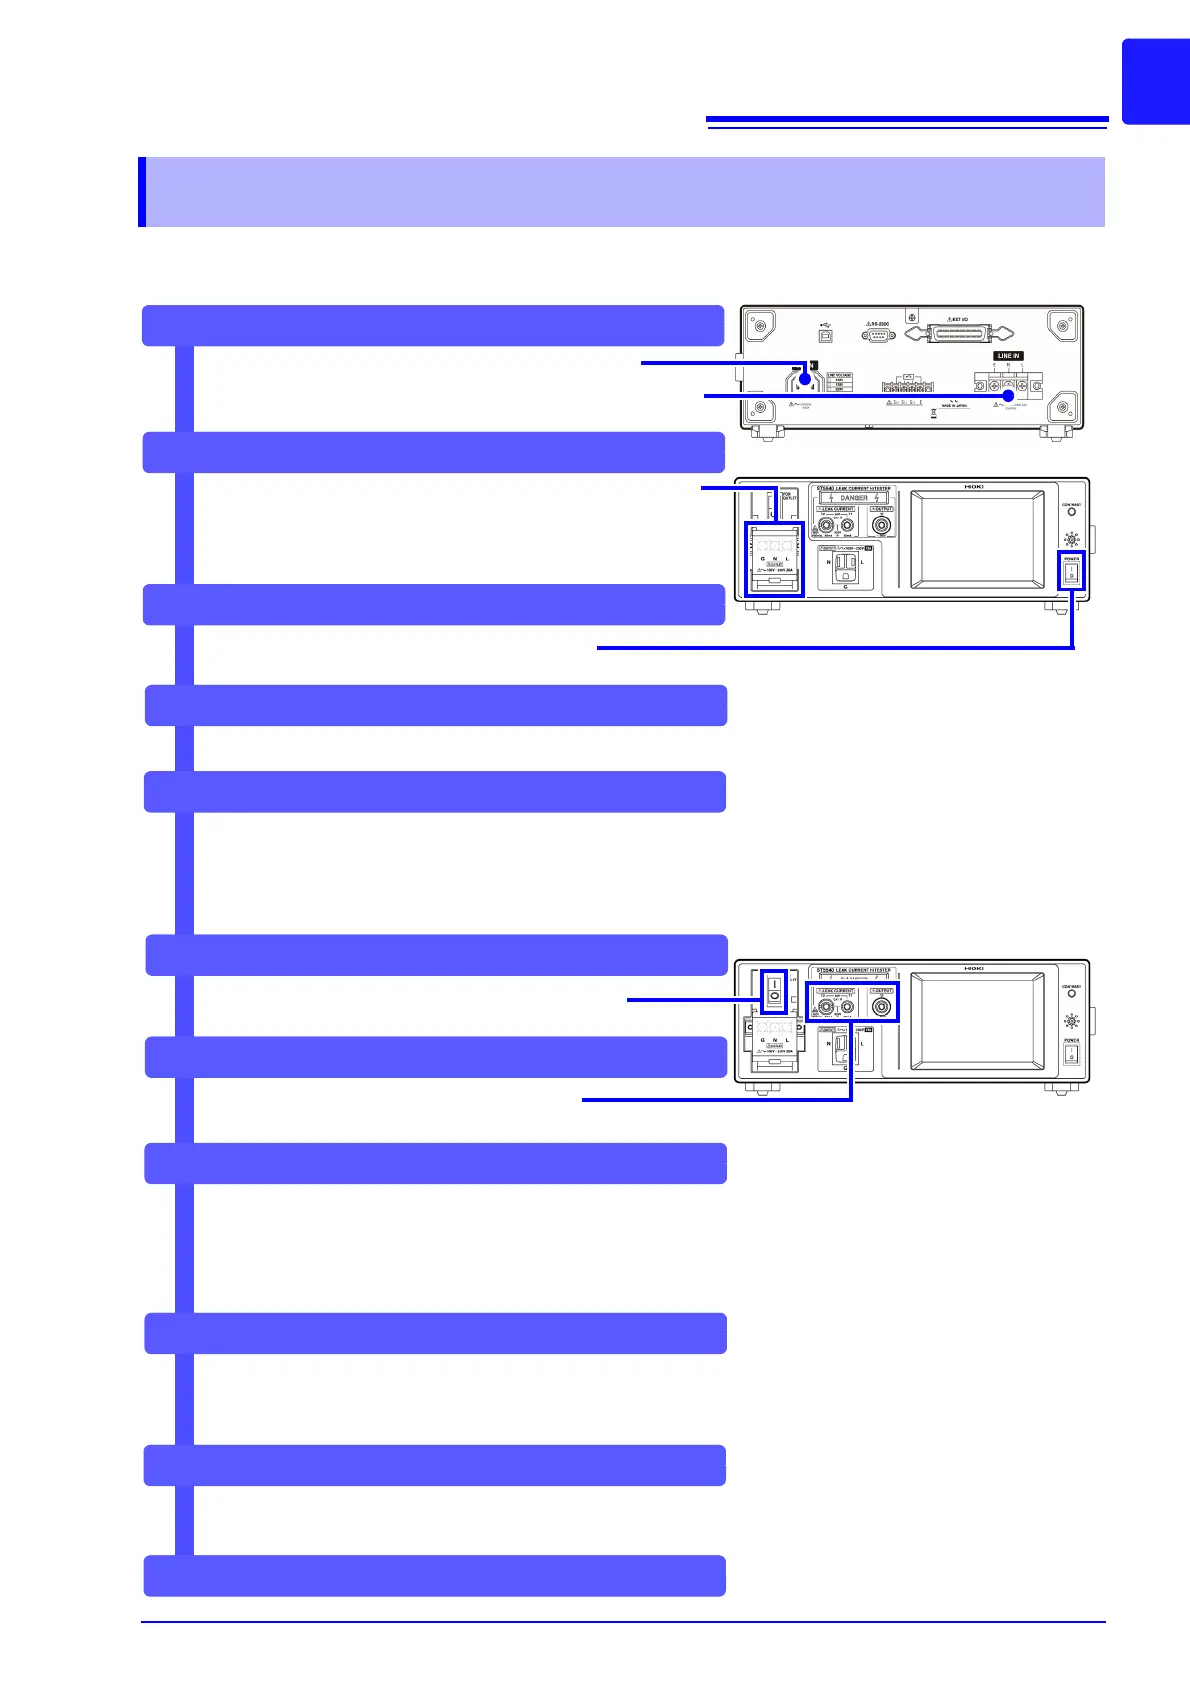
Connect the power cord
Connect test leads
Pre-Operation Inspection
Measurements
After automatic measurement ends
See "Chapter 4 Settings" (p. 47)
Settings depend on measurement method (Manual or Automatic)
Manual measurement : Perform settings from (p. 48) to (p. 67)
Automatic measurement : Perform settings from (p. 48) to (p. 73)
Turn on the circuit breaker
Settings
Connecting equipment under test to the instrument
See "3.3 Connecting equipment under test to the instrument"
(p. 36)
Turn on the power switch of the HiTESTER
The actual connection procedure will vary with the power supply
of the equipment under test.
Disconnect test leads and equipment under test
Turn off breakers and instrument power